Buyer's Guides Vinyl Care

VINYL CLEANING GUIDE PT. 1: MANUAL METHOD

Much requested and long promised but it’s finally here, the Vinyl Cleaning Guide. This is the first of a proposed trio of ‘How To…’ features. In this initial outing, Paul Rigby examines how to clean vinyl using a manual process

As there are a multitude of ways to clean your vinyl, I’ve decided to split this Vinyl Cleaning Guide into three parts. 

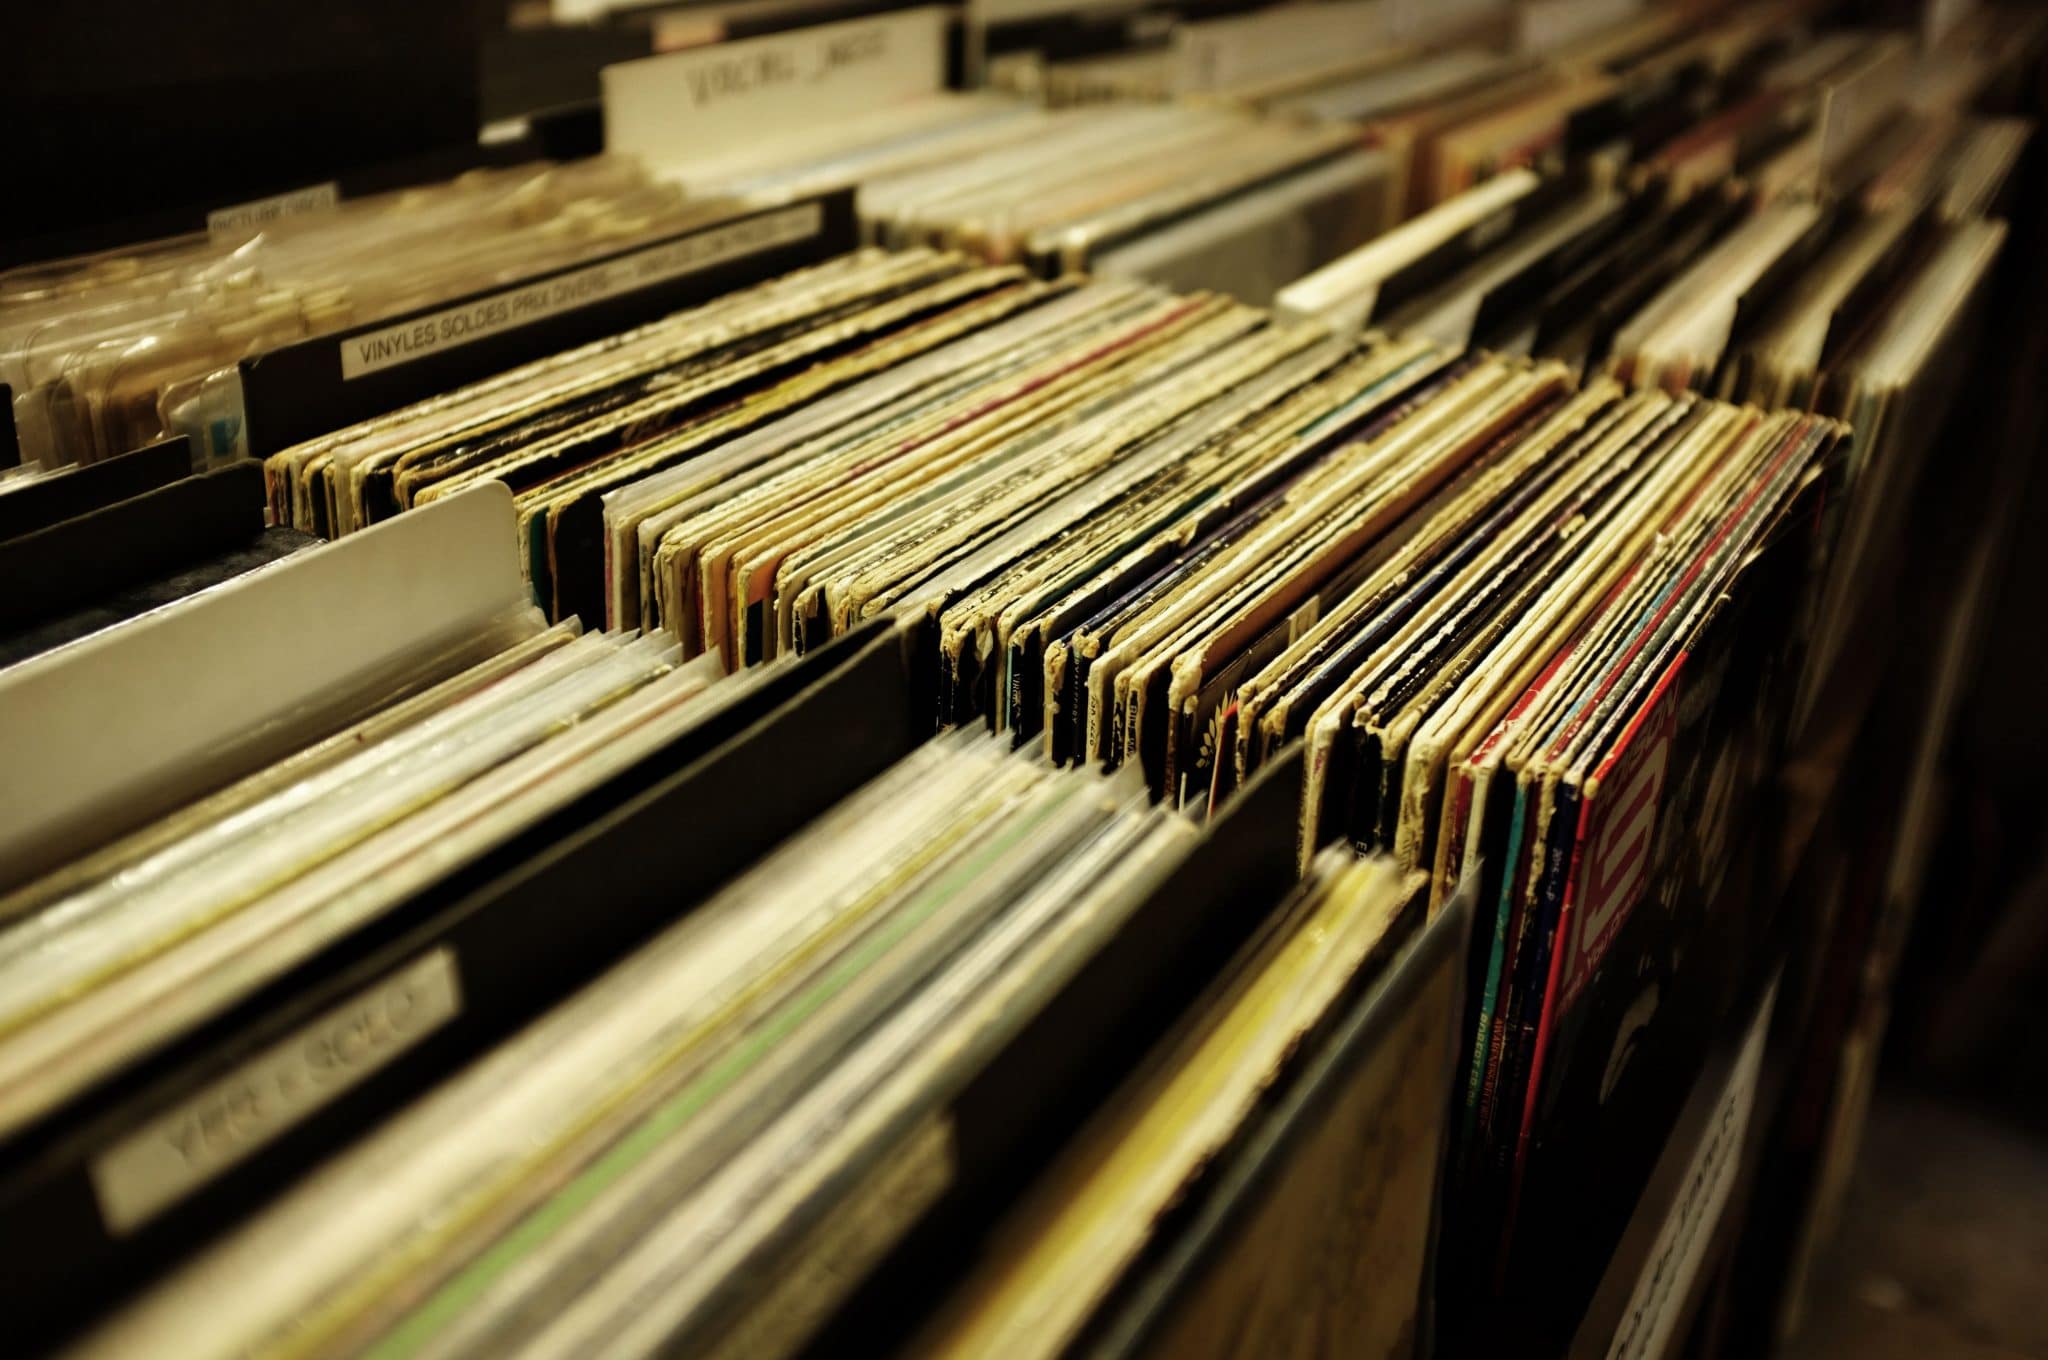
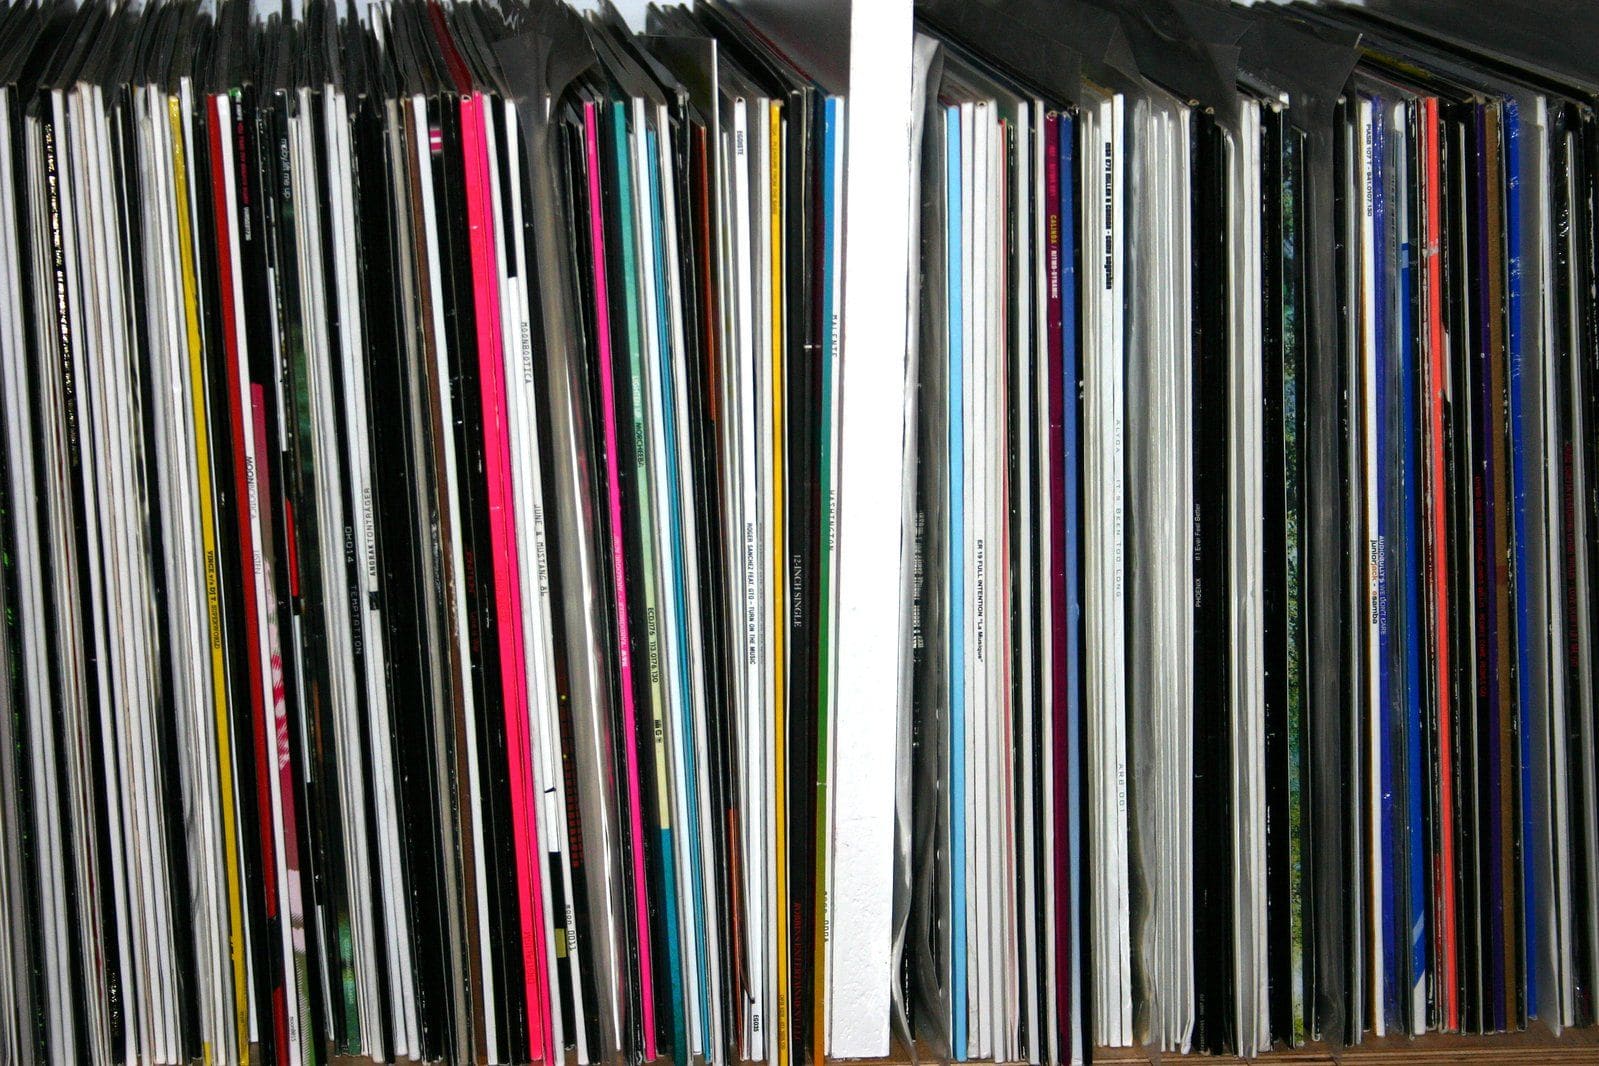
Part 1 is the manual option and the one I’ll be looking at here. There are a multitude of ways to clean your vinyl. If funds are tight, you can use a manual process. What do I mean by manual? Things like a felt pad, a Pixall Roller (remember them?), carbon fibre brush, Disco Antistat manual machine and its brethren Spinclean and the like. More on this below.

Then there’s the fully-fledged record cleaning machines based upon a vacuum process. Everything from the low-cost Moth and Pro-Ject machines up to the more expensive Loricraft et al. The RCM method will be reserved for the Vinyl Cleaning Guide Part 2.

Finally, ultrasonic technologies will be discussed in the Vinyl Cleaning Guide Part 3.

VINYL CLEANING PART 1: MANUAL CLEANING

To save time, if you just want to skip to the cleaning methods and that’s all you signed up for here then, by all means, scroll down to the heading: Required Tools. 

If you’re already kitted out then skip that and scroll down further to Cleaning Your Vinyl – Step by Step and read from there.

ROOTS OF THE SYSTEM

For everyone else, a bit of background might reassure but also provide a bit of context as to why I decided upon this method.

After all, you’re being asked to use this new Vinyl Cleaning Guide on your precious vinyl. To have confidence in the system itself, via a bit of background and an explanation of the system itself, should be in order I reckon.

I haven’t come to this point in isolation and I haven’t just picked it out of thin air because it sounds good or a chap told me about it down the pub. There’s been years of application and research behind it. 

This Vinyl Cleaning Guide was the result of ongoing and exhaustive testing. If new technologies or techniques presented themselves, I experimented with those and either discarded or adopted them as part of the ongoing evolution. 

VINYL CLEANING PART 1: MANUAL CLEANING

In that quest I was aided tremendously by my job. That is, as a full time hi-fi journalist I have been very fortunate to be able to call upon new products, of varying types and price points, to test on a regular basis. Whether they be low cost tools, elaborate cleaning machines, liquids, brushes and more. Having the opportunity to compare and contrast a host of products, I was able to undertake a broad comparison with most of the products out there, currently on the market. 

Hence, there have been numerous occasions over the past years where I thought I’d found ‘the answer’. The final cleaning system. The One. Only to be presented with a new cleaning liquid or new technology or new technique. That’s then opened new doors to further tests and possible improvements. 

Hence, I realise that the Vinyl Cleaning Guide I offer here will, I have no doubt, be improved and enhanced in the future sometime. 

VINYL CLEANING PART 1: MANUAL CLEANING

As such, there is no ultimate cleaning system. And don’t be fooled by the person that says that such a system exists. There’s only the best system you have, thus far. Improvements will be lurking around the next corner. Or should be. I know that I never rest and am always testing new hardware, liquids and techniques.

The final parts of the puzzle began to be applied late last year. At that time, I began to undertake the testing of a range of ultrasonic machines. This began around September 2018 and finished during the Summer of 2020.

During that time, I took it upon myself to seek out and interview a host of professionals who might be better able to shed light on the vinyl product itself, its make up and behaviour. The idea was to better understand thus stuff called ‘vinyl’.

That involved a range of interviews with the vinyl industry itself. And when I say vinyl industry I mean people who are involved in actually creating the raw material, those who use it in pressing plants and recording studios. 

VINYL CLEANING PART 1: MANUAL CLEANING

Hence, I talked to two UK companies who create vinyl pellets (i.e. INEOS and Dugdale). Two of the most important outfits currently in operation in the world, actually. Vinyl pellets are the raw material that’s bought in by vinyl pressing plants and is used to make vinyl records. 

I also talked to a lady, based in Canada. A chemist, she is employed as a consultant to Abbey Road and has an excellent knowledge of vinyl.

Similarly, I talked to the MD of a company, based in the UK this time, who create blank acetate discs and cutting stylii for the recording industry called Micro-Point, formerly Transco-blanx. Both products were and are used by Abbey Road during the creation of demo discs. Micro-Point’s products have been in use since the 50s. Again, their knowledge was invaluable.

As was the information I received by the General Manager of the current Vinyl Factory vinyl pressing plant, the old EMI Hayes site. The same one used to press all of those old Beatles records of yore and one that originally swore by its original ‘kite’ marks of excellence, I recall. In fact I myself once paid a visit to the place and was shown the thick ‘kite’ standards document they used, when the plant was still in EMI hands. Oh and by a man in a white lab coat, would you believe. Yes, they still existed, even then. I think this was around the year 2000. Possibly a bit later.

VINYL CLEANING PART 1: MANUAL CLEANING

So you can see. I ran around collecting as much information as possible, over the months, in my quest to find the best possible method of cleaning vinyl discs. 

I repeat though, the Vinyl Cleaning Guide I present here is not perfect. It can’t be. Such a thing doesn’t exist. It remains the best system I have to hand for now. Who knows, next week, I might change and improve upon it. 

THE SYSTEM

The Vinyl Cleaning Guide I use is based on three elements: 

ALCOHOL

The first is the use of alcohol. Depending on the advancement of my own research, I have rejected, adopted, rejected and have now adopted it again. My initial caution in its use related to the fact that alcohol can be aggressive when used in direct contact with vinyl. It can soften the material leading to groove wall distortion and even brittleness in extreme cases, if used over long period of time. 

Used judiciously and in small amounts though, it can be highly beneficial in terms of vinyl cleaning. It took me a while to find that out. I eventually found the correct proportions over months of testing.

VINYL CLEANING PART 1: MANUAL CLEANING

I have produced a more in-depth study of alcohol in video form. You can find the link below. This video also talks about the nature of vinyl itself. A subject that is also important when cleaning the stuff is being considered.

Most people think that vinyl is made purely from PVC. More knowledgable people realise that other substances are used in its creation. In fact, a vinyl disc is an amalgamation of a dozen or so different chemicals (the quantities vary depending on the individual pellet company producing the recipe). All of which are useful in terms of vinyl production and sound quality.

What many don’t know though is that the recipe for vinyl itself is not fixed or constant. Each vinyl pellet company has their own recipe (well recipes, six variants are on hand every single working day) while that recipe can change multiple times over the years via modifications and tweaks. 

Which means, if you add up the multiple recipes used on a daily basis by each company, that there’s a 40-50 pellet companies currently operating in the world and hundreds more have gone to the wall over the past several decades, the history of vinyl consists of possibly thousands of different vinyl recipes, all of which hold their own chemical properties and behave differently when faced with stress, pressures, heat and yes, cleaning products.

VINYL CLEANING PART 1: MANUAL CLEANING

This also means that, quite possibly, and especially if you hold older examples, every vinyl disc in your current collection may very well be chemically unique.

You can find more via the link below:

SURFACTANTS

Alcohol is one of the main points of this cleaning regime but surfactants is another. Finding out about surfactants was a revelation to me in terms of vinyl cleaning. Its use took the standard of my cleaned vinyl discs onto another level. I only came across the technique when ultrasonic technology entered my professional life a few years back but I soon found that surfactants could be applied to any sort of of vinyl cleaning. 

I have written a Guide to surfactants HERE which will explain what they’re all about, what surfactants are currently out there and my preferred product. I won’t repeat myself here so please check out the link for more on that. Suffice to say that surfactants play a part in this cleaning guide.

ABRASION

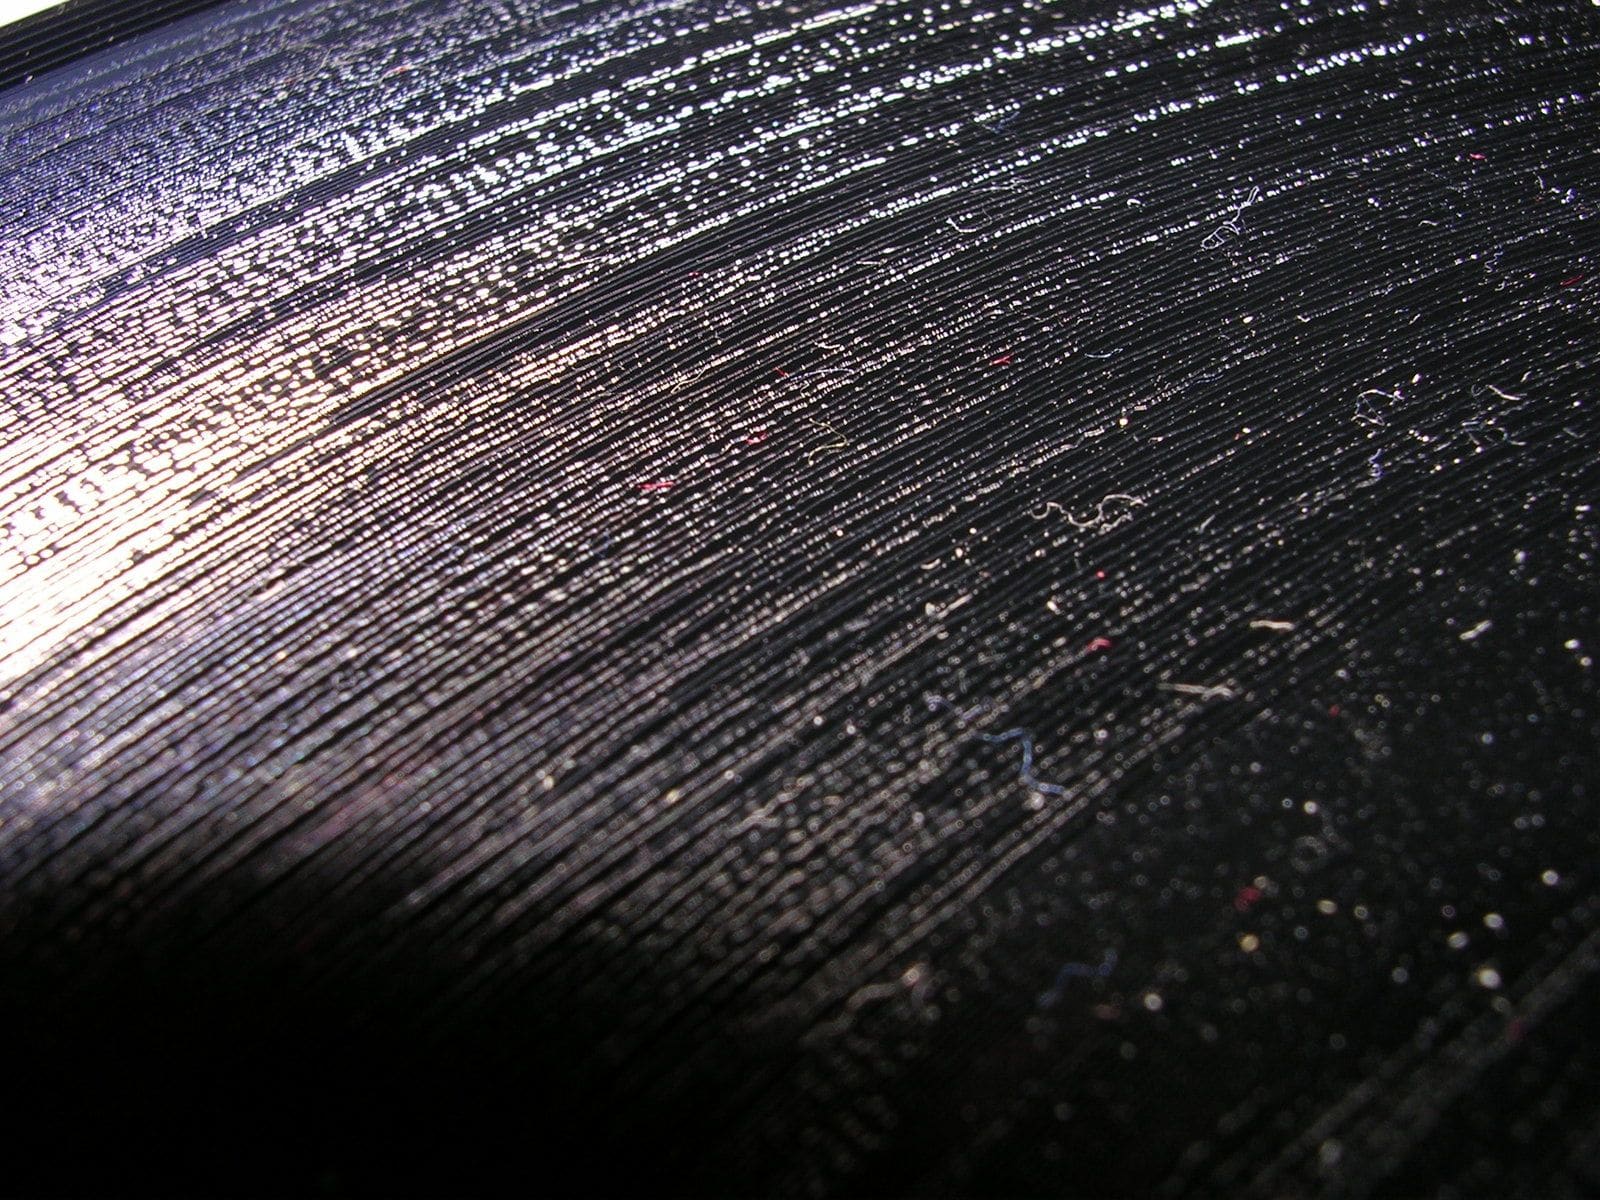
Finally, one of the most neglected parts of vinyl cleaning is abrasion. I haven’t talked too much about this in the past so let’s examine the process now and find out why its important to the cleaning of vinyl. 

Talk of abrasion is not something you tend to see within editorial dedicated to hi-fi. And yet. Here we are.

VINYL CLEANING PART 1: MANUAL CLEANING

Don’t settle down too much because I want to whisk you off to your school days for a moment. Abrasion was always that thing you talked about in Geography class as the force that transformed rocks into nicely rounded pebbles. Ready made to add a tad of textural variety to your garden or to hand paint as a ladybird or hedgehog and sell on Etsy. Isn’t nature wonderful?

Abrasion is also something that’s sorely needed in hi-fi. Trouble is, we ain’t getting enough of it. 

To explain why, I want you to picture TV personality and actor, Tony Robinson. The Baldrick of this parish and the man who would gaily bounce around a different sort of trench on the BBC TV programme, Time Team. Within which, he would run around terribly fast, hither and thither, securing breathless updates on the latest dig, offering wide-eyed excitement and puppy-dog enthusiasm. Fit to burst, he was.

Archeology for the masses it might have been but I want you to recall the sights inside one of those trenches. 

VINYL CLEANING PART 1: MANUAL CLEANING

Just ignore the wide-brimmed hat and West Country accent of Phil Harding for a sec and look below. There you will see an eager young tike, prodding the hardened soil. A piece of pottery is partially revealed. Our intrepid urchin is carefully brushing away the friable dust and soil. There, like some remnant of the Roman version of Habitat, we can see the patterns on a fragile pot. No doubt used to contain olives. Perhaps wine. Who can tell? 

Now keep looking at that pot. 

This trench is actually a metaphor. A metaphor for a vinyl groove. That dust is the daily grime that builds up in the groove. The solid, caked, baked soil? That is a heady concoction sautéed lightly from hardened oils emanating from sweat, the fabled ‘release agent’ from the original pressing plant and other substances that I wouldn’t like to dwell upon in a family-friendly website. 

The pot itself? The detail you’re desperately trying to access when you listen to a vinyl record on your hi-fi.

Time Team perfectly illustrates, not just how difficult it is to properly clean your vinyl, it offers the essential clue as to why many of us vinyl fans are not cleaning our vinyl properly. Because your detail remains stuck in the trench. It’s all down to abrasion. Or the lack of it.

VINYL CLEANING PART 1: MANUAL CLEANING

Whenever you clean your record, the chances are that you will clean it manually with a felt pad or carbon brush or some such. If you’re flush with a bit of cash, you may have spent out on a record cleaning machine (RCM). There’s plenty out there, you know the brands. They range from a couple of hundred pounds to a couple of thousand. 

I’ve tested and used most of them.

In use, you either clean ‘dry’ with that felt pad or brush hoping to dislodge as much dust and grime as possible.

With a RCM, you’re probably looking at using the machine in conjunction with a liquid of some sort. The reckless will apply, directly to the vinyl surface, a liquid containing a high-strength alcohol that will risk immediate damage to the groove. Others will apply an enzyme-based liquid.

The upshot for both applications is that you spread the liquid around the vinyl surface with a brush of some sort, cross your fingers then you hoover up the liquid and then you’re done.

VINYL CLEANING PART 1: MANUAL CLEANING

The hope is that you will improve sound quality. You will. But the degree of improvement will only go so far and not far enough.

I’ve been testing record cleaning liquids and hardware for decades now. Every time I found a new toy to play with, one that did a good job, right then I would think to myself, “This is it! I’ve finally found the answer! I can rest easy now and just play my vinyl.”

Then I would write about it, proclaiming how amazing liquid Y was and how much more efficient RCM X was and how System Z was truly the way to go. 

Three months later, I would discover a new liquid/system/hardware and I’d have to think again.

Well, I’ve been doing a lost of testing of late and the one element that is becoming essential in terms of vinyl cleaning is, you guessed it, abrasion. 

VINYL CLEANING PART 1: MANUAL CLEANING

Liquids – whether applied directly to the vinyl surface or applied as vinyl is dunked into a machine-held bath – act like an archeologist’s brush. They shine the easily accessible detail, the detail that’s there yet veiled. 

If you want to find the rest. The detail hiding behind the hardened oils? That trench-based hardened soil I mentioned above? The hardened stuff in the groove that won’t shift by dowsing with a drop or two of liquid? You need abrasion. Nothing too aggressive of course. We have to be gentle when applying it because this is vinyl we’re talking about, after all. Nevertheless.

Abrasion is also part of this cleaning system. We’ll find lots of abrasion below, during our cleaning process.

REQUIRED TOOLS

The above forms the basis of this Vinyl Cleaning Guide and provides clues as to how this thing actually works. Now I turn to the tools. What will you need to complete your clean?

Buyer’s links are provided below.

1: Disco Antistat

Price: £46.50

Contact: Amazon, eBay, etc

VINYL CLEANING PART 1: MANUAL CLEANING

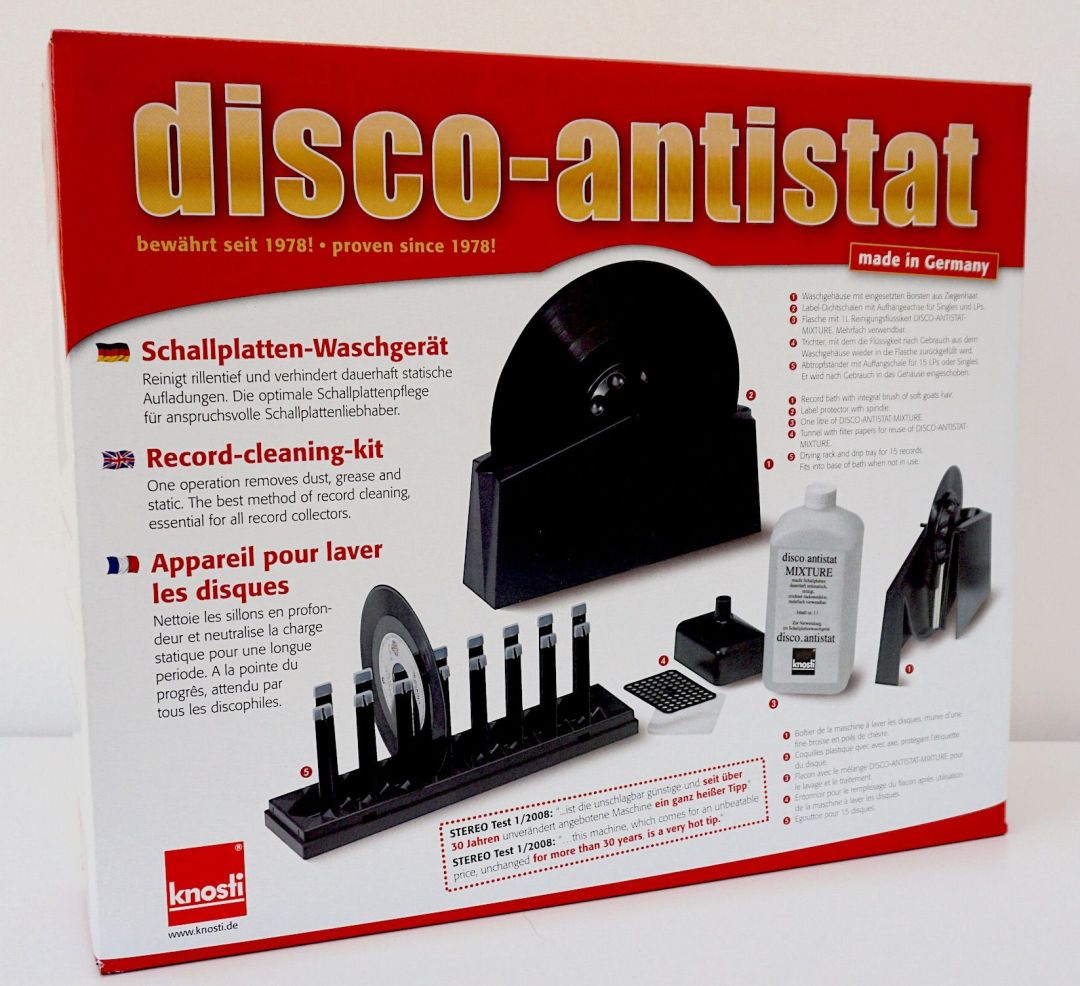
This Vinyl Cleaning Guide looks at cleaning your vinyl. It’s not a buyer’s guide of manual cleaning tools. I have spent years doing that sort of filtering and the Disco Antistat is my manual cleaner of choice. This is the best manual cleaner I have found, currently for sale on the market. It offers a relatively low cost, great value, it’s easy to use and is wholly effective. But look, I won’t repeat myself here, either. You can read a full review of this product HERE. Oh and ideally, you will need two units for this Cleaning Guide. You can get away with one but two is best.

2: Distilled Water

Price: £2.95 per litre

Contact: Amazon, eBay, etc

There are dozens of brands out there, any will do. Unless you know of a reason why certainly brands should be excluded?

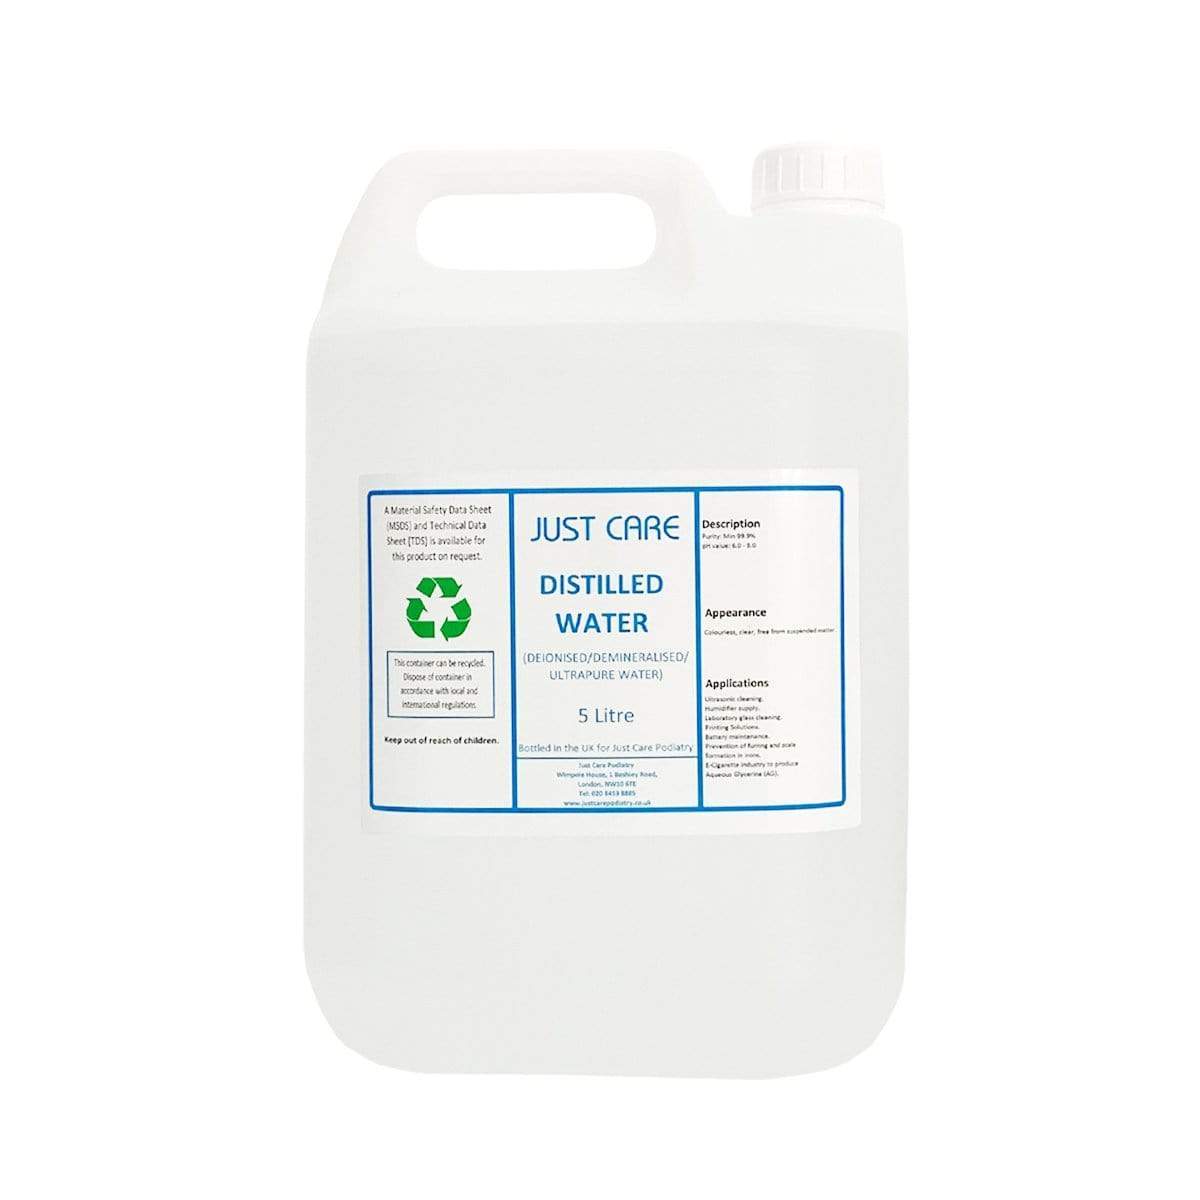
Distilled water will be the main content of the Disco Antistat’s bath. I use distilled water as opposed to any other filtered variant because of the range of potentially troublesome elements that distilled water rejects and other do not. For example, deionised water reportedly does not remove bacteria, viruses or other organic compounds. 

3: Alcohol

Price: £4.05 per litre

Contact: Amazon, eBay, etc

I use Isopropanol at 99.9% strength. I see no purpose in using a solution of lower strength because products such as Rubbing Alcohol (70%) merely fill the other 30% with distilled water, lowering the monetary value of the product because you’ll need to use more of the stuff to achieve the same ends. Hence, I would recommend using Isopropanol at 99.9%.

4: Tergikleen 

Price: £26.50 per bottle

Contact: eBay


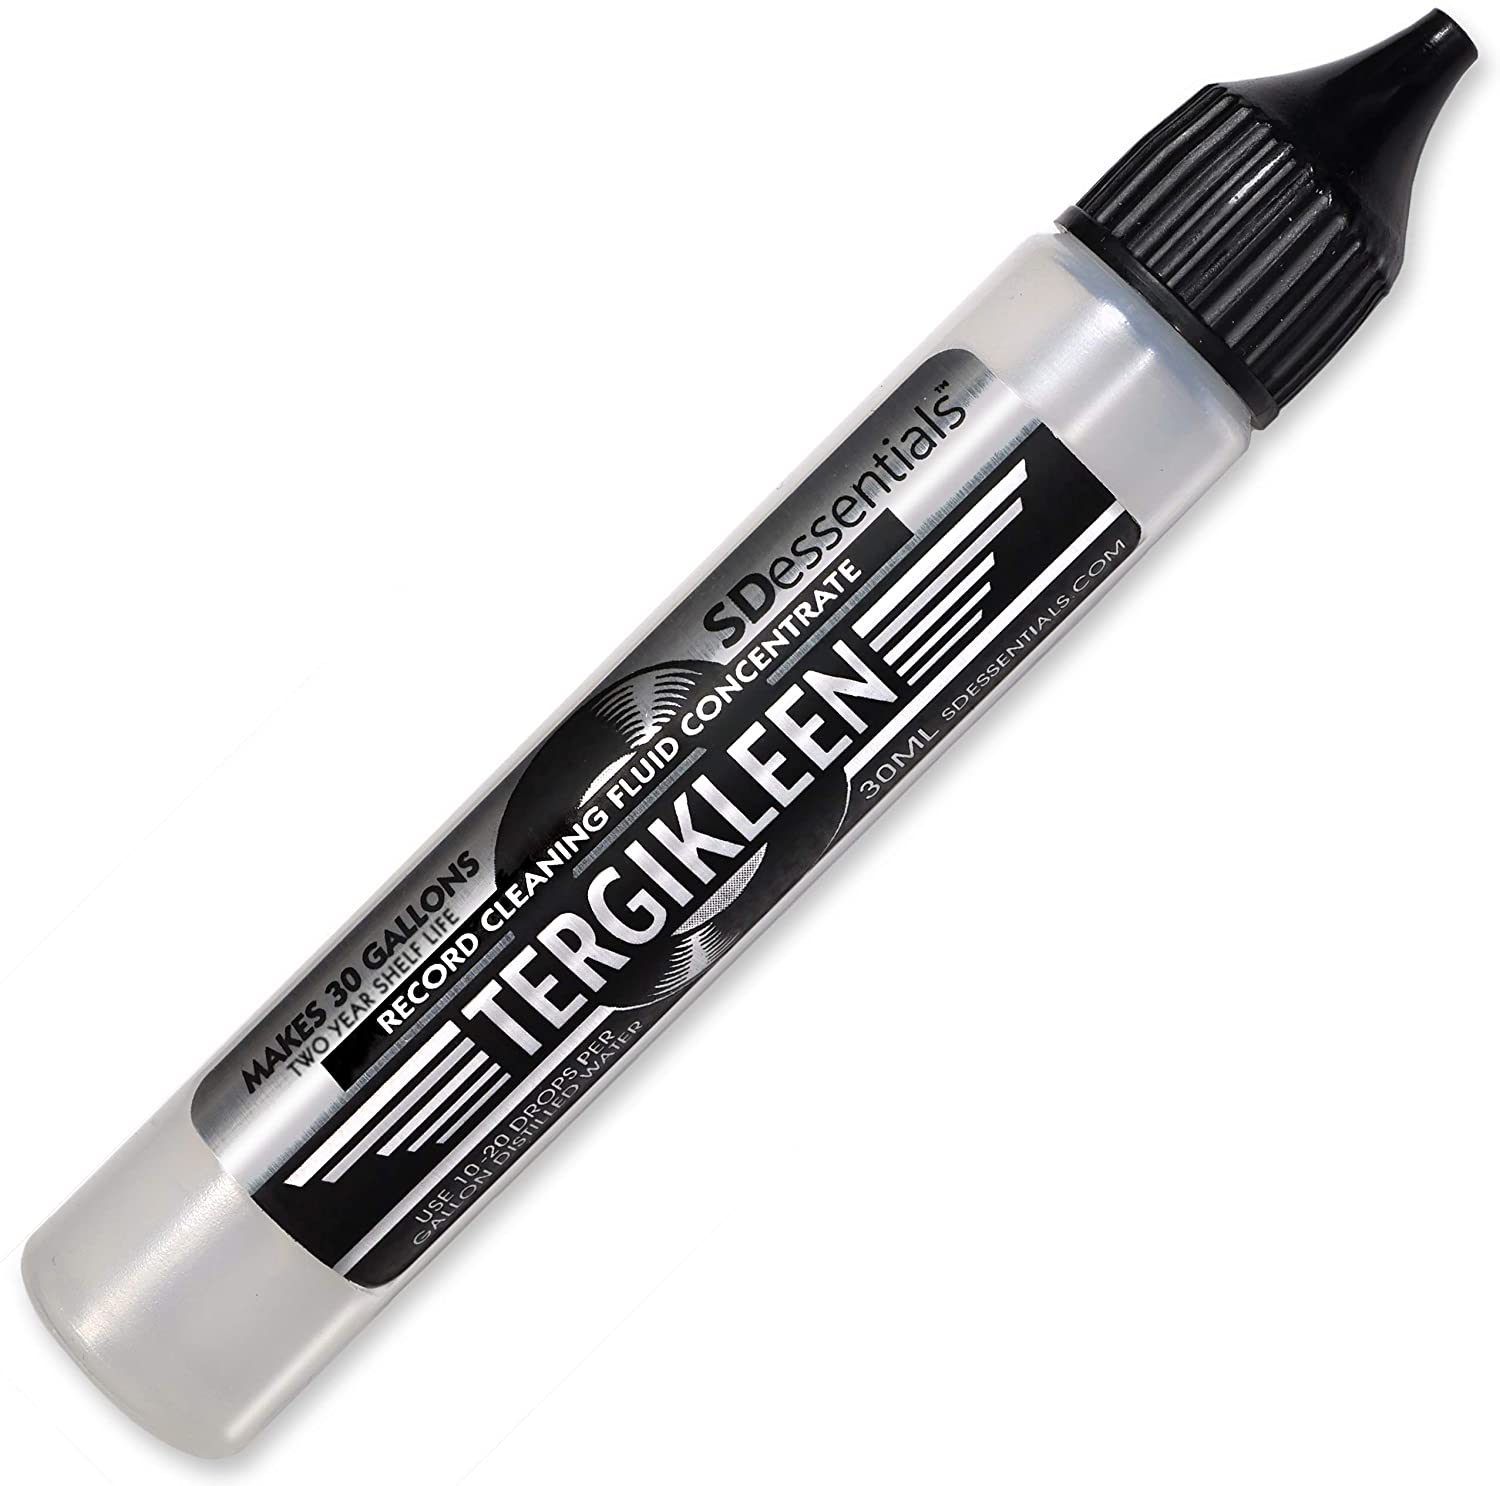
This is my surfactant of choice but you might prefer another. The surfactant feature I talk about above provides a selection of surfactants to choose from. Tergikleen is based upon the well-known surfactant, Tergitol. 

5: Pipette

Price: £7.69 for two bottles

Contact: Amazon 

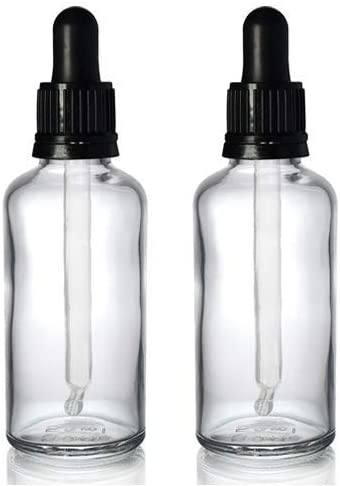
To apply surfactant to the vinyl surface. Or more specifically, a glass bottle secured with a pipette, screw-top vial. I use two at 50ml capacity which provides a bit of leeway before it has to be filled again but it’s small enough to be used ‘on site’. That is, where you do your vinyl cleaning. Use one for the surfactant and the other to hold your Glycol. Label both in case of future mix ups. Both liquids are easier to dispense form these small vials.
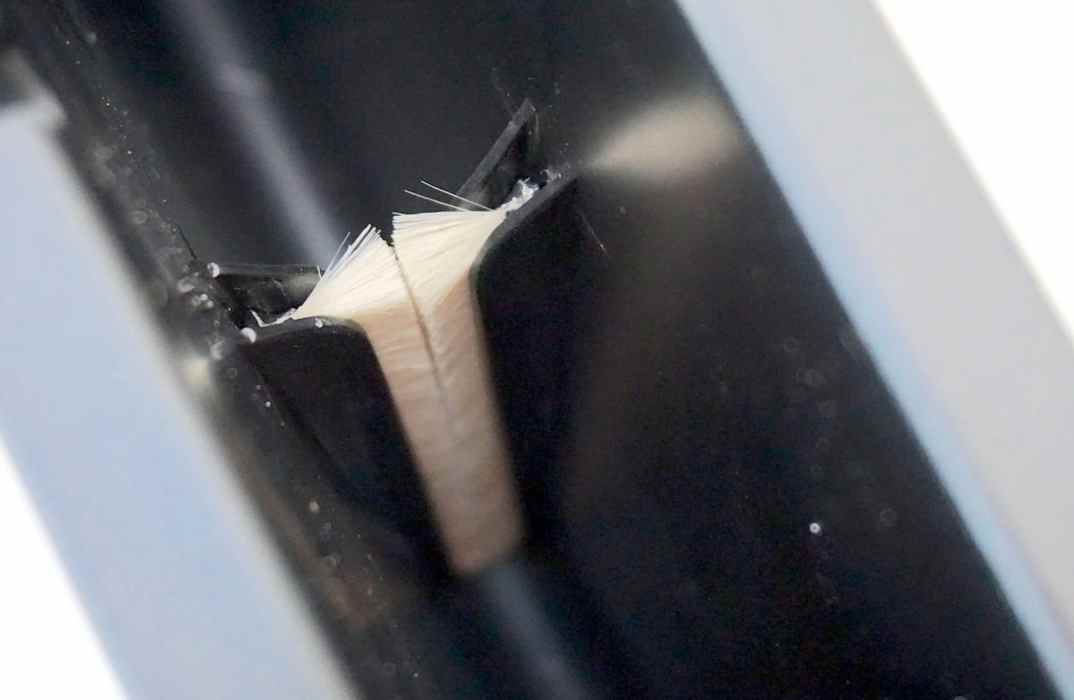
6: Kabuki brush

Price: Various [see text]

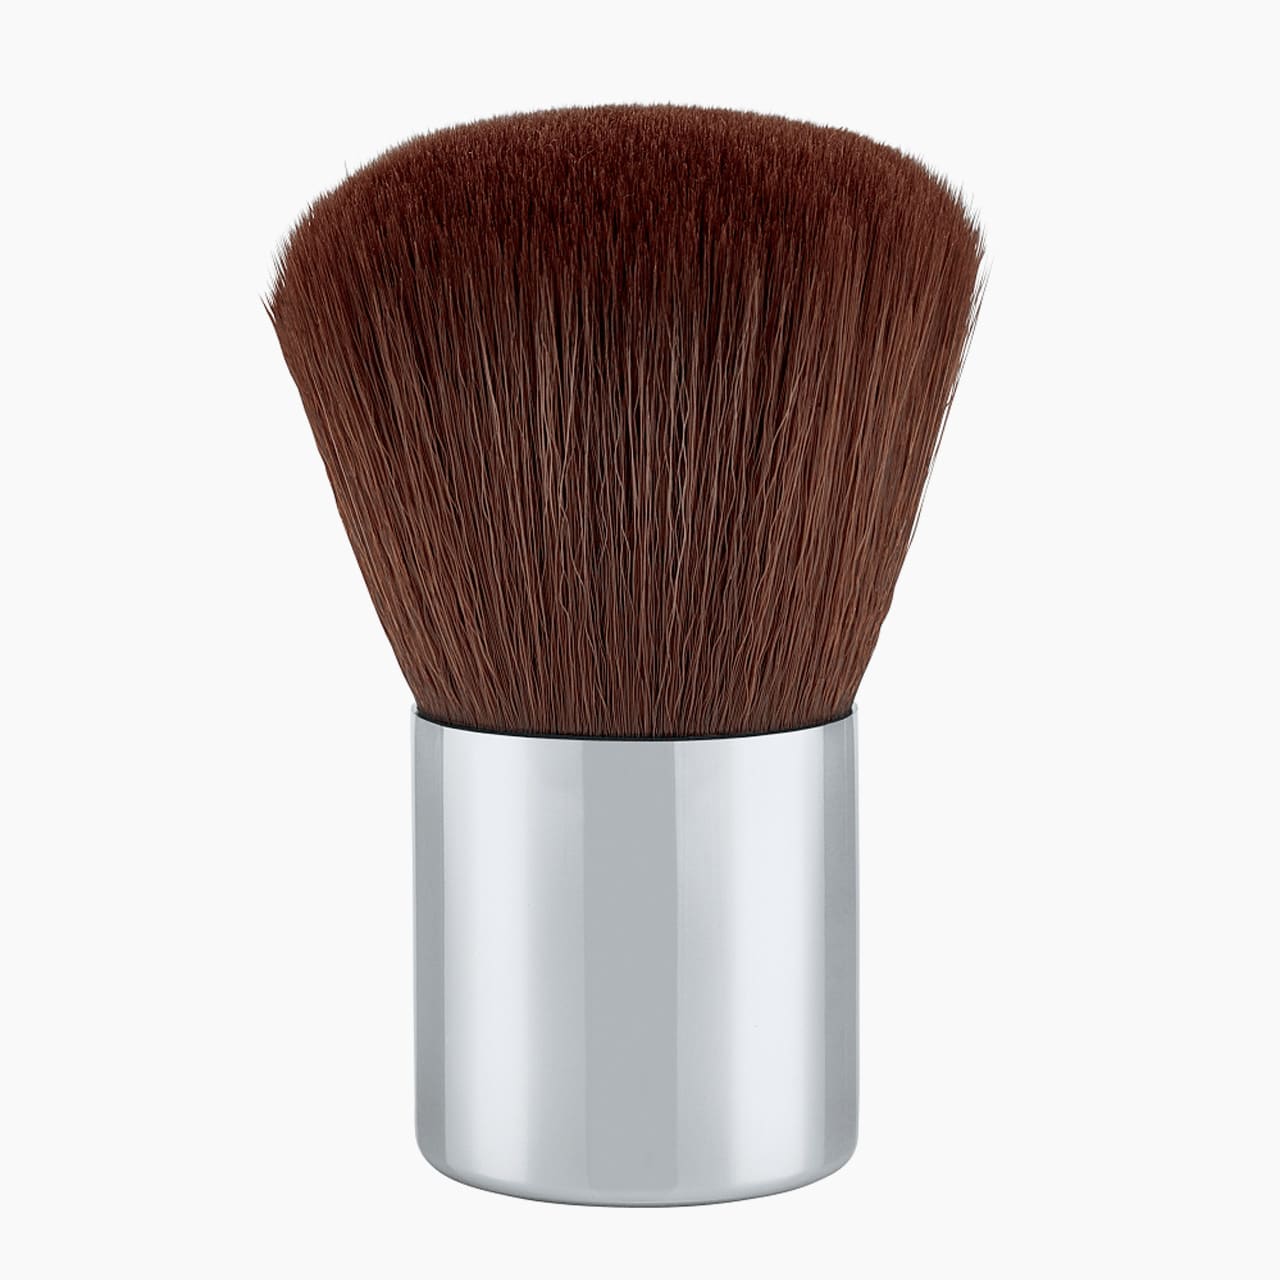
You will need this when applying surfactant to the vinyl surface. A Kabuki brush is a lady’s make-up brush. Short and wide in nature and featuring stubby bristles, this little thing is perfect for pushing surfactant deep into the grooves. Don’t be afraid to spend out on this one. You can buy one for a couple of pounds but I’d recommend getting a good quality example to prevent bristle and fine hair shedding. There’s no point in trying to clean your vinyl if you only succeed in adding more debris to the grooves at the same time. Mine cost around £20. There’s lots of brands out there. Try a specialist make-up store on line but Amazon should be fine too.

7: Water Bottle [two]

Price: £2

Contact: Supermarket and general shops

Any recognised brand is fine

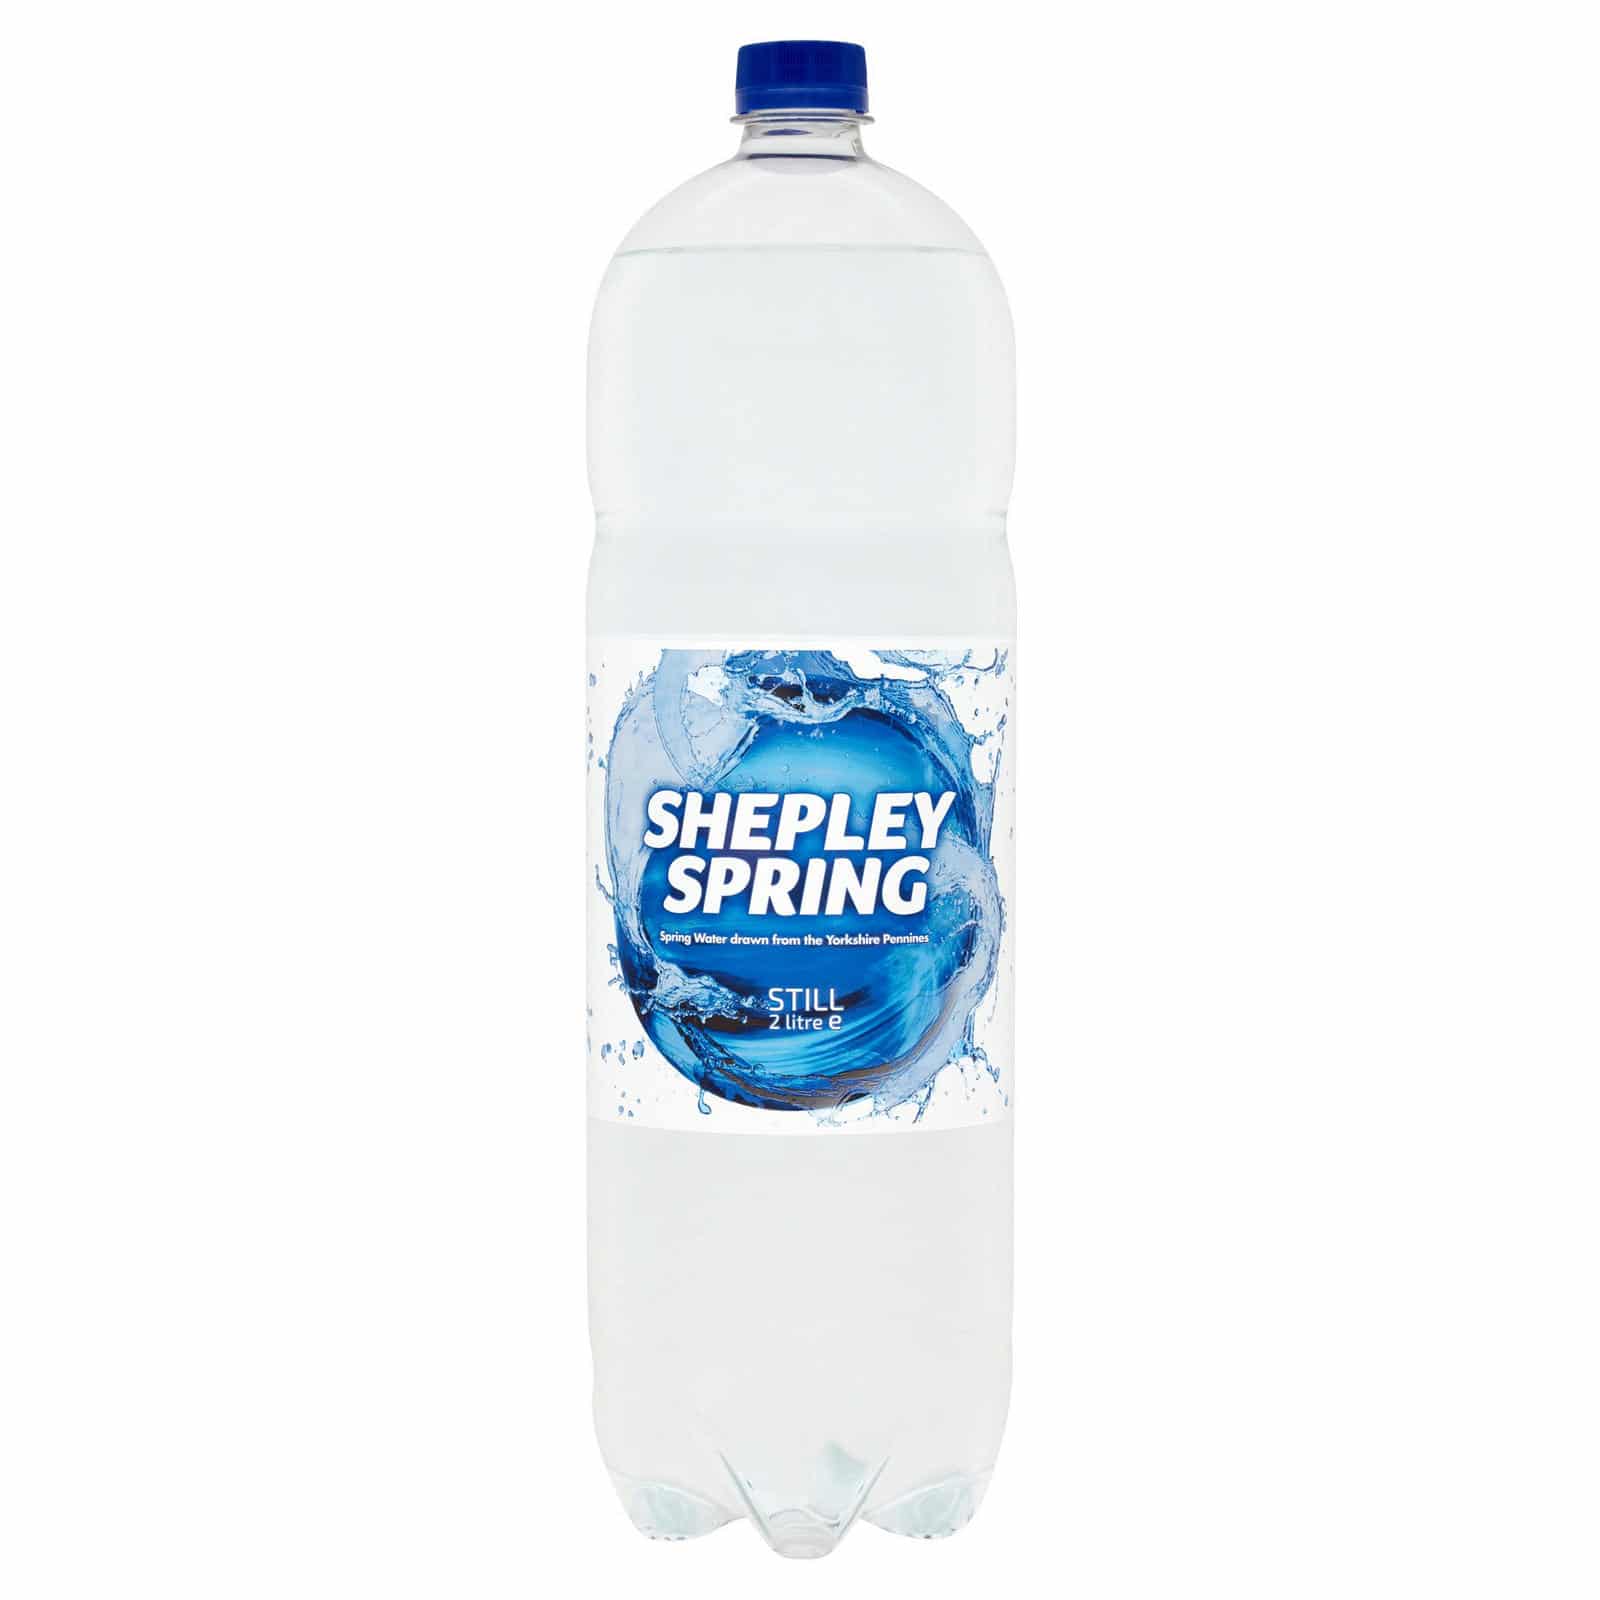
What I’m talking about here is an empty spring water-type bottle of 1.5-2 litres. The sort you might buy from a typical supermarket. You will need two of these. 

8: Propylene Glycol

Price: £11.67

Contact: Amazon, eBay, etc

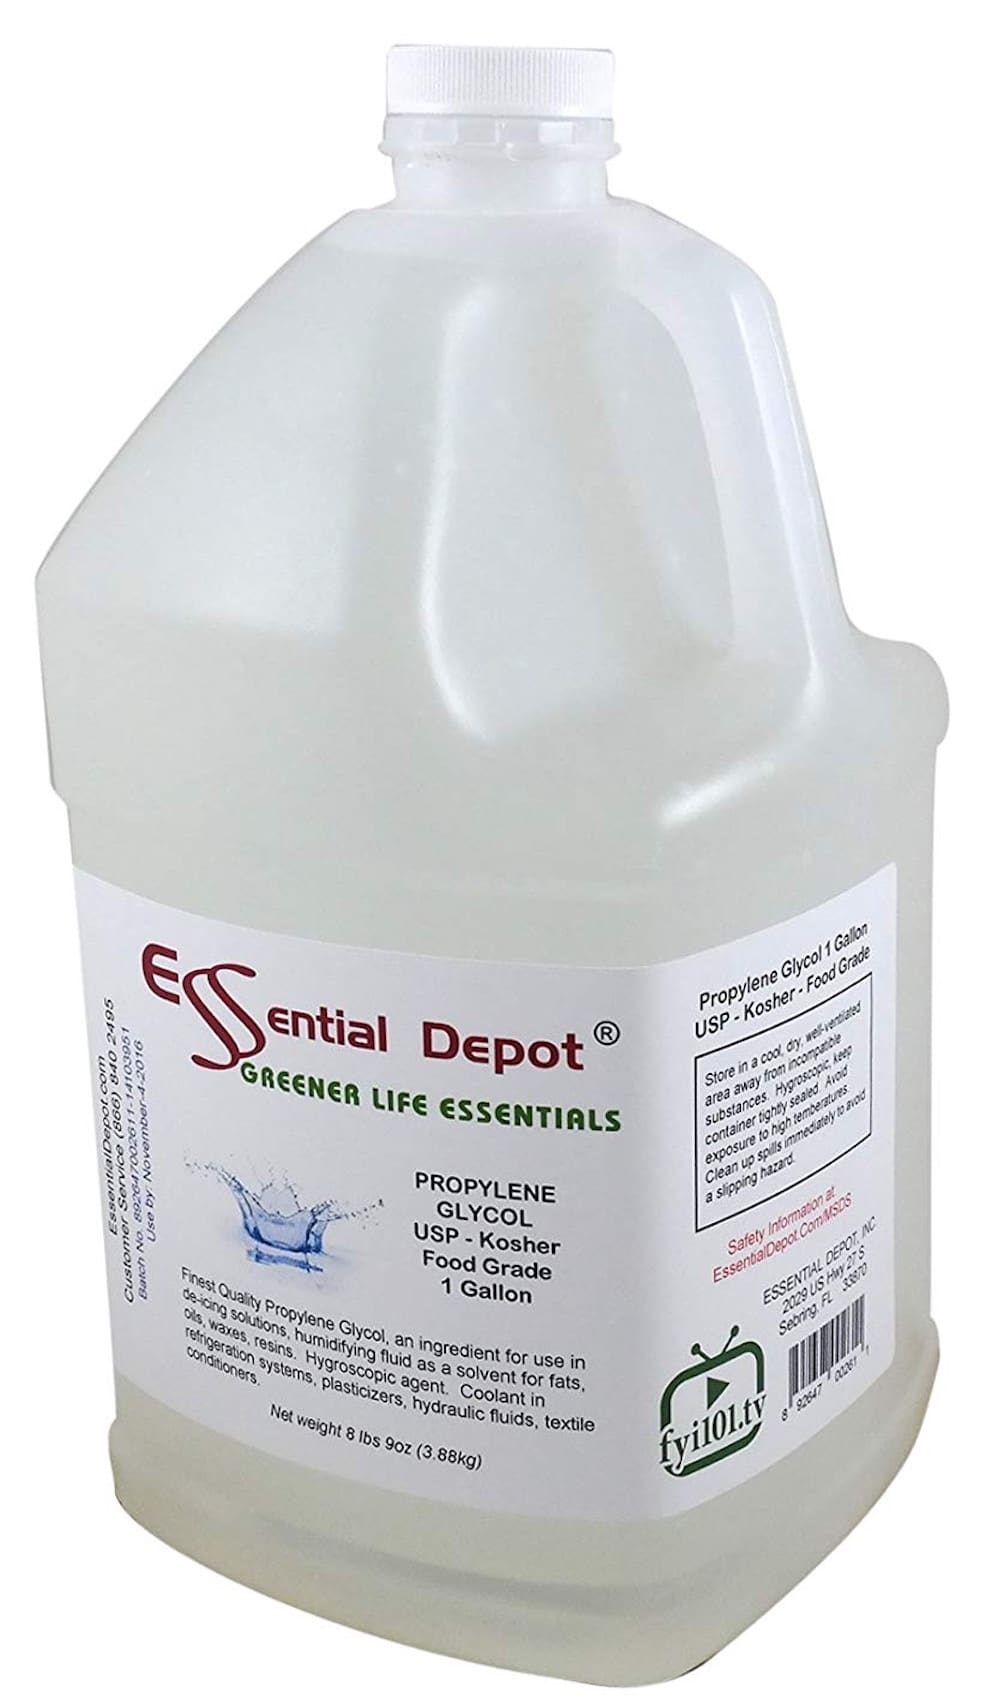
Because the Disco Antistat cleans your vinyl in a vertical position, if you add surfactant to its surface, gravity will try to pull it off again when the disc sits vertically. Mixing your surfactant with a measure of Glycol will fix the surfactant deep into the grooves with no loss of surface contact. Do NOT buy ethylene glycol, it’s particularly nasty stuff. When you receive your large bottle of Glycol, decant a small amount into a glass vial (see 5).
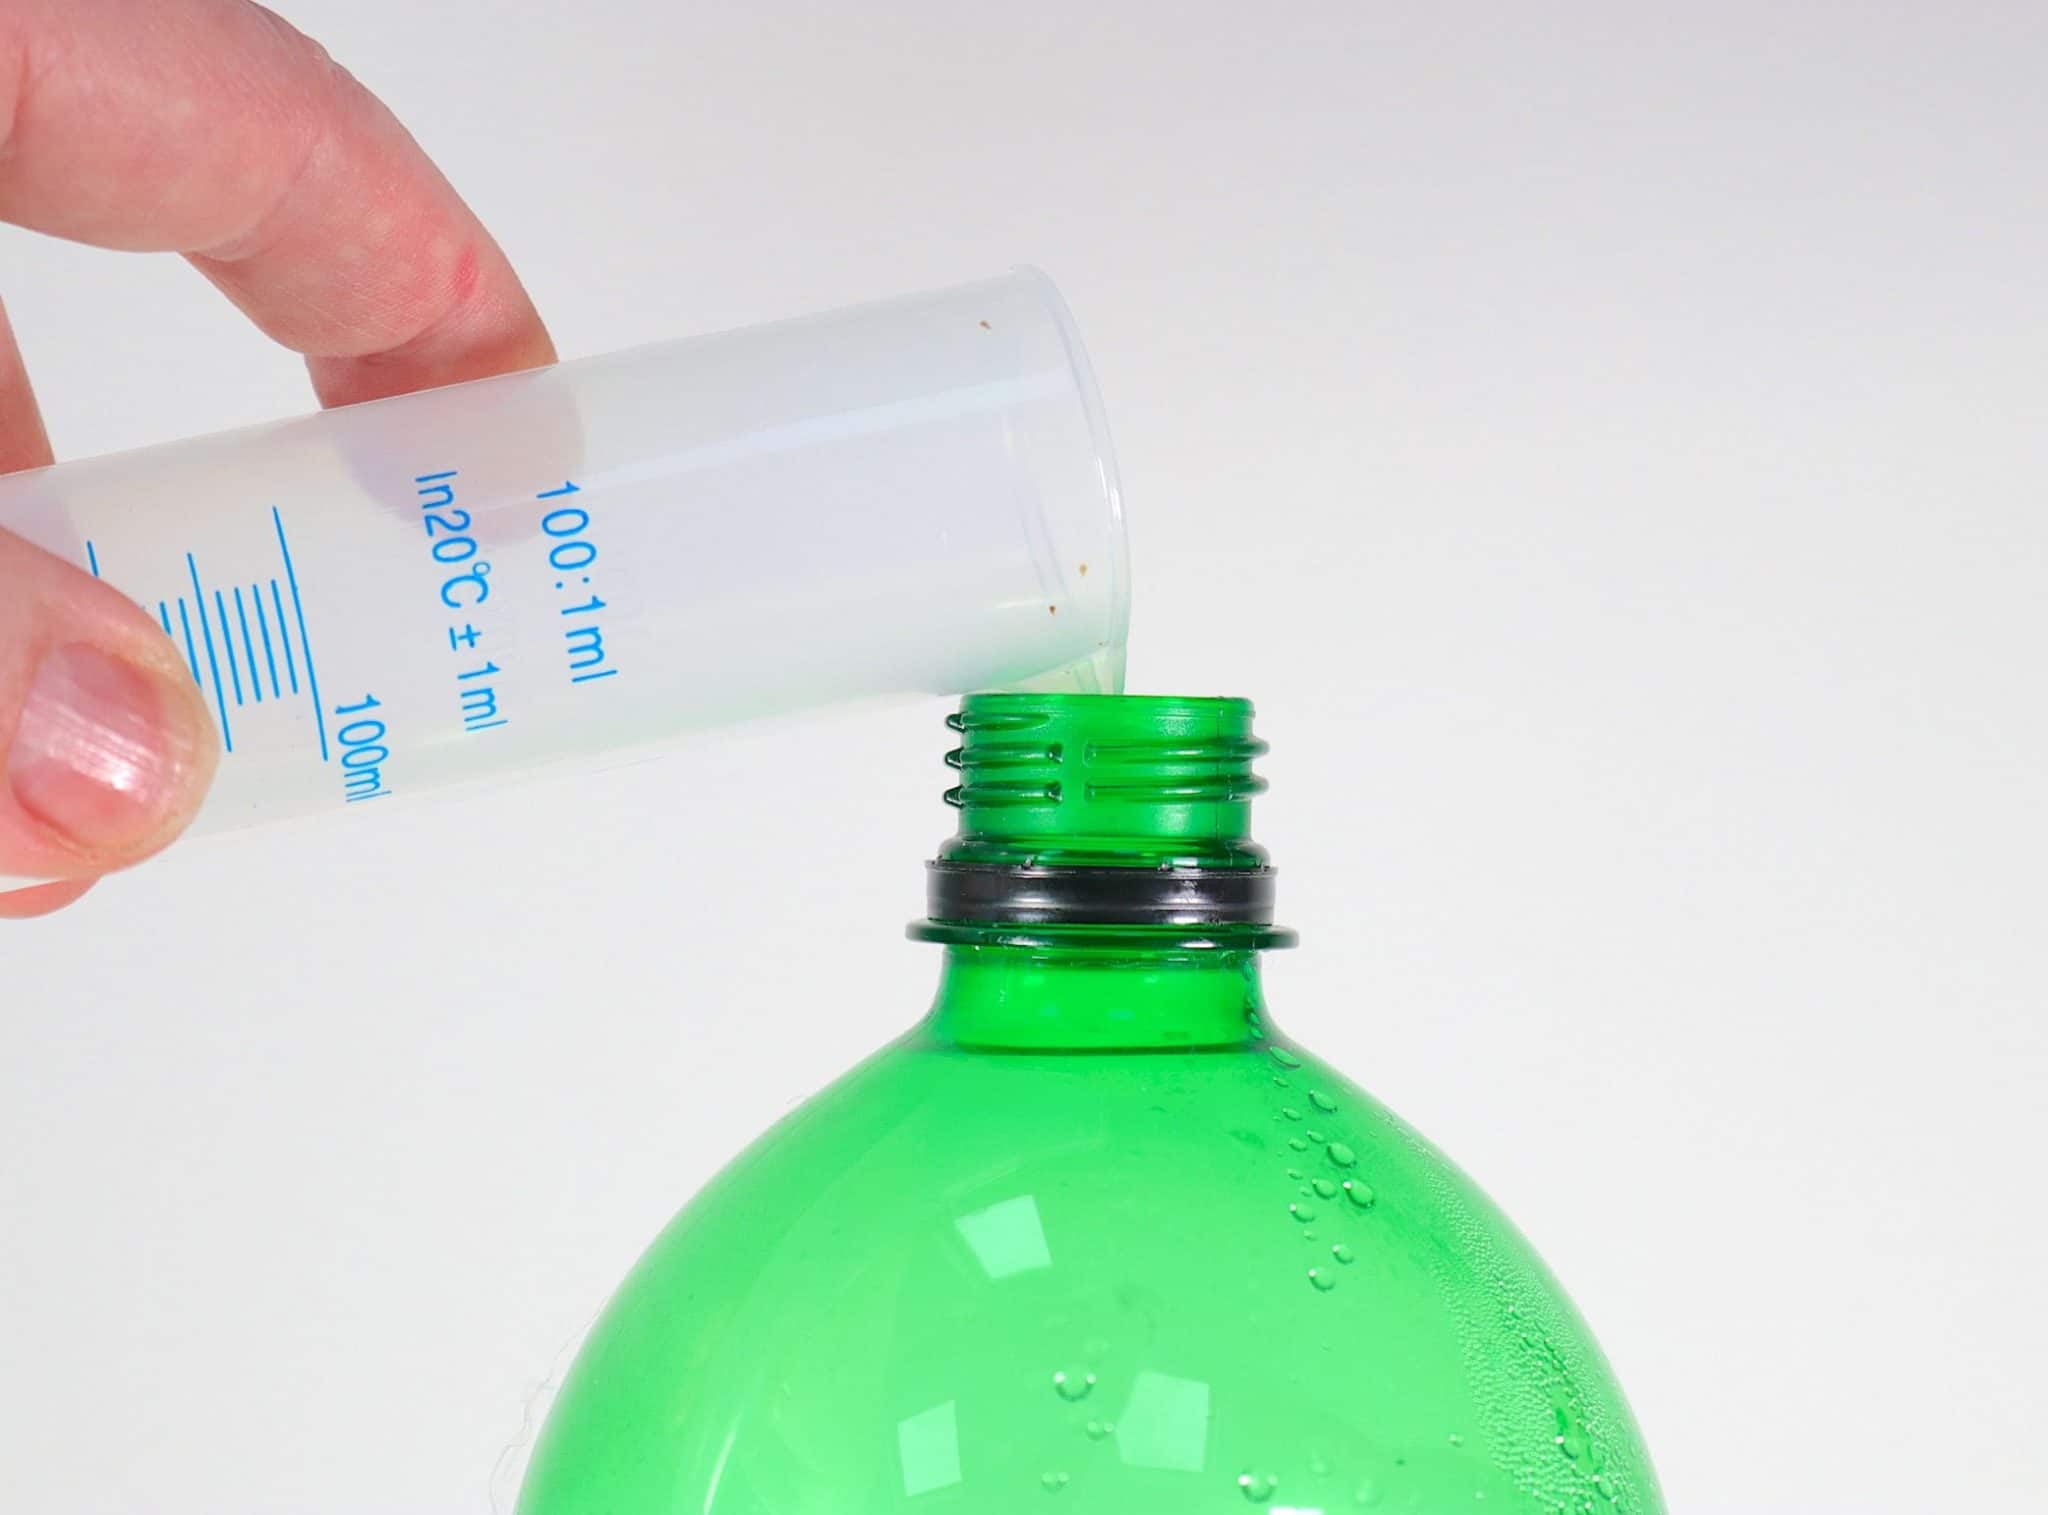
9: Measuring Tube

Price: £8.50

Contact: Amazon, eBay, etc

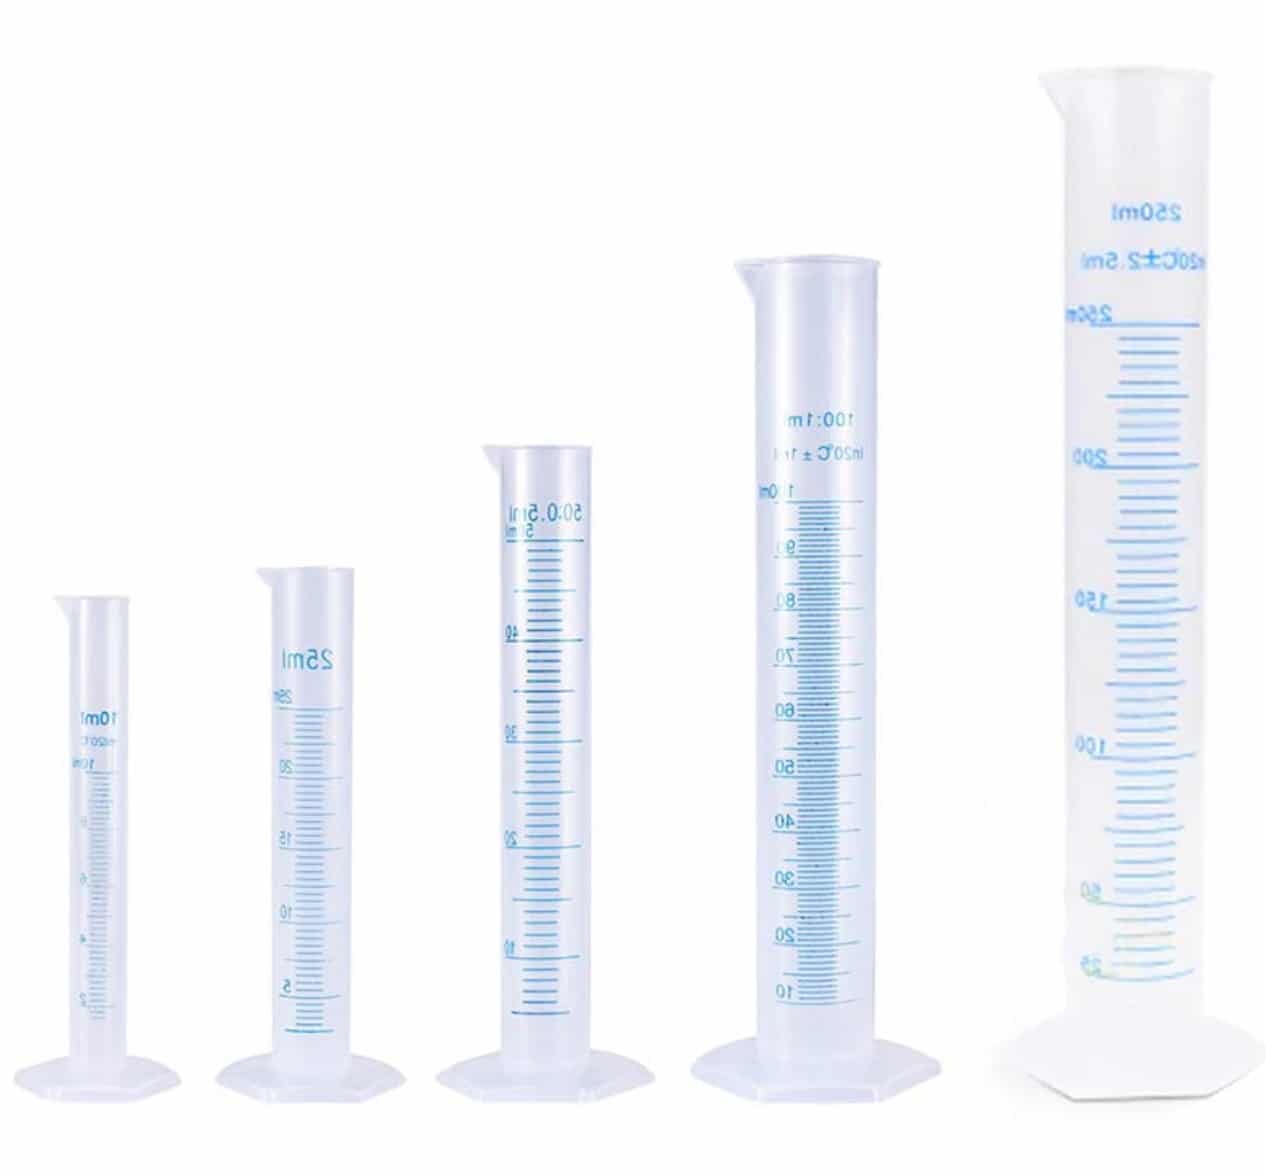
To measure the amount of alcohol you will need per litre of distilled water. The price here include a pack of five plastic measuring tubes. 
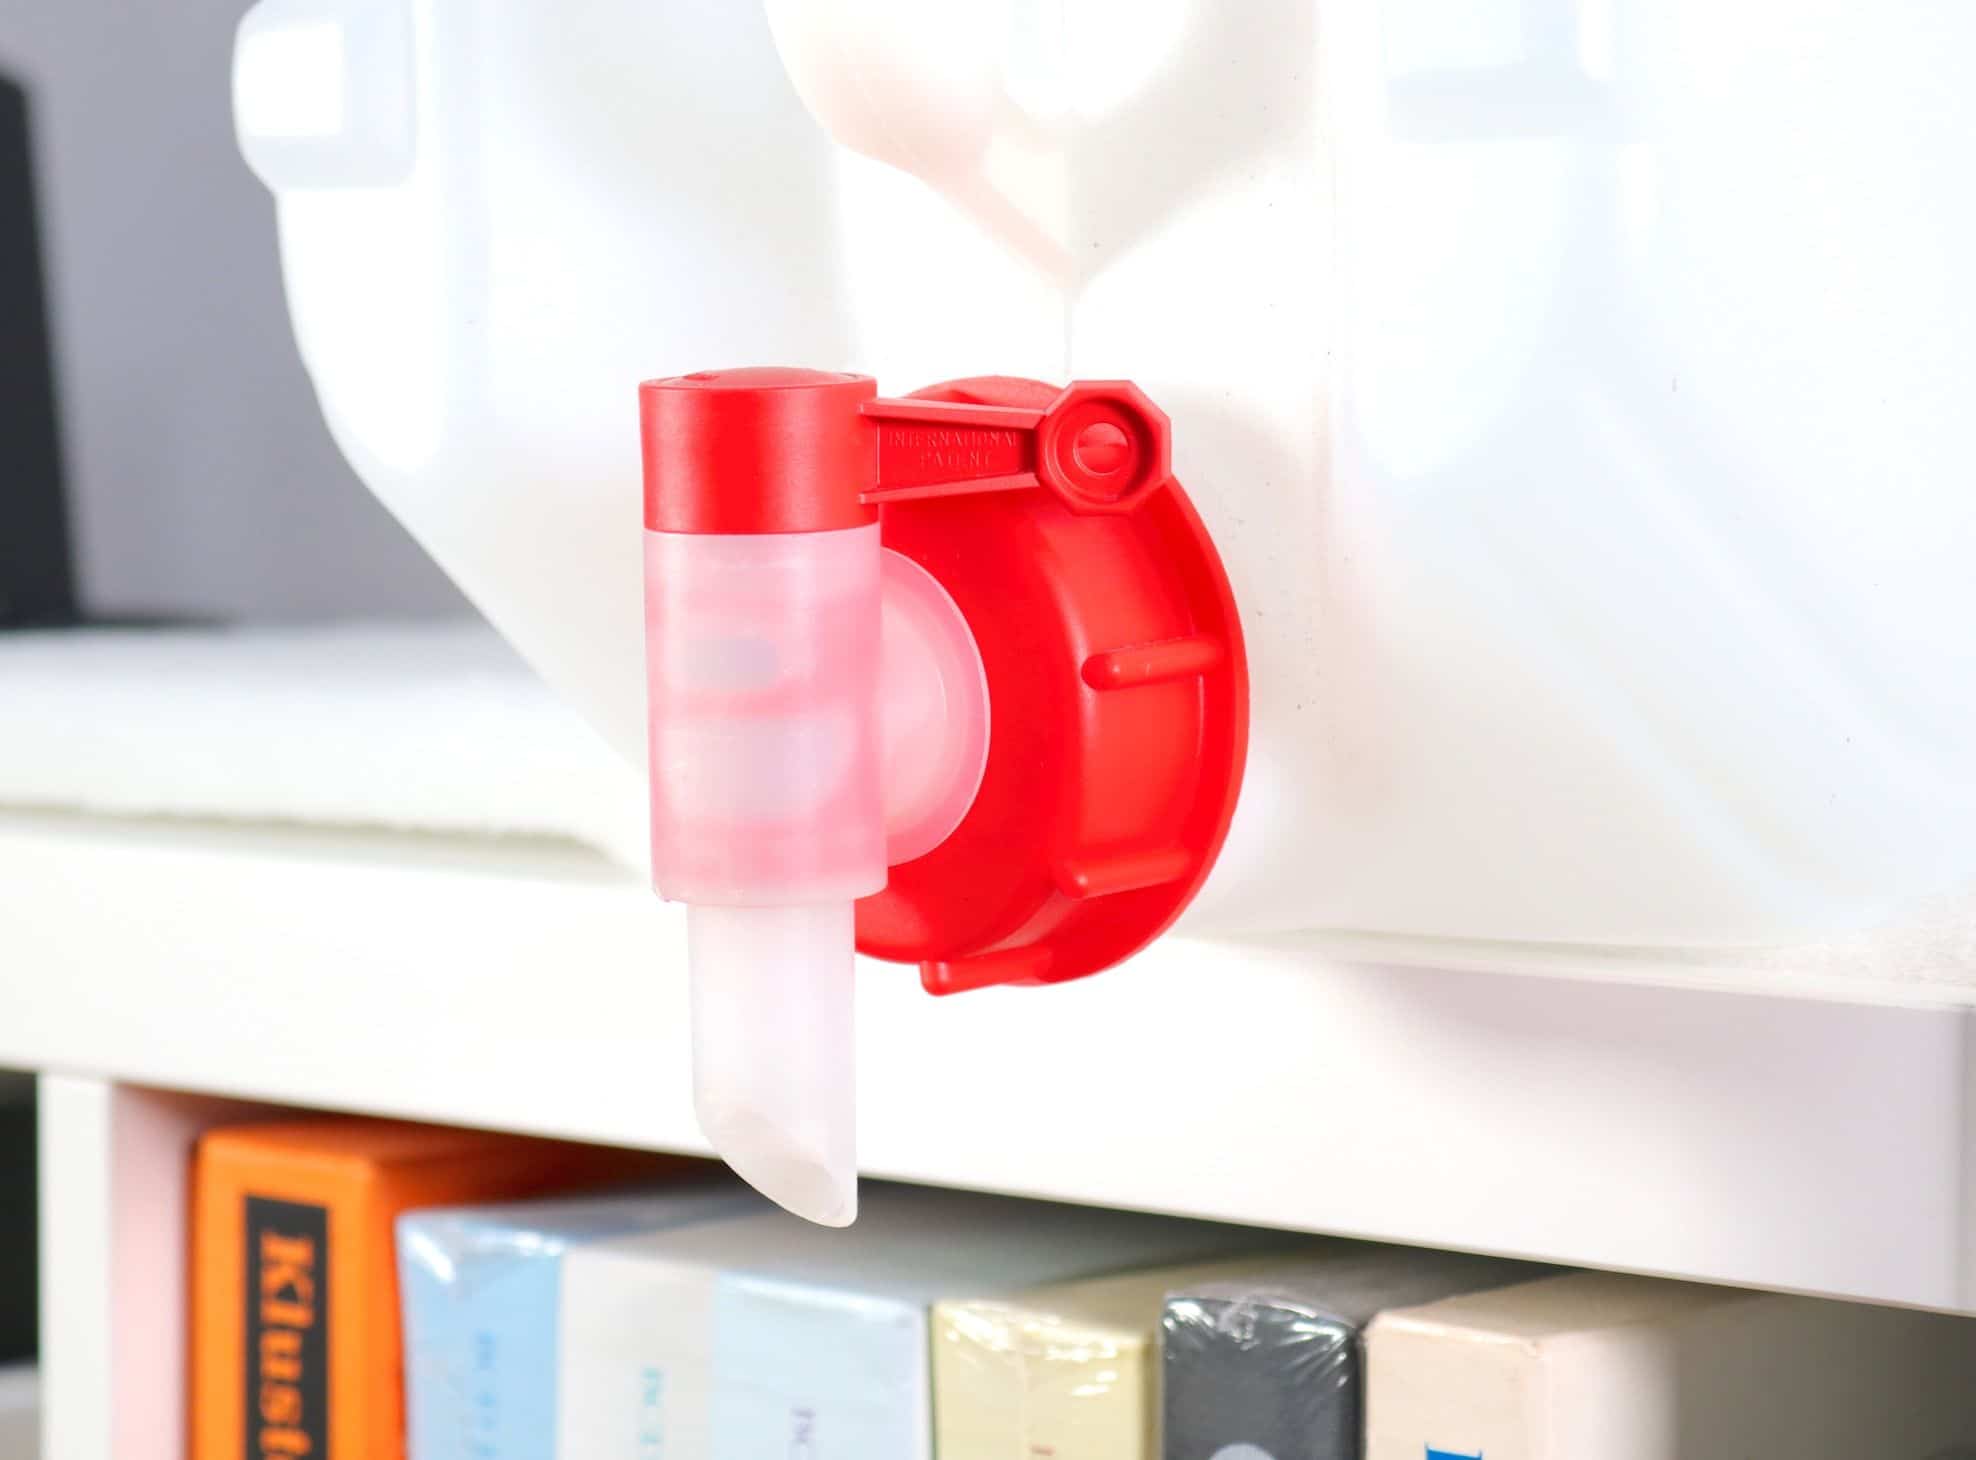
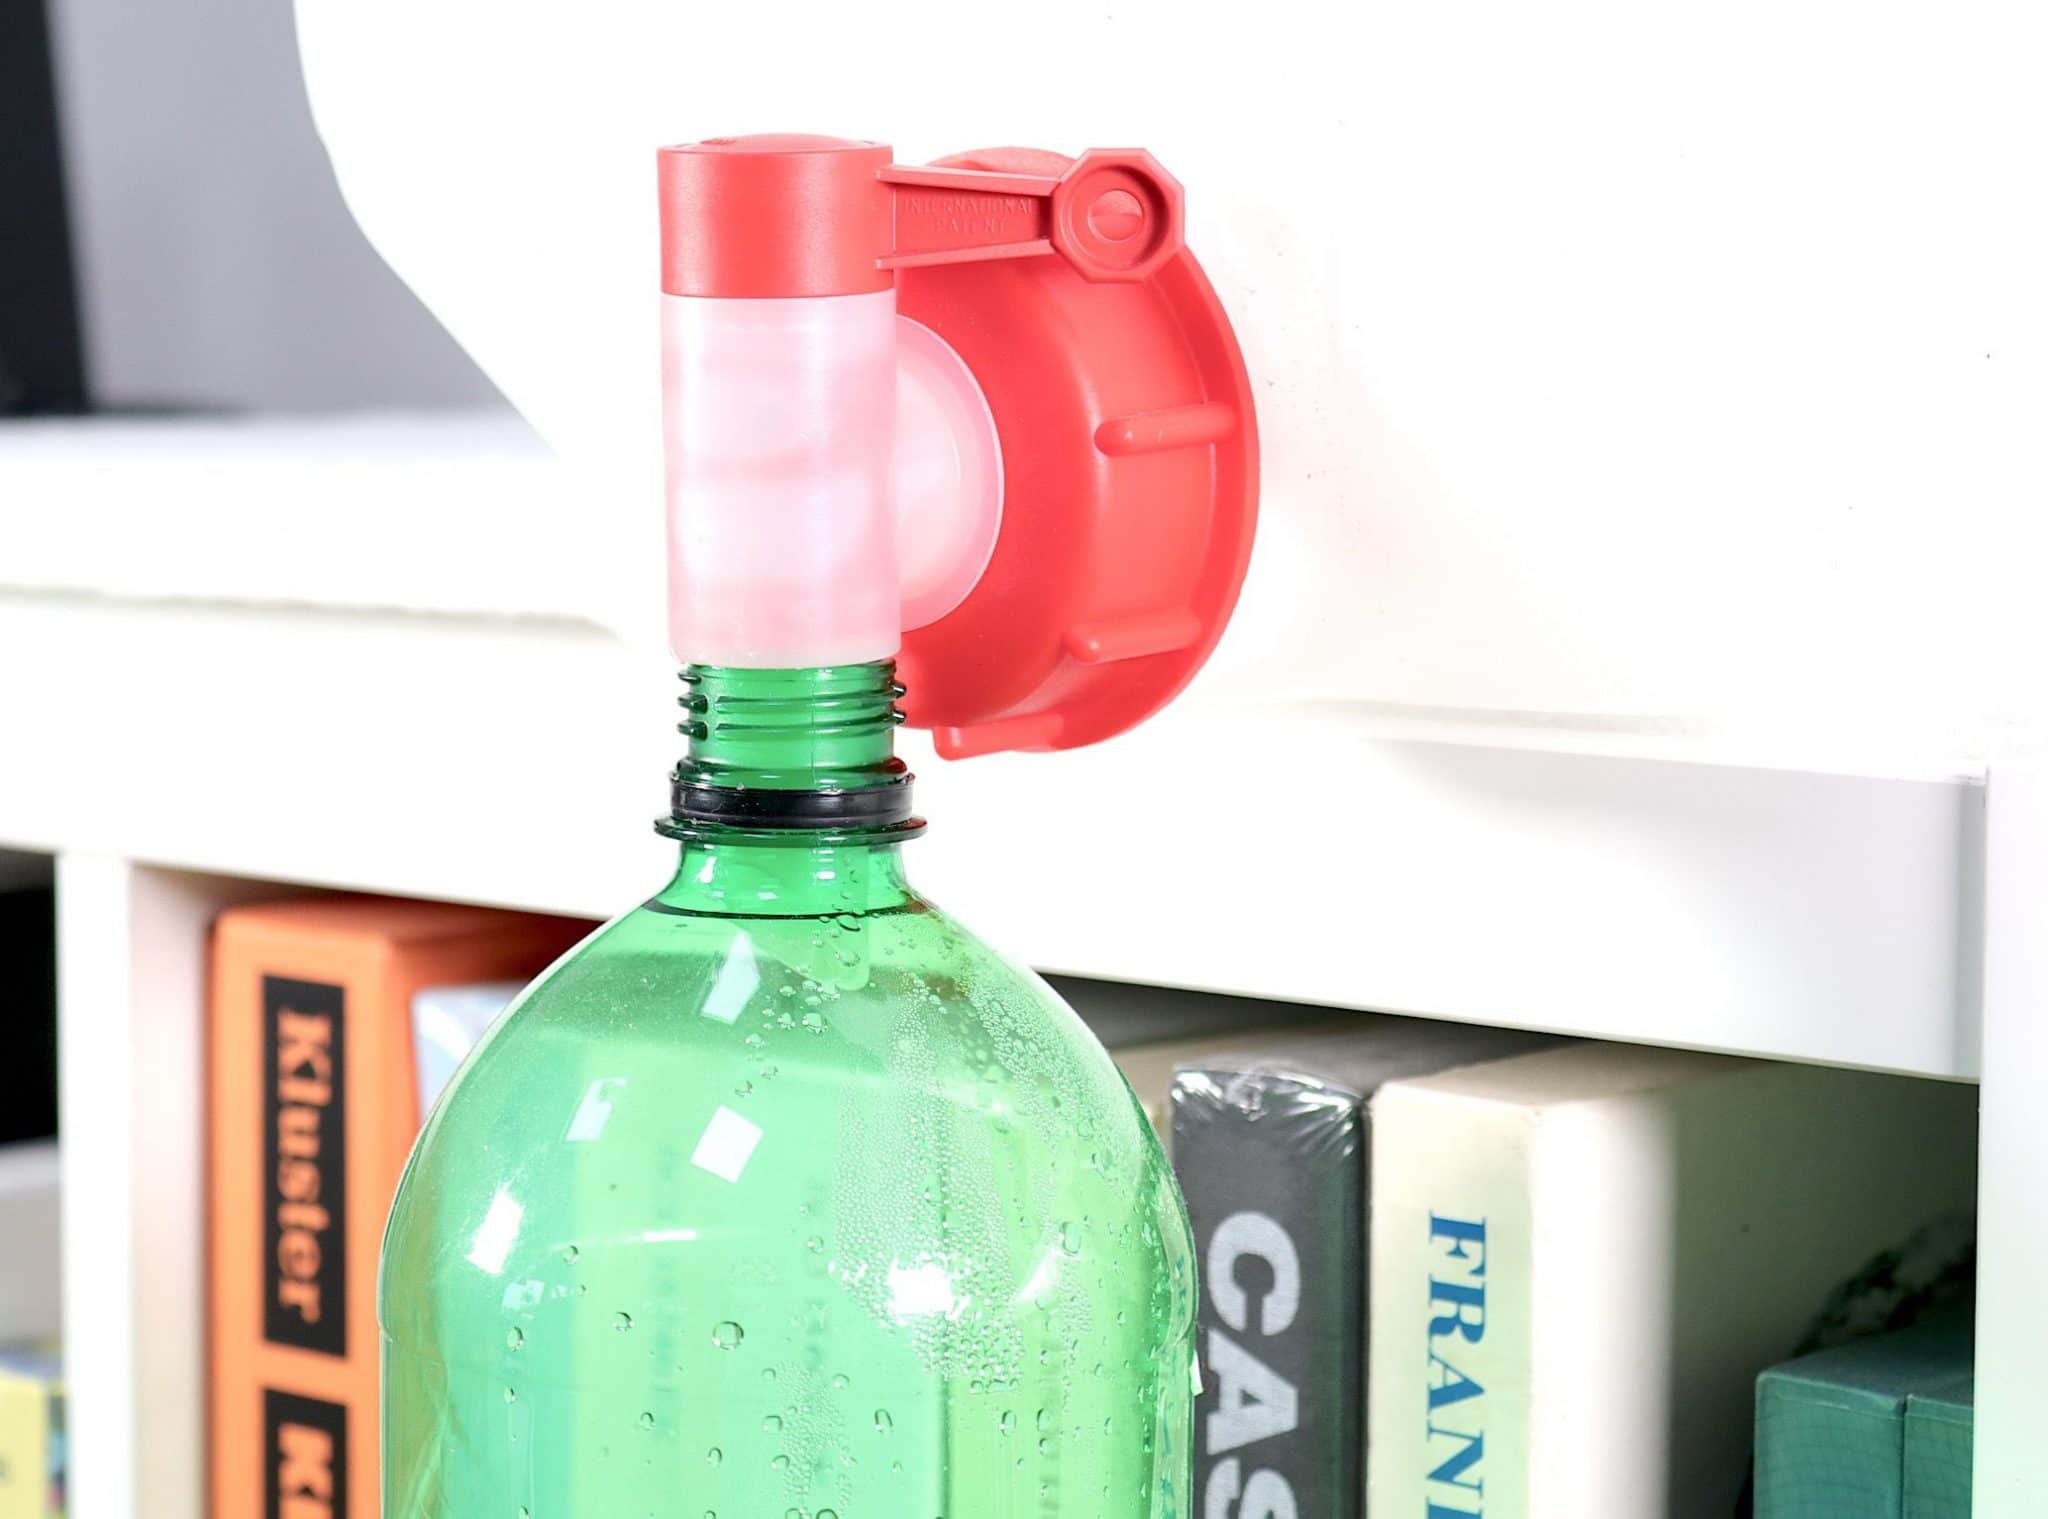
10: Container tap

Price: £5

Contact: eBay

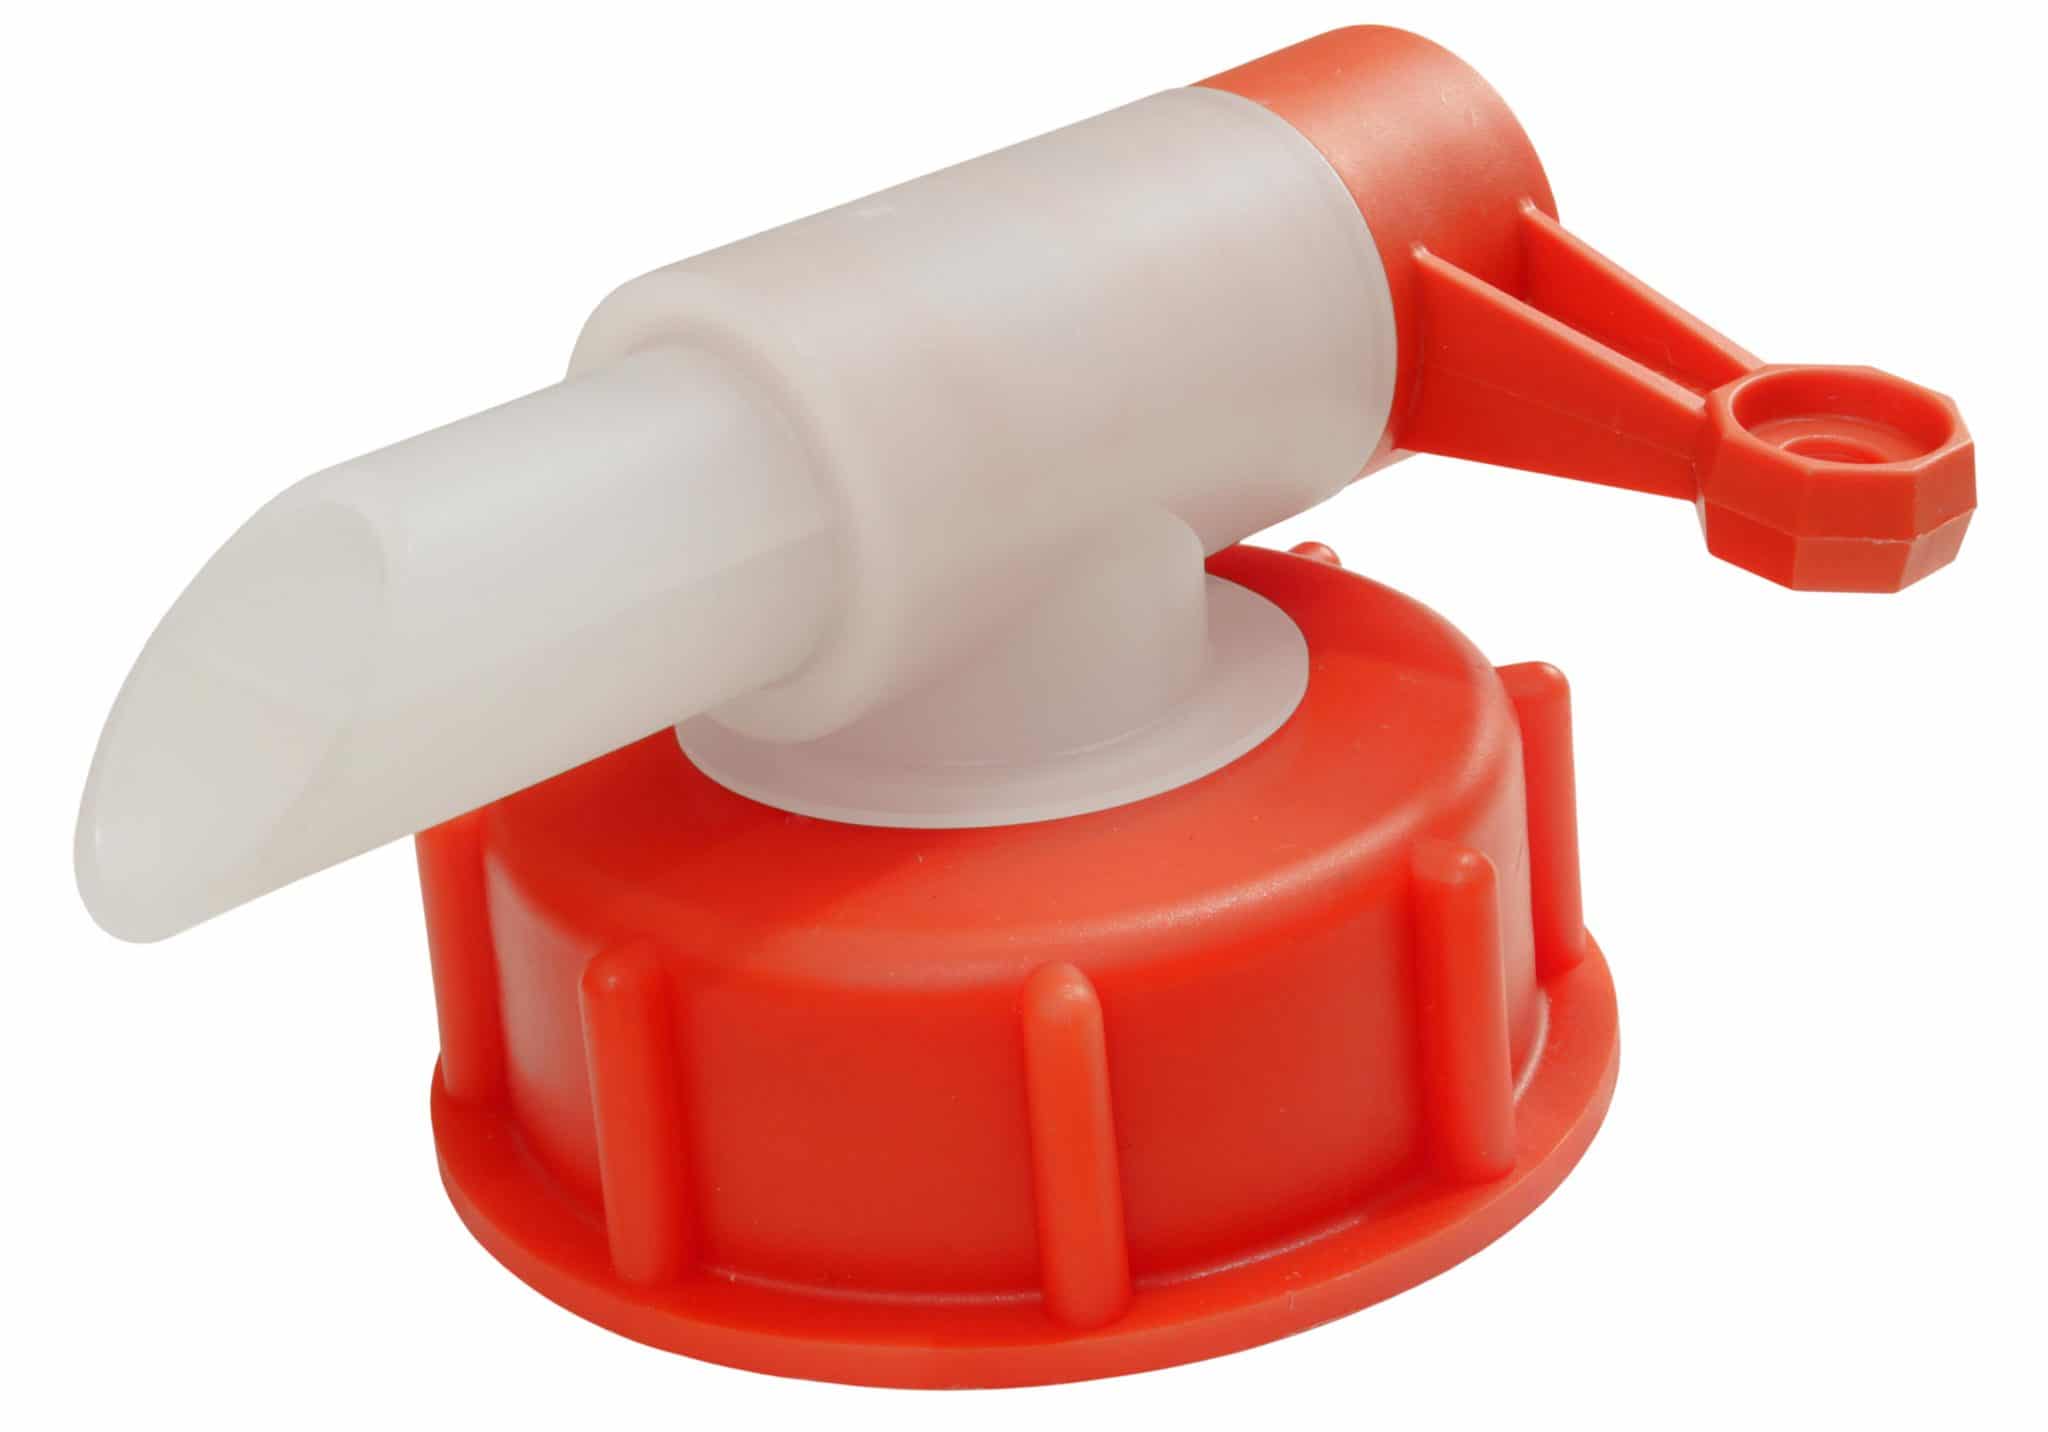
Because I know that I’ll be cleaning vinyl for some time to come, I tend to buy 25 litre ‘barrels’ of distilled water. Then I remove the default screw lid and attach this tap instead. I lift the barrel onto a bench surface, lay it on its side and the tap easily dispenses water into my 2 litre bottle easily and efficiently.

TO THE EXTREME

Before I begin the actual Vinyl Cleaning Guide’s step-by-step sequence, allow me to say this. What you’re going to read below is cleaning to the extreme. Not to me but maybe to you. The amount of cleaning I do below might seem excessive but I do it because, of course, I can hear the difference. Otherwise I wouldn’t bother. 

But look. Just because I wander towards the halls of madness, doesn’t mean that you have to follow me. You can reduce the actually amount of cleaning to suit you and the time you have available so look upon this section of the Vinyl Cleaning Guide as that only, a guide. Take what you want from it. You don’t have to copy the entire Vinyl Cleaning Guide step by step if you don’t want to. You will hear sonic improvements even if you only clean to a fraction of the level.  

CLEANING YOUR VINYL – STEP BY STEP 

1: Let’s address the Disco Antistat’s bath first. First rinse the bath with distilled water. Then we need to fill that bath with cleaning liquid. That will consist of a mixture of distilled water and alcohol, mixed together. To contain that mixture, we need to find a suitable bottle which is where one of the plastic spring water bottles comes into play.

Bottle of distilled water with third-party tap attached – at the ready.

Before you use either bottle, give them both a good clean. Spring water contains impurities (in vinyl cleaning terms, at least) so add around a quarter to a third of the capacity with distilled water. Seal with its cap. Give it a thorough shake, empty that out and repeat twice more. Once done, the bottle is primed for use.  

2: Fill your first bottle with distilled water. 

Filling a cleaned spring water bottle with distilled water

3: Add your alcohol. You need 7% of the capacity of the bottle. So, if you have a litre bottle, that’s 70ml of alcohol you need to add to the distilled water. Use a measuring tube for this task. Seal with a cap. Give that mixture a shake and you’re sorted. 

Adding the alcohol – you might prefer to add the alcohol first and then the water to better mix the two.

You only need 1% of alcohol to make a sonic difference but 7% is the figure of choice here because you also need to melt the Glycol off the vinyl surface. 

Just 1% won’t be enough for the job. 7% will melt the Glycol but also perform cleaning in the groove. 

The alcohol cleaning is a bit like brushing that pottery I mentioned above in the Abrasion section. Alcohol will effectively clean away the friable and easily removable grime. 

Never apply alcohol directly to the vinyl surface, though. It’s too aggressive for that.

A close look at the Disco Antistat bath with fixed brushes

4: Fill the Disco Antistat’s bath with the water/alcohol mixture but stop just below the top of the fixed bath brushes. Just to be on the safe side, to avoid wetting the record labels. I know that the Disco Antistat’s clamps are designed to prevent that happening but, you never know and I’d rather be safe on this matter. By all means perform a dry run and vary the level for your record to make sure. OK, that’s the bath sorted. Now onto the vinyl itself. 

5: Prime another spring water bottle. Fill that with distilled water.

Surfactants need to be diluted

6: Take your surfactant and dilute it as directed using the included instructions. If you are using Tergikleen, I use 10 drops per litre. The drops are dispensed from the built-in dropper which offers micro-drops, smaller than the usual drops you might see from a pipette. So add 10 drops of Tergikleen per litre to the bottle of distilled water. Once applied, seal the bottle and shake for a while to mix thoroughly. 

The surfactant is now ready to apply to the vinyl. The bottle is too big and cumbersome to try to move surfactant from there directly to the vinyl surface so you’re going to have to decant some of it to make the task more manageable.

Decant both the surfactant and Glycol into these bottles

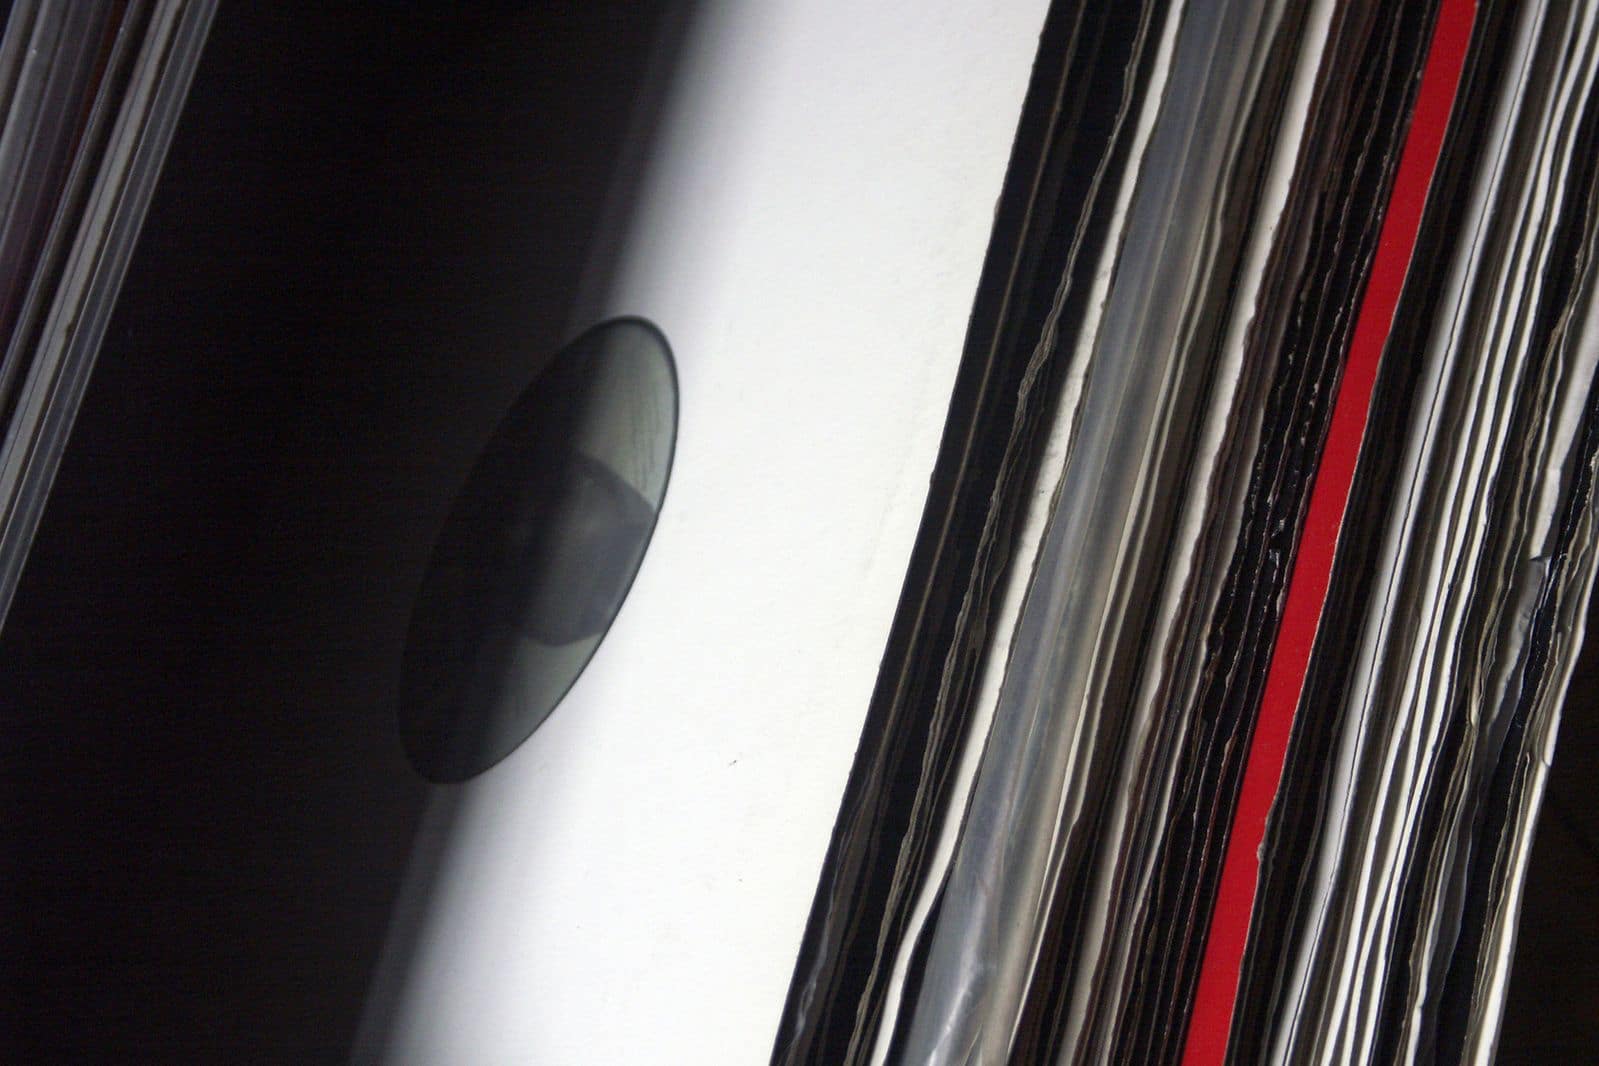
7: Fill one of the glass bottles (see image above) with Glycol. It’s easier to handle that way.

8: Before you decant the surfactant from the large, plastic spring water bottle into one of the small glass bottles take the vial from the Glycol bottle and fill it with Glycol. I say ‘fill it’ but you’ll find the vial will probably reach half way with Glycol (see mage below). Add that to the glass bottle. Repeat. You should have two vial’s worth of Glycol in your surfactant glass bottle. Fill the rest of the glass bottle with the diluted surfactant from you spring water bottle. Be careful not to spill the surfactant all over you floor. Do this over a sink and take your time. So you should now have two glasses bottles. One is filled only with Glycol. The second is now filled with surfactant and two vials of Glycol.

9: Seal the glass bottle filled with surfactant/Glycol and give it a good shake to mix thoroughly.

A ‘full’ vial tends to be around half full or perhaps slightly more, in actuality

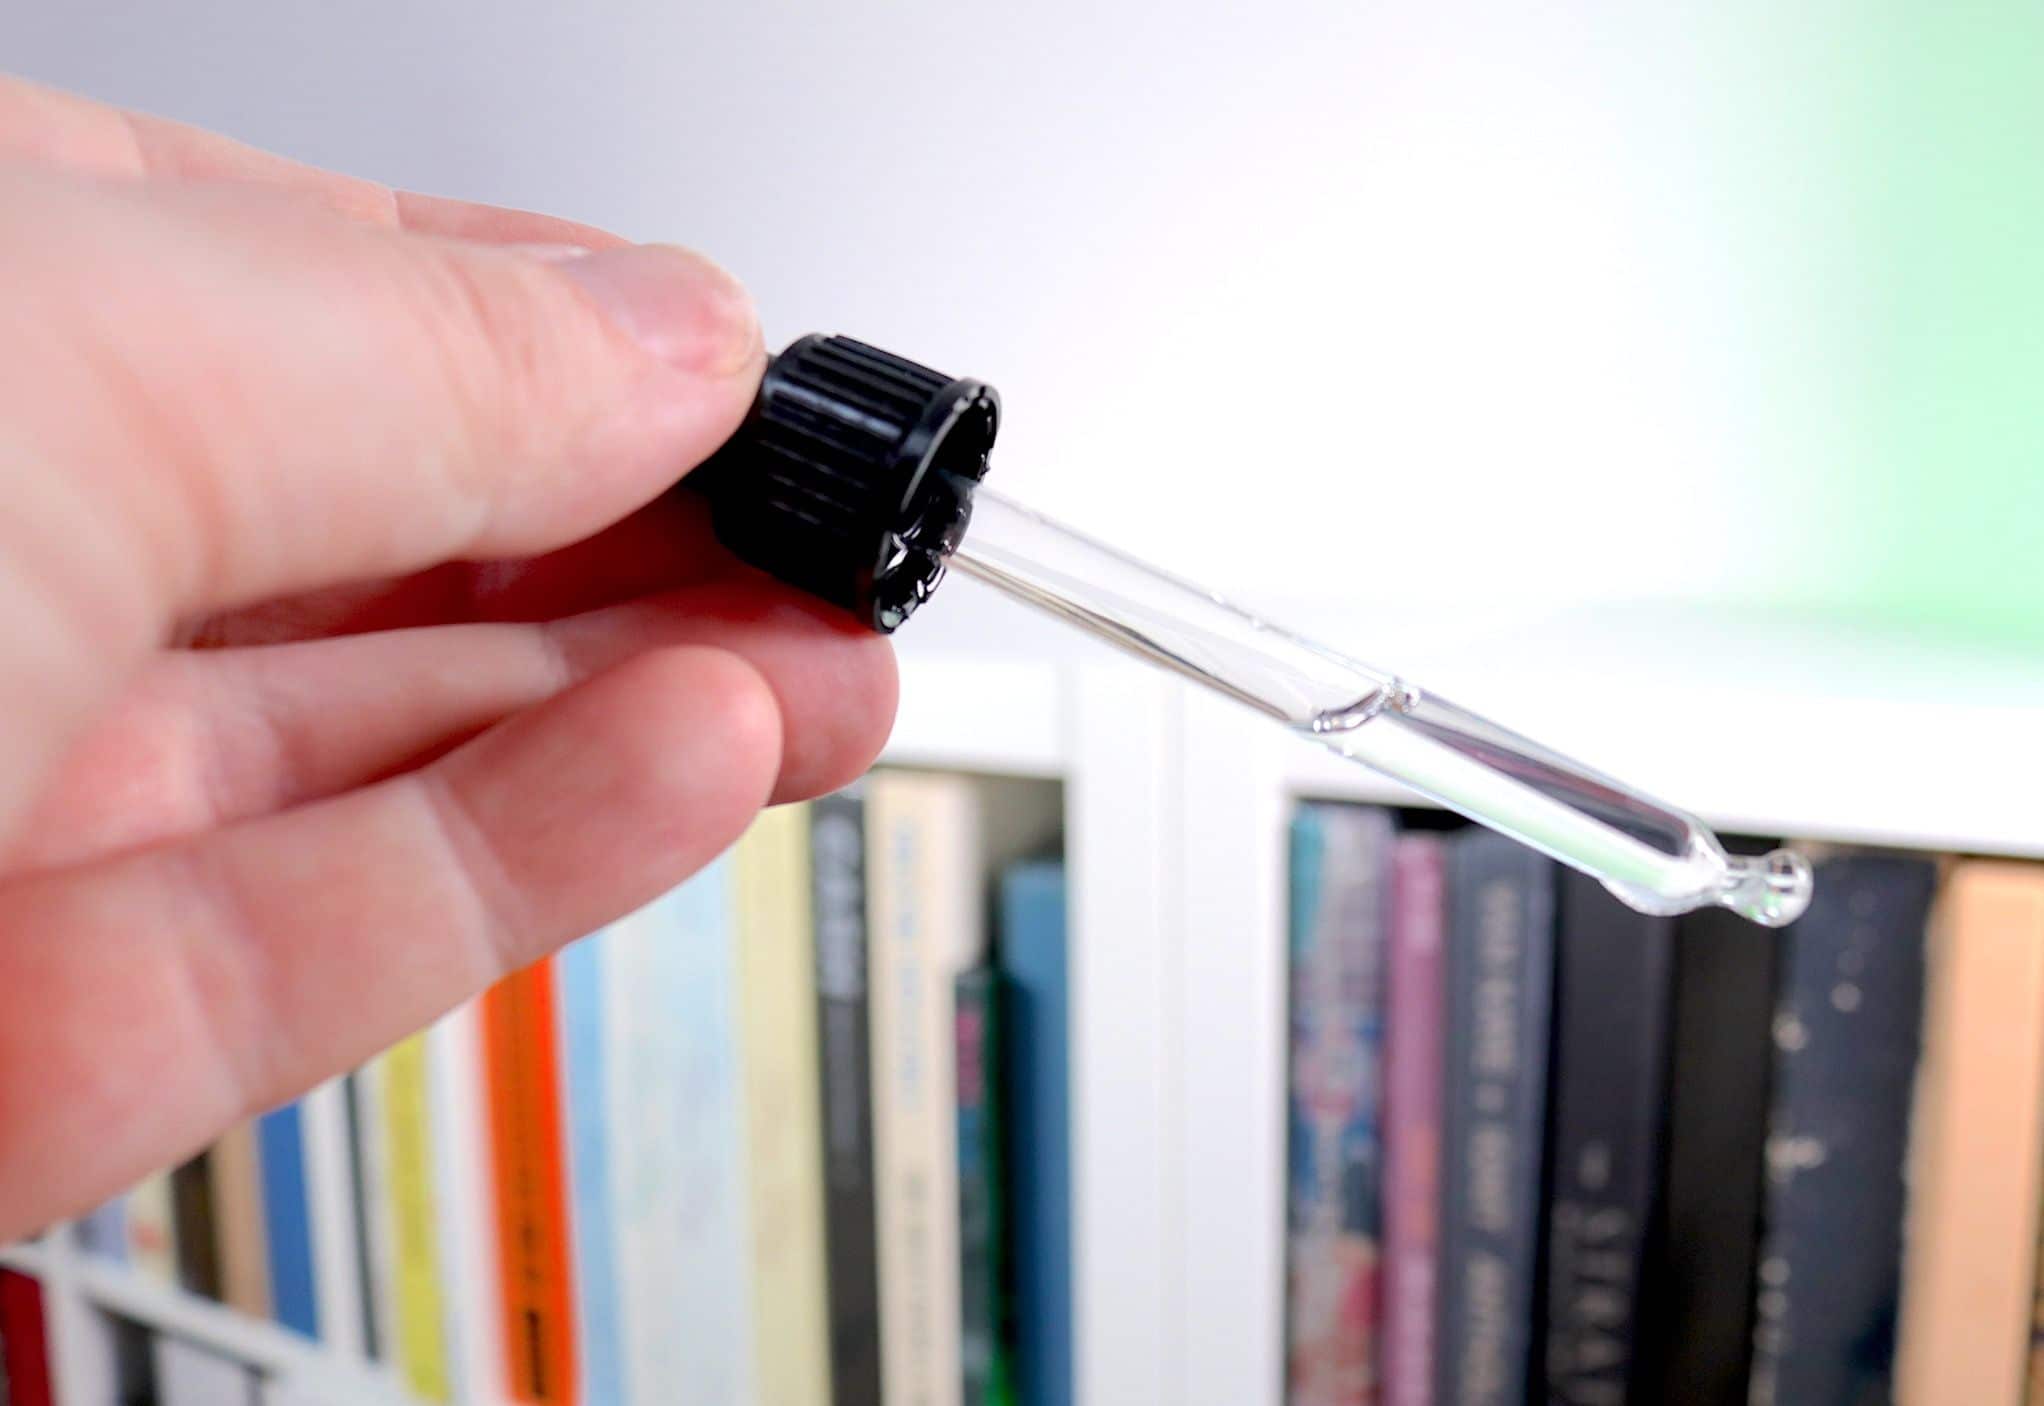
10: Now, take the glass bottle full of glycol/surfactant to your vinyl. Fill a vial with the mixture (again, it will be around half full (see image above).

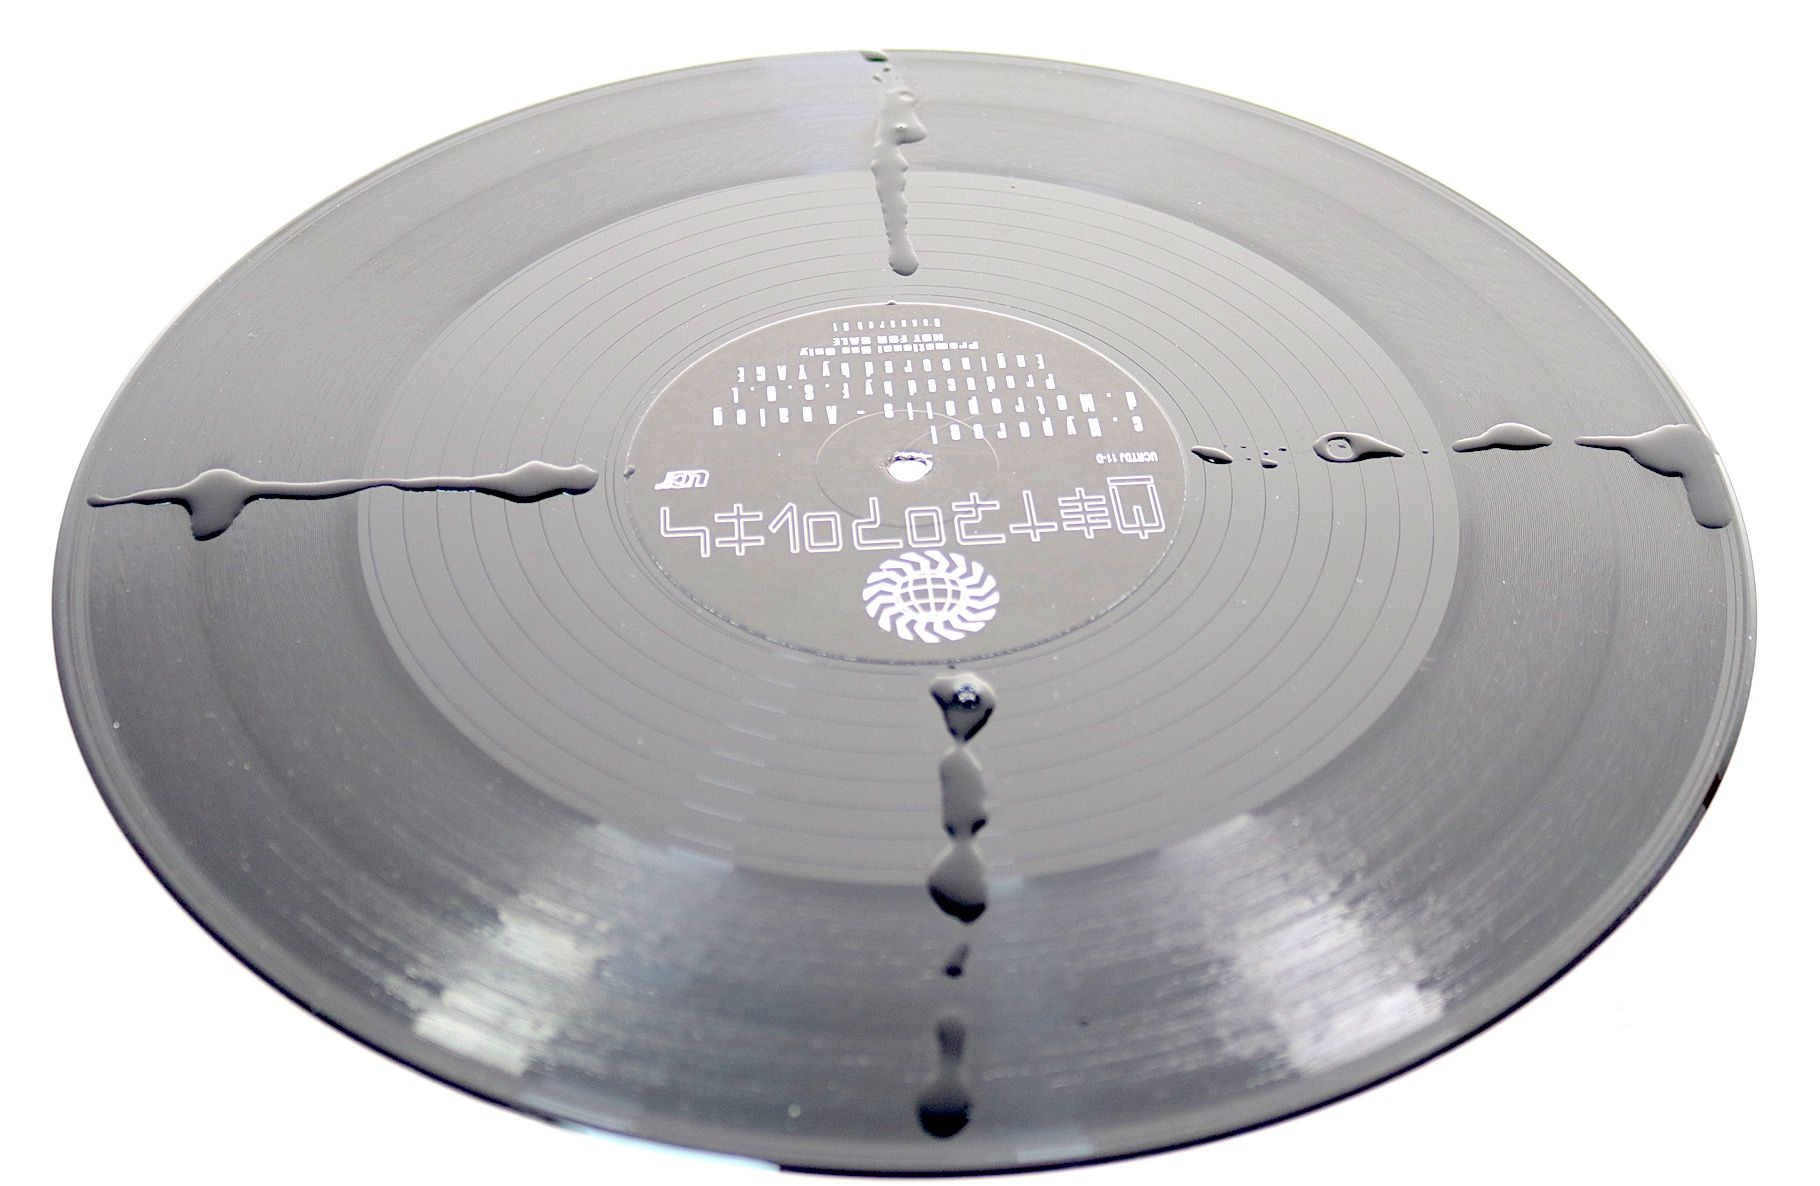
You need to apply this mixture to the vinyl surface but you want an even spread of the liquid across the record’s surface. Hence, ‘draw’ a stripe of liquid, using the pipette from the inner edge of the run-off outwards to the edge of the record itself. In a straight line. Draw four lines. One at 12 o’clock another at 3 o’clock, then one at 6 and the final at 9 o’clock. 

Surfactant stripes to aid an even distribution over the vinyl surface

11: Take your Kabuki brush. Move the brush around the vinyl surface to evenly spread the surfactant. You don’t have to be too OCD about this. Don’t worry if there are dry spots after you do this. We’ll get to that next.

After you Kabuki brush has done its thing

12: Holding the Kabuki brush move your fingers from the handle and down to the actual bristles themselves. The idea is to have around a centimetre of bristle sticking out from your fingers. Holding the majority of the bristles with your fingers, that’s the amount of visible bristle you should see. The remaining bristles will be quite stiff in nature now.

Stiffening the bristles prior to ‘pushing’ the surfactant into the grooves in a spiral motion

13: Using this stiff bristle, press the surfactant into the grooves in a spiral fashion working clockwise from the outer edge towards the centre and then anti-clockwise from the centre to the outer edge. That’s one side done.

The surfactant is worked into the grooves with the stiffened bristles of the Kabuki

14: Repeat the whole process on the flip side of the record. Your record has now been prepared for cleaning. 

15: Add the Disco Antistat clamps to the record as per the Disco’s own instructions and insert the clamped record into the Disco’s bath. Slowly rotate the record six times in a clockwise direction. Stop. Then rotate the record six times in a clockwise direction. Stop. 

Into the Disco Antistat

What is happening is this. The surfactant is allowing the liquid to get closer to the vinyl groove surface by breaking surface tension. Allowing for a deeper clean, if you will. 

The Glycol is ensuring that the surfactant sticks to all of the grooves during this time to maintain an even clean. 

The alcohol is cleaning the loose, friable material and more easily removable oils from the groove surface.

The abrasion is being applied by the built-in goat-hair brushes. The relatedly tough Disco brushes will help to break down the hardened oils and gunk I mentioned above. 

The combination of these products and actions will produce an effective clean, noticeably improving sound quality.

16: Steps 10-15 are seen as a single ‘cycle’. The extreme bit for some is this. While one cycle takes long enough to achieve and will enhance sound quality and you can stop there if you wish, during tests, I found that more cycles applied to the same record improved sound quality. That is, the sound from a record sounded better after two cycles when compared to one. And with three cycles when compared to two. And so on. 

I stopped – finally – at six cycles. This will take a long time. Over an hour for each record. I repeat, you don’t have to go there but I’m doomed because I’ve heard the differences so I can’t go back, I’m afraid. You decide how far you want to push it.

17: When the cleaning cycles are completed – however many that may be – then insert the record one final time but do not add any surfactant this time. Don’t add anything to the vinyl surface. Just add the record ‘as is’ and complete the same rotations clockwise and anti-clockwise. This is a rinse cycle to remove any lingering residue. 

If you are able to buy a second Disco Antistat then perform the rinse cycle in the second unit. Keep the second unit for rising only with a bath filled with the same proportion of distilled water and alcohol. In this way, the Rinse bath will last longer before it has to be changed.

Don’t forget to rinse, whether that be albums or singles

After a series of cleans, you may want to change the bath water for a fresh batch because the surfactant will slowly build up in it. I’ll leave that change over time up to you because it depends on how much surfactant you apply to the vinyl surface in the first place, the frequency of your cleaning and the amount of cycles you decide to run with.

18: Once the rinse has been completed, remove the record and the clamps and insert the record into the supplied drying rack for drying. A warm room will be more efficient. 

CONCLUSION

And that’s it for this Vinyl Cleaning Guide, folks. I must add though that the above is a one-off intensive clean. You won’t have to do this every time you want to clean the same record.  So don’t be concerned about that. 

See this Vinyl Cleaning Guide above as a sort of ticket into your record collection. A test that any piece of vinyl has to run through before it earns the right to sit on your storage shelves. 

Once a record has been through the above then you only need a maintenance clean whenever you feel it’s necessary. If it is, do one cycle only, when required.  

If you have any questions about the above or if you need me to elaborate then, by all means, give me a shout in the Comments and I’ll help all I can. 

I hope that this feature has helped in some way to improve your vinyl cleaning technique and, more importantly, the final sonic performance of your records. Next up? Cleaning with a vacuum-based record cleaning machine!

[Don’t forget to check out my Patreon Page at www.patreon.com/audiophileman, for exclusive postings and more!]

You Might Also Like

213 Comments

  • Reply
    Ian Barber
    18th December 2020 at 2:16 pm

    Hi Paul,

    Brilliant work, many thanks for this and it is much appreciated.
    I have already done about 50 discs out of my 223 with the Mk2 Knosti Disco Antistat. The only problems that I have found, so far,are that the record clamp can and does work loose ,especially when reversing direction to anti-clockwise when in the bath. I gather that this is a known problem with both the mk 1 and mk 2 versions, but there is an aftermarket version available which has a proper clamp together with a far better seal ( see http://highqual.co.uk/clamp-details/4580311057 )However the two versions that they do cost around £ 40( mk 1 )- £ 47( mk 2 ). But, I suppose, long term they will pay for themselves.
    Another problem is one of drying times, with minimal dust floating around in the air. I use my conservatory for the process, having been ‘moved’ from the kitchen by my long suffering Wife ! In this cooler weather, without the use of extra heating which stirs-up the dust, I have found that it takes around 3 hours, or more, to clean 8 lp’s ( one drying rack full). The filters in the mk 2 kit are ok, but do not fit the rectangular funnel too well, allowing fluid to escape around the edges. I will try some different filter material in the future, that I can cut out myself which covers both the base of the funnel, as well as the sides. That should do the trick. At present, I discard the liquid after 24 cleans. I use a solution of 1 % IPA/distilled water in the bath (The Knosti one !! ) and use a 1:200 solution of Ilford Ilfotol/distilled water using the droppers as a pre-wash, spread around by a Kabuki brush. I have, not yet, tried Tergitol etc, but the results seem to be ok, though I find that some of the treble on the lps does sound a bit ‘tizzi’ after cleaning on some lp’s so I may do a few more cleans of the affected ones and, maybe try the Tergitol at some point. Looking forward to parts two and three in due course. Cheers Ian

    • Reply
      Paul Rigby
      18th December 2020 at 5:55 pm

      Very kind of you to say and…intriguing, Ian! Never seen that Knosti mod before, I’ll make a point of reading it ASAP. Part 2 might be of some interest to you yes because I look at using a low-cost RCM as part of an accelerated drying process.

      • Reply
        Michael Treiber
        13th May 2021 at 1:16 pm

        Hi Paul,
        i really appreciate your way of cleanig records.
        For my 10inches i do it your way.

        As a owner of the audio desk (AD), i combine your manual way of cleaning with the AD for the 12 and 7 inches.
        Three cycles of the steps 10-15 and then the record goes to the AD, which is filled with 1% Isopropyl.

        After playing the record, the record goes straigt to the AD.

        Now i have, after cleaning about 50 records, an question (the question suddenly popped up in my head) to step 13 – the spiral working with the Kabuki.
        Is it a spiral just like the way of the needle….and reverse, or is it more straight from the in- to the outside of the record?

        And yes, i´ m looking forward to part 3.

        Have a nice day

        • Reply
          Paul Rigby
          14th May 2021 at 2:14 pm

          Hi Michael – re. the spiral: like a needle.

    • Reply
      Henk ter Maten
      19th January 2021 at 4:00 pm

      What am I enthousiastic, almost a perfect description of how to clean vinyl.
      I already did have the Disco-Antistat in my possession and it works quite good.
      Now I ordered the rest, but that was difficult, especially the Tergikleen you cannot get in The Netherlands.
      Though I look forward to receive all ingredients and cannot wait to go on work.
      However I do have some questions. Why don’t you mix all together: distilled water, alcohol, Tergikleen and Glycol.
      A lot of steps make one step ( one Disco Antistat mixture). It seems to me that this is a lot easier.

      Another question: How do you dry your records at the end of the session?
      With a microfiber towel or in the drying rack of the Disco Antistat?

      Or am I wrong, does Acohol, Glycol and Tergikleen cannot get along??

      • Reply
        Paul Rigby
        19th January 2021 at 4:13 pm

        Hi Henk – thanks for your kind words. If you combine the liquids in the bath, if will work…at a push. But only to an extent. You will lose most of the effectiveness. I have tested both and can confirm this. Also, the Glycol will be instantly attacked by the alcohol.

        Drying? For a Knosti only? In a warm room on the supplied rack, as per the product instructions. I would advise against using a towel, you may reintroduce dust or other elements which will only reduce the effectiveness of the clean.

  • Reply
    Saverio
    18th December 2020 at 2:34 pm

    Much anticipated feature and perfect timing!
    What else could we do during this “locked-down Holiday season” other than cleaning or records? LoL
    Now all the stars and planets finally align (your tube videos, your articles, comments here and there, etc.).
    Just one note, not to be picky but…just following your explanation I was wondering: in the last rinse, given there’s no surfactant/glycol applied before, shouldn’t alcohol be reduced to 1% instead of 7%?

    • Reply
      Paul Rigby
      18th December 2020 at 4:47 pm

      That’s a good point, actually. I was going to change my feature to suit but, thinking again, this rinse section is also intended to remove any residue so 7% would be recommended to do a thorough job.

      • Reply
        Miguel Gonzalez
        18th January 2021 at 9:27 pm

        Hi Paul,
        Hope this finds you well. Thank you so much much for this thorough and thoughtful guide! I have a process question: do you allow the records to dry on the rack before each surfactant mix application, or do you go straight through, applying the next round of surfactant mix right after the bath, an only dry them after the final cycle?

        Best,
        Miguel

        • Reply
          Paul Rigby
          19th January 2021 at 10:37 am

          Hi Miguel – a quick bath in distilled water every now and again will clean the brush.
          I advocate a full dry before you start the next cleaning cycle otherwise the distilled water remaining on the record surface will alter the liquid ratios you’ve already carefully curated. Also, there may be part of the disc where your pushing pure distilled water into the grooves instead of diluted surfactant.
          To cut waiting times, you might want to stagger a series of discs for cleaning. Say 5 at a time. So by the time you’ve cleaned the 5th disc, the 1st disc will be dry and ready for another cycle, for example.

  • Reply
    Dave Gabbard
    18th December 2020 at 3:37 pm

    Having watched all of the previous vids i could get my hands on for a few years, i knew pretty fast this one was different than the rest. No secretive formula or product pushing, just straight up science performed by someone who knows what he is doing. I can’t thank you enough for this series other than to subscribe to your Patreon, which i just did. (A small price to pay for the saved time n useless products you have stopped me from buying)

    After a frustrating year of watching people with varying degrees of skill attempt to sell me on the best or only way i should be cleaning my vinyl, this series of yours should be required watching; it has saved me hours of time, and possibly a bit of my sanity.

    Keep up the amazing work.

    • Reply
      Paul Rigby
      18th December 2020 at 4:45 pm

      Thats very kind of you Dave and it also give me the opportunity of thanking you for joining me on Patreon – thank you!

  • Reply
    Trygve
    19th December 2020 at 2:33 pm

    Thanks for the very informative article!
    You seem to use more than the recommended amount of Tergikleen? On mine it says 10-20 drops per gallon, you use 10 drops per litre. Does the increased amount lead to sonic improvements in your experience?
    Keep up the good work!

    • Reply
      Paul Rigby
      19th December 2020 at 3:56 pm

      Thanks Trygve – indeed yes, that concentration seems to work for me.

    • Reply
      Michael Metcalf
      23rd December 2020 at 2:18 pm

      Truly superb Paul,in the process of purchasing all the kit to use with my audio desk please hurry with part three .

  • Reply
    ETolpan
    19th December 2020 at 11:32 pm

    Thank you for this great Work.
    I’m looking forward to the following episodes 🙂

    • Reply
      Paul Rigby
      20th December 2020 at 10:57 am

      Very nice of you, many thanks.

  • Reply
    J
    7th January 2021 at 6:16 pm

    Hey Paul, I have Tergikleen, Iso Alcohol, Distilled Water, Mofi Record Brush, and one of these RCM’s. What would you recommend as the process for this vs your process with the Disco-Antistat? Do I not need Glycol since it’s not cleaning vertically? Thanks

    • Reply
      Paul Rigby
      8th January 2021 at 10:46 am

      Hi J – I’ll be looking at RCMs in Part 2 of my Guide next. So please hang on in there for that one.

      • Reply
        Weston
        5th May 2021 at 3:59 am

        Hi Paul— I am pretty OCD when it comes to audio; however, I am very new to vinyl. Not paying much attention, I recently made the mistake of buying some cheap,“lubricated” cleaning cloths at my local record store and was horrified to see the greasy mess they made of my records and my stylus. After doing some research on your website and YouTube I have ordered supplies to clean my stylus, but can you recommend any budget friendly ways to clean a record without an actual washing device like the Disco Antistat? I want to clean them well enough to get rid of this gunk for good, but I’ve just about maxed out my budget on a turntable, speakers, etc. I have yet to see much reasonable advice on the internet regarding vinyl other than your website, so I figured I’d ask. Thanks, Weston

        • Reply
          Paul Rigby
          5th May 2021 at 5:54 pm

          Hi Weston – apart from a carbon brush to remove loose dirt, the only manual method I would actually recommend is the Disco Antistat and the system I use or, at least, the Disco on its own. It’s precisely because there are so many bizarre products and suggestions and frankly dodgy products out there that I put all of this together in the first place. I’ve used most of them and dislike the same 🙂 Like you, I see my vinyl as precious so it’s worth saving up and investing in a cleaning system that will actually clean and take care of my discs, not put them in peril or make the situation worse. If you need to save then I’d advise grabbing a low-cost, non-invasive carbon brush for now to remove harmful grit and give the discs a proper clean later, when you can afford it.

  • Reply
    mike
    16th January 2021 at 12:42 am

    Hi Paul,
    So if you were doing just a basic wash with the DAS you wouldn’t need the Turgicleen? As here it is being used in conjunction with the Glycol. and extra steps An hour a record is far to much for me! I have seen some people say they do add a drop of wetting agent (which you said in a vid is the same thing) to the water/Iso mix also? Could you add it that way? And another thing is would you still always you were doing it this way? Maybe just with Distilled water. Cheers for any help mate. Hope you and yours are well.

    • Reply
      Paul Rigby
      18th January 2021 at 3:56 pm

      Hi Mike – you can leave the surfactant off, if you wish, of course. Although the cleaning effectiveness will lessen. Adding the latter to the bath helps, sure. Although again, the effectiveness is lessened. And the Glycol is only used when a disc is cleaned vertically. Also the cleaning time will be vastly reduced if you only use one cycle. I use half a dozen, which is where the hour comes from. But take what you want from this feature. Don’t feel tied to it. You’re welcome to adapt it for your own system.

  • Reply
    Ezra
    16th January 2021 at 9:28 pm

    Hi Paul, I nearly sunk 3 grand US (that I didn’t necessarily have) on a Degritter after reading your review. I caught my wits in time and will be trying your prescribed method above which is affordable to me! My question to you is about the glycol ratio in the surfactant mix. I have 4oz (118ML) dropper bottles and I’m not sure the larger pipette droppers included necessarily scale up. How critical have you found the glycol ratio? Any way to estimate what 2 full (or half-full as you say) droppers worth of glycol amount to in mLs so I can scale to my 188mL bottles? The simple answer is to tell me to pipe down and just go scare up some 50ml dropper bottles… Thanks for your great work and sharing here!

    • Reply
      Paul Rigby
      18th January 2021 at 3:59 pm

      Hi Ezra – hmmm, I would say between 1-2ml. You really want to stay in that zone, otherwise you’ll need more alcohol to melt it off and you don’t want to go above 7% really. And thanks for your kind comments.

  • Reply
    David
    18th January 2021 at 7:46 pm

    Paul, I can’t seem to find Part 2 of this series where you cover the vacuum process record cleaning machines. I’ve been considering a purchase of one of this style machine for a couple of weeks, but have yet to pull the trigger. I’d love to read your take and process before committing.

    Can you point me toward part 2? Thanks!

    • Reply
      Paul Rigby
      19th January 2021 at 10:22 am

      Hi David – That’s because it doesn’t exist yet 🙂 It’s on the drawing board for now.

      • Reply
        David
        20th January 2021 at 12:27 am

        Ah, my apologies. Very much looking forward to Part 2.

  • Reply
    Miguel Gonzalez
    19th January 2021 at 2:54 am

    PS: I was also wondering how you would recommend cleaning the kabuki brush after a cleaning cycle.
    Thanks again Paul!

  • Reply
    Oscar
    20th January 2021 at 12:22 pm

    Hey Paul,

    Thanks for another detailed guide. I have all of my bits on the way in the post, including 2x Disco Antistat machines for the extra rinse to remove all surfactants as you suggested. I just had a couple of questions:

    – I expected to use surfactant method on my most dirty records. However, if I just did a one step clean without surfactant would distilled water with 1% isopropyl be sufficient or would it be better to keep it at 7%?

    – I have recently moved to a new house and I am noticing quite an issue with static charge on my records. I’m wondering on the results for reducing static using the method you mention above. I’m wondering which part of the Disco Antistat aids in the reduction of the static. Is it the solution they send with the machine or the process of using the machine itself? I’m wondering if it’s the former, will there be sufficient static reduction using the alternative solutions you mention in the post? (I will be using Ilfotol surfactant). Please forgive my lack of knowledge here, I’m just wondering if I will need to make further efforts post cleaning to reduce static.

    Thanks in advance!

  • Reply
    Phil
    20th January 2021 at 4:58 pm

    Hi Paul and again thanx for this great tutorial.
    I do my best to follow it as closely as possible and have adapted it a bit with the products I have at hand.
    First I don’t have Glycol. I made the mix with 10 drops of Triton X100 in a liter of distilled water for the vinyl prep. I left the Glycol aside since I don’t have any for now. Can you please telle me if this is compulsory or can it all be done without ?
    I then wash the records in the disco antistat with a similar solution as yours. Distilled water, alcohol, and a few drops of Tetenal Mirasol 2000. I have mentioned this product on your YouTube channel on the video you mention all the surfactants available and your preferences on these.
    This allows to add some antistatic to the washing product, so I don’t rince the record after washing them.
    No with this method if I let the record dry on the disco’s stand, it seem some marks will be left from the pretreatment. Is it because of the missing Glycol ? Or did I do something wrong ?
    Just a light wipe with a clean and dry microfibre cloth get rid of all these small marks on the vinyl, or at least this is how I solved the problem.
    Thanx for your input 🙂

    • Reply
      Paul Rigby
      20th January 2021 at 5:15 pm

      Hi Phil – the Glycol improves performance (I tested it with and without) but you can clean without, sure. Not sure about the source of the marks but they could be residue because you haven’t rinsed – just a guess, though. I wouldn’t touch the surface with a cloth, either. Your choice of course but I’d advise not because you will introduce any micro dust on the cloth back into the grooves.

      • Reply
        Phil
        20th January 2021 at 5:54 pm

        Paul doesn’t the distilled water + alcohol (even with a few drops of Tetenal) work as a cleaning and ringing solution at the same time ? I’m afraid that if I rince again at the end it will remove the antistatic properties of the Tetenal…

        • Reply
          Paul Rigby
          21st January 2021 at 9:51 am

          Hi Phil – agitating a vinyl record, handling it, shuffling bits and pieces around and about while cleaning…will increase static. I wouldn’t recommend focusing on a liquid-based anti-static solution. There are more effective methods available to you, once the disc is on the platter. Removing residue is more important for the health of your disc (it’s not a good idea to allow surfactant to remain in contact with vinyl for a long period of time) and more effective in terms of revelling sound quality.

  • Reply
    Henk ter Maten
    24th January 2021 at 3:05 pm

    Hi Paul,
    Some more questions from me:
    . When you are ready with cleaning the record in the /Disco Antistat, step 3, do you dry at first that record before going on the next step?
    . When you finished step 11: how do you you exactly repeat the proces of pressing the surfactant on the flip side of the record? Do you lay down the record on a clean towel or what else? You did advice me before not to use microfiber towels.
    . You are talking about a single cycle, steps 8-13: do you dry after each cycle before you go to the next?
    After all cycles, it seems to me that rinsing the stuff is very important. I have seen on the internet that someone uses a garden sprayer, manual pumping for pressure and fill it with distilled water. What do you think of this. You don’t need the a second Disco Antistat then.

    One more thing:
    What a luxury to tweak your analog records to such a high level of sound improvement, only by a cleaning process.
    I don’t see this is possible in the digital world at such relatively low cost!

    • Reply
      Paul Rigby
      26th January 2021 at 2:44 pm

      Hi Henk –
      1: Thanks for this Henk because I’ve just realised that my step numbering is out! I had two No.3s for a start. Good grief. So please check back with the feature to get back in step, as it where 🙂 I’m finished cleaning the record after step No.18. Or is that not what you meant? Please explain and I’ll try again.
      2: Good question – this is a step I wrongly left out. It’s something I should have tried to photograph but it was tough to position the camera, etc. I must try again on this. There’s two options. Firstly, I hold the LP in one hand (this is ok if you have large-ish hands) because a thumb can be positioned along the LP edge and fingers can be touching the rear label. So one hand is supporting the back of the LP, in effect. The other hand can be applying the surfactant with the brush. Then flip it over to apply surfactant to the other side. To prevent the LP falling during the surfactant application, lean an edge of the LP into your stomach – just a bit – for leverage. Alternatively, look out for a physical support onto which you can place your record. One that does not touch the vinyl surface. A squat yet wide-ish jar perhaps? Problem here is the outer edge of the vinyl will bend when you push the surfactant brush against it. Which is why I favour the two-handed approach.
      3: Absolutely! 🙂

  • Reply
    Henk ter Maten
    26th January 2021 at 3:40 pm

    Hi Paul,

    Thanks, I see that you are not able to find back your steps I mentioned. You forgot also to answer one question. So I try it again and number my questions:

    1: Before you bring your surfactant with the brush to the record’s surface: did you dry at first
    the record which came from the Disco Antistat bath?
    2: Flipping over the record to add some surfactant seems to me a magician’s trick. We must find
    a better solution.
    3: You are talking about a single cycle, steps 8-13, if you want more cycles to clean, do you dry
    the records after each cycle before you go to the next cycle?
    4: What do you think about rinsing wit a manual pump about which I have already written?

    • Reply
      Paul Rigby
      26th January 2021 at 4:31 pm

      Hi Henk:
      1: The surfactant is applied *before* you put it into the bath. Not after. The record is already dry.
      2: Not at all. It’s actually very easy. I’ll see if I can update the Guide with a few extra images.
      3: Yes, each cycle ends with a drying period. Otherwise you’re further diluting the next batch of surfactant with the water that is already on the vinyl surface.
      4: Please explain what you mean by a manual pump – remind me.

      • Reply
        Henk ter Maten
        26th January 2021 at 5:01 pm

        1: Now I understand, you didn’t put first the record for cleaning with the distilled water/propanol mixture, but AFTER, you have made the Disco Antistat’s bath ready and AFTER you applied the surfactant to the vinyl. (I am a Dutchman). so am I correct?
        2: OK.Looking forward.
        3: Ok. That’s clear.
        3: The red garden sprayer/pump: https://www.youtube.com/watch?v=j1ObGW6kGws&ab_channel=DaveStephens

        • Reply
          Paul Rigby
          27th January 2021 at 1:16 pm

          Hi Henk –

          1: I applied the surfactant to the vinyl and then put the record into the Disco Antistat for cleaning.
          4: Please see my reply to Phil below.

  • Reply
    Phil
    26th January 2021 at 4:39 pm

    Paul I believe our friend us referring to some gardening pressure container. You pump air into it and then spray the records Karsher style.

    • Reply
      Paul Rigby
      26th January 2021 at 4:43 pm

      Hi Phil – ahhh, gotcha. I prefer the Disco (or, even better, a second Disco) because you’re getting that essential abrasion effect which helps to thoroughly remove any residue. It’s not a great idea to have surfactant remaining on a vinyl surface for long periods of time. This option makes sure it’s all gone.

  • Reply
    Henk
    27th January 2021 at 7:23 pm

    Hi Paul,
    1: Did not see YOUR reaction what you think about that sprayer.
    Oh yah, just a comment towards Phil, I think by Karsscher he meant Kärcher. I want to see your reaction, Paul.
    2: Am I correct now with my point 1 yesterday?
    3: I have find out how to manage much better to flip over the record during adding the surfactant mixture. It’s very easy to do and I recommend it to everyone. No more hocus pocus with the flipping in the air.
    I even use the Knosti clamp and you can continue your work in the same comfortable way as usual. I even think the active ingredient can work better than before. And it’s up to you to more easily determine how long you leave this substance in the grooves.

  • Reply
    Henrik Borberg Jensen
    31st January 2021 at 2:02 pm

    Hi Paul
    Thank you for a very thorough guide. I am not sure if you have answered this. before After you have purchased your ultrasound cleaner do you then ever user the manual method? And what would be the best way to combine them.
    I am asking because i am ( hopefully) receiving an ultra sound cleaner in July https://www.youtube.com/watch?v=XqPrPigrHko.

    • Reply
      Paul Rigby
      2nd February 2021 at 11:53 am

      Many thanks. Using a quality ultrasonic cleaner like the Degritter, for example, means that you don’t need to combine that with the manual cleaner. It’s a good idea to combine the manual with a RCM, though.

      • Reply
        Henrik Borberg Jensen
        3rd February 2021 at 9:16 pm

        The degritter is a little to pricy for me. So i took the chance and backed a kickstarter project. Its a 40 kHz ultrasound cleaner with a dryer built in. 390$ including shipping but excluding tax. It is almost as convenient to use as the Degritter. Exciting to see if it also is an effective cleaner.

  • Reply
    Henk ter Maten
    3rd February 2021 at 12:50 pm

    Hi Paul,
    Some of my most beloved records: like a Mozart Requiem record and a Dire Straits record sounded after 6 cycles full of noise. Despite the choirs and singers, guitars sounded much better overall, I couldn’t stand the sound because of all that terrible splashing (is this good English?)sound, my wife also noticed this. These records seemed very damaged after those treatments you recommended.

    After researching I found out that most of the surfactants on the market leave a residue like salt crystals. These are the cause of the splashing sound.

    Surely that is not the intention Paul. Please come up with a working solution for this.

    • Reply
      Paul Rigby
      3rd February 2021 at 2:01 pm

      Hi Henk – its difficult for me to diagnose your issues at this distance and from a text message but there is no residue if you properly follow the cleaning procedure. Salt or otherwise. In fact ‘salts’ are not part of this cleaning procedure.
      And I don’t use ‘most surfactants’.
      It is entirely possible that the cleaning process is slowly removing caked on grime for the first time in years and you’re hearing that. So you may need further cleaning to remove it. Again though, I’ve no idea at this distance, I’m speculating.
      I have been researching vinyl cleaning for many years and my current system is the result of long-term and in depth research. I never came across the issues you’re experiencing. It’s possible other factors are involved here.
      Ultimately, after further cleaning, if you still find issues then maybe you need a more efficient cleaning system than a manual operation. My day-to-day system is ultrasonic. It’s far more expensive but it’s also more effective.

      • Reply
        Henk ter Maten
        8th February 2021 at 4:45 pm

        Hi Paul,
        You wrote: “My day-to-day system is ultrasonic. It’s far more expensive but it’s also more effective”.
        Which ultrasonic system do you use, the Kirmuss or another.
        Did you hear about the new kid on the block, the ultrasonic HumminGuru it seems very good plus it’s affordable.

        What do you mean with elbow grease? There is no Dutch translation for it.

  • Reply
    Phil
    3rd February 2021 at 3:07 pm

    Henk, you should take your vinyl to a pro. there is probably someone in your area with za high end cleaning machine (most audio shops have these) and get this record a good clean this way.
    Then you’ll know if the cracks you hear are hard embedded into your record or if the cleaning process might be in cause.
    For my part I don’t have any issue wit this manual cleaning process even though I don’t use that exact method, but pretty close.

  • Reply
    H. ter Maten
    3rd February 2021 at 3:36 pm

    Hi Paul, thanks.
    Can you imagine that after 6 cycles and with all the ingredients, as you described, I dare not continue what I was doing. I cleaned the The Mozart record as many as 20 cycles and it’s still noiser than before.
    I own an all in one solution that includes surfactant and it gives very good results PLUS a quiet background.
    If you want I can forward the data.
    But I want more.
    I have spoken with the inventor, a chemist, of this Vinyl Cleaner.
    He told me that you can’t do without surfactant if you want to get everything out of it. But that some of them also have the nasty property of adding nasty things, causing that splatter.

    Oh yes did you read that I have found a solution for the flipping of the record during the addition of surfactant?
    You can read about this also in my email to you.

  • Reply
    Ezra
    3rd February 2021 at 7:17 pm

    Hi Paul, thank you for your earlier reply in helping me get my glycol ratio right. I’m having revelatory results following your exact method with 2 disco-antistat stations.

    I suspect some are having cleaning issues based on the quality of the distilled water they are using. I can only imagine the havoc that leaching chemicals from the plastic containers that distilled water is often sold in is bringing to your readers’ vinyl collections.

    This is why I implore you to do some reviews on some of the commercially available water distilling machines on the market, from the budget bench-top machines up through those costing several thousand US dollars and occupying the better half of a standard garage bay. The only way you can truly gain control over the results of high end record cleaning is by having perfectly brewed, user-distilled water with contaminants measuring in the low parts-per-trillion.

    I eagerly wait with tongue firmly planted in cheek for your upcoming review of this essential production component for our record cleaning frenzy.

  • Reply
    Henk ter Maten
    5th February 2021 at 9:00 am

    Hi Paul,
    When firmly inserting with the Kabuki brush the surfactant I see a greasy substance emerge, I can’t get that off. This also happens with new records.
    Therefore my question, is there too much Glycol in the combo combination ratio OR am I using the wrong Glycol?
    I am using Monopropylene Glycol:
    http://www.lubrisolve.co.uk.

    Despite rinsing for a long time afterwards I feel that the result is still not good.

    • Reply
      Paul Rigby
      8th February 2021 at 1:07 pm

      You may either be adding too much Glycol or not enough alcohol. That is, if you are seeing the residue after cleaning. The prescribed ratios in the Guide have worked for me on numerous occasions without any residue.

  • Reply
    Kevin Robertson
    6th February 2021 at 1:47 pm

    Hi Paul, a great article, thank you.

    I know Part2 and 3 are still yet to be published, but could I ask a question about this process in conjunction with my Audio Desk RCM.

    Would you still use the Surfactant/Glycol mix before putting in the machine., and is the Audio Desk cleaning soloution appropriate to remove the glycol (as your alcohol mix does). I know it’s not recommended to use a different cleaning soloution in the Audio Desk.

    Many thanks
    Kevin

    • Reply
      Paul Rigby
      8th February 2021 at 1:21 pm

      No worries, Kevin and yes – I’d still use the surfactant/Glycol/brush method before putting in your Audio Desk. The AD solution is good. Not great. But good. If Tergitol is first division, the AD solution is third division. But it does help, yes. And don’t forget, AD want you to spend money on their products. It’s an income stream for them. I’ve used plenty of other products – including alcohol – for, well what, a couple of years, without any issues. Your choice though and your responsibility (he says, covering his backside 🙂 )

      • Reply
        Kevin Robertson
        8th February 2021 at 1:41 pm

        Perfect, thanks Paul.

        I’ll use up what I have left of the AD cleaner and thereafter I’ll go with your 1% alcohol mix.

        Thanks Kevin

  • Reply
    Oscar
    7th February 2021 at 4:46 pm

    Hi Paul,

    Have been cleaning a few records now I’ve got myself up and running. I’m cleaning most records with a surfactant brushing beforehand as per your guide. I’m generally finding that i’m getting better results on newer less crackly records in terms of improving the sound, as opposed to ‘cleaning up’ and old dusty record. Do you find similar in that this method is better at bringing out the best in a cleaner record rather than restoring an old really filthy, crackly one? I’m wondering if taking it to the full six steps on a crackly record would reduce this or if this method has limits in this area? (I don’t currently have access to an ultrasonic method of cleaning for comparison)

    Also I’m finding that after air drying i’m getting marks where the slower evaporating water left, is this something you find too?

    • Reply
      Paul Rigby
      8th February 2021 at 1:29 pm

      Both, Oscar to be honest. It would depend on the condition of your records, of course and the life they’ve lead. Some will need repeated cleans to get the baked off stuff out of the grooves. It’s like using elbow grease and a scourer on a kitchen surface: a few seconds rub might begin to remove the grime but you may need a full minute to remove it completely. It’s a rough metaphor but you get my meaning, I’m sure.
      I also find that, after 6 complete cycles and a full rinse, if I still hear crackles and pops then I tend to assign that to groove damage.
      I don’t see any marks, no. Again though, that might just be evidence of the grime being exhumed from the grooves. It depends what’s in there. Could be anything. Hey, I’d seen some people on YouTube ‘clean’ their vinyl with WD-40, which is basically natural gas condensates, petroleum distillates and the distillation of coal tar and peat plus kerosene and other oils. Imagine doing that, leaving it in there for 10 years so it goes hard and then trying to remove that stuff with a single cleaning cycle.
      I’m not suggesting your LPs are covered in that but I am saying that second-hand LPs can be subject to bizarre cleaning methods before they arrive into your hands.
      I would take each record on its own merits, especially if you have any second hand LPs.

      • Reply
        Oscar
        8th February 2021 at 5:48 pm

        Hey Paul,

        Thanks for your reply. I’ll go down the elbow grease method for some of the more stubborn records and repeat as you suggest. I see what you mean about how caked different kind of nasty stuff can become, I am generally finding the issues to be on secondhand records yes so could be they’ve been through some interesting substance mixes before they got to me. I’ll keep on with the cycles and dream of a day I can afford a more professional solution!

        With regards to the marks it is mainly noticeable on the run off, where the liquid has dried rather than evaporated (if that makes scientific sense). I just thought I’d mention it as I wondered if what I could see on the run off was actually all over the record but hidden in the grooves. That said the liquid does seem to be more conducive to drying off the grooves rather than the run off. Was wondering if anyone else has found this?

        • Reply
          Paul Rigby
          9th February 2021 at 11:54 am

          What you might be seeing is the alcohol holding grime in suspension on top of the record’s surface. The grime having been lifted from the groove but now having nowhere else to go. The latter then evaporates and then deposits the suspended ‘stuff’ onto the surface afterwards. The best solution for that particular issue would have been a vacuum-based cleaning machine which would have sucked the material away from the surface before the alcohol evaporated. Just my guess.

  • Reply
    Kevin Robertson
    8th February 2021 at 1:52 pm

    Paul, apologies but I just want to clarify I’m not using the AD as the Surfactant, I’m using the Triton X100 and then combining with the glycol.

    If I continue this pre clean before using the Audio Desk, is the AD soloution in the RCM suitable to remove the glycol? Moving forwards would you recommended your alcohol soloution in the Audio Desk rather than their fluid (subject of course to my own risk :-).

    • Reply
      Paul Rigby
      9th February 2021 at 6:45 pm

      You’ll only be able to remove the Glycol if you use alcohol in the bath. If that’s an issue, don’t use Glycol. I’ve done the A-B tests and alcohol in the bath, Glycol, etc is the better option. As you say though, at your own risk and all that 🙂

  • Reply
    Kevin Robertson
    9th February 2021 at 10:09 pm

    Thank you.

  • Reply
    Henk ter Maten
    18th February 2021 at 2:02 pm

    Hi Paul,
    This is what you say: “ It doesn’t clean the record itself but allows your vinyl cleaning machinery and liquid to do a better job, because of preventing surface tension. It assists them”.

    You make it appear that Tergikleen is just a surfactant to make the action of water and alcohol work better.

    But Tergikleen itself indicates in their instructions how they use this agent exclusively to clean a vinyl record without distilled water and alcohol.

    This application can be found everywhere on the web.

    So I am still left with the following question:
    What is the truth, the Tergikleen solution or your solution?

    I hope you see my point.

    • Reply
      Paul Rigby
      19th February 2021 at 11:19 am

      You ultimately need to decide, Henk. I’ve already stated my case based on my own tests. I’ve done my bit. Now it’s your turn. If my system works for you, that’s all that matters. Then enjoy your music. If it doesn’t, then find another system.

    • Reply
      Paul Rigby
      19th February 2021 at 5:16 pm

      To address your point directly, Tergikleen should not be used ‘neat’ on vinyl, in my opinion or the opinion of the suppliers for that matter, if that’s what you’re implying. You need to dilute it with distilled water.
      And I don’t ally alcohol with Tergikleen. They are not dependant upon one another. Alcohol is part of the larger cleaning process. It doesn’t have to work with Tergikleen. I have found alcohol to improve the overall cleaning process.
      And sure, you can use any substance you want to clean records. Tergikleen on its own, washing up liquid, WD40, crude oil and sulphuric acid – whatever you fancy. I wouldn’t personally recommend it, though.
      As for “truth”? What I’m giving you is my truth. The results of my own research. As I said in my earlier reply, it’s up to you if you want to follow the system. You really don’t have to, Henk. You can use my system as a launching pad for your own system if you so wish or you can ignore it altogether. Ultimately, it’s all about choice. All I’m offering you is the result of my own extensive, multi-year research.

      • Reply
        Jack Pot
        21st February 2021 at 7:43 am

        Dear All,

        Thanks to Paul’s investigations, my Audiodesk RCM now delivers stellar sonic performance. I follow almost all his suggestions, incl. the use of diluted Tergikleen applied directly to the vinyl surface. I do not use glycol. There are many much cheaper ultrasonic RCMs on the market than the Audiodesk which probably yield similar results but might not offer the ultimate convenience. When properly used, as per Paul’s recommendations, ultrasonic RCMs DO DELIVER. They are a game-changer.

        It is therefore with much bitterness that I want to share with the vinyl community my experience with Ortofon, the Danish world-leader in cartridge manufacture. I just sent Ortofon the attached letter.

        The Demise of a God
        Neither Wagner nor Shakespeare. But still Danish.

        Two years ago, my official Ortofon dealer convinced me to buy an Ortofon MC Century cartridge. There was no chance to audition the cartridge, but my dealer assured me it would be a major upgrade from my Ortofon MC Anna cartridge. I have been an Ortofon fan all my life, slowly moving up the food chain of Ortofon cartridges. The investment and risk were considerable, but the MC Century would be the culmination of my lifelong loyalty to the brand. Empathy played a considerable role in the decision.

        The upgrade was disappointing. The Century improved on the Anna in the lower registers but at the cost of an incisiveness reminiscent of digital playback. Detail at the cost of musicality. Over the course of the next 2 years, my dealer reset the cartridge/ arm combination a number of times, because I kept complaining that it did not deliver on its promise. To no avail.

        Finally, after more than 300 hrs play-back (closer to 500 hrs by my estimation), the Century revealed its true character. At long last, the Century delivered on its promise: thunderous but always musically accurate bass, life-like mids, soaring highs and an expansive and wholly coherent sound stage.

        A few months later, early January 2021, and quite suddenly, it died. The cartridge would no longer track. My dealer rushed it to Ortofon. They had long exchanges. I highlight the most notorious ones (my highlights).

        Feb 12th, 2021,
        The cartridge has a lot of dust that has almost cemented to the cartridge and you can also see that the cartridge has a bit of rust on the bottom.

        Best regards / Med venlig hilsen
        Anders Bentley
        Sales Department

        Feb 17th, 2021,

        The diagnostics made by our operator sounds like our recommendations for stylus and record care have not been observed, and that is how it had happened. The physical condition of the cartridge doesn’t align with the story customer has told, whilst we only rely on facts.
        To avoid it would happen again, I’d recommend refer to our HiFi FAQ, p.1 Stylus and record care here https://www.ortofon.com/support/support-hifi/faq-installation/, very shortly:
        1. Remove dust carefully from record surfaces by using Ortofon antistatic Record brush before every use.
        2. Use Ortofon Stylus fiber brush a few times along the cantilever in the direction of the stylus tip, whenever you play a new record or change sides.
        Ortofon do not recommend the use of solvents of any kind for cleaning of either record surface or stylus
        Best regards/Med venlig hilsen
        Katarina H. Nielsen
        Technical support Web Marketing

        Unbelievably, these are the very words of Ortofon.

        It is obvious from Bentley’s remarks that there was a serious quality control issue at Ortofon when my cartridge (nr 16) was assembled.

        Rust? Rust!
        Cemented dust? Cemented!

        I live uphill in a cork dry climate (Greece). I religiously clean all my records in a Glass Audiodesk RCM before their first spin, always use a microfiber brush to remove dust from any record before playing, and apply a Furutech DeStat-3 before lowering the diamond into the groove. Besides, during almost 50 years of playing vinyl almost exclusively with Ortofon cartridges, I NEVER had ANY issue, let alone with either rust of cement.

        Obviously, the rusted(!) part was rusted “ab initio”. And probably contaminated during manufacture with some cutting or hydraulic oil. Which in turn contaminated the cantilever and attracted/ attached the dust, which turned to “cement”. Or some variation of the above. Ortofon itself identified and recognized the problem! It sent a microscope picture illustrating the issue. But then Ortofon went Hamlet-crazy.

        According to Ortofon, the condition of the cartridge does not align with the “story” (?!) customer has told. Obviously, the customer and the Ortofon-dealer connived to deliberately rust and cement the cartridge. My official Ortofon-dealer and myself are liars.

        These are the “facts” and here is the “proof”: the customer uses a Glass Audiodesk RCM (which uses water as a solvent, but then thoroughly dries the record). By the way, the use of any “solvent”-based record cleaner invalidates the warranty! And this, unashamedly, by the world’s leading manufacturer of cartridges!

        Ortofon dismisses the self-evident explanation – its own glaring shortcoming – to go on a rant against its most loyal customers. Ortofon devises a crime involving customer and dealer. It throws credibility out of the window.

        A crime needs:
        1. a victim: the cartridge
        2. a motive: why would 2 Ortofon loyalists make up a story? One is its official dealer for 30 years, the other a loyal customer for 50 years, both with an impeccable track-record
        3. a weapon: how did the suspects manage to “rust” a cartridge? And in such short time! To cement dust to the cantilever? If the use of an ultrasonic vinyl-cleaner or other “solvent” vinyl cleaner rusts cartridges or cements dust, the WHOLE vinyl-community, incl manufacturers of all feather, should put Ortofon in its place: stop the b*s*!
        4. a causality: absent motive and weapon, there is no causality.

        If we apply the above fact-based reasoning to Ortofon, only one conclusion imposes itself: guilty!

        The God has fallen off his pedestal.

        What would I like to achieve with this letter?
        1. an apology: Ortofon has no idea how hurtful its baseless allegations are; it seems to have lost track of its mission, which is to provide musical enjoyment to its customers and revenue to its dealers. Instead, it is content to insult them.
        2. a redress: Ortofon repairs or replaces the MC Century at its own cost and provides a 5-year warranty, independently of the customer’s use of a vinyl-cleaner.
        3. a warning: it is impossible for a customer to check in-depth a piece of brand new HiFi when he buys it; if defects are present, they might appear with time; a customer must then rely on the reputation of the vendor for a reasonable outcome; in fact, in such cases, HiFi enthusiasts rely solely on the manufacturer’s reputation. Ortofon failed the test ignominiously. I can only hope that the vinyl-community, led by its most trustworthy opinion-makers, puts the company in its place. Otherwise, any Ortofon customer will fall prey to the company’s predatory practices. Any problem with an Ortofon Blue? Your fault: only use blue vinyl. Ortofon Ti? You “rusted” it. Ortofon Wood? You “rotted” it.

        The rot is elsewhere. In Denmark.

  • Reply
    Ezra
    28th February 2021 at 4:13 pm

    Hi Paul – here’s an update on my cleaning process based on your guide which may be of interest to your readers. I use the 2nd Generation Disco-Antistat (white tub with the record clamp with the handle on the spindle) and I have a second tub/brush (w/o other kit accessories) for clean rinse tub. I’ve been following your exact process above with WONDERFUL results on records that I’ve purchased new and used from roughly 1977 through the day before yesterday.

    Here are two things that I’ve added that make my process easier:

    1. I hacksawed the turning handle (which I found useless and flimsy for actually spinning the lp – easier to spin with the edge of the record) on the record clamp to shorten it so that its within the circumference of the record clamp. By shortening the length of that handle, the record clamp fits PERFECTLY in the opening of a standard US plastic pint or quart container of take-away Chinese soup with the lip of the container safely resting in the dead-wax. This allows me to rest the lp/clamp on the soup container on my workbench to apply the tergikleen/glycol solution then flip and repeat for side two. The now stubby arm, when the record clamp/lp is placed in my disco-antistat, serves as a reference (like a clock hand) for me to easily count my rotations. (Version 1 disco-antistat clamps won’t have this handy feature but the clamp should fit as neatly inside the Chinese soup container for applying solution.)

    2. I added an inexpensive ($149US) vacuum-based KAB EV-1 RCM to my process. Attached to my home vacuum, it quickly suctions off rinse solution from my LPs so that I can get back right away to doing 2nd,3rd,4th,etc, repeats of the process without having to wait around for the air to dry my vinyl. Not a necessary piece of kit, but for doing volume record cleaning with multiple passes of your process in less time – this has been a game changer for me.

    While my wife was initially suspect of what she thought was my meth-lab in the basement, she too now hears the differences in fidelity and our new late-stage pandemic post-dinner routine includes many wonderful hours in front of the hi-fi! Life is good with clean records!!

  • Reply
    Henk
    1st March 2021 at 8:31 pm

    Hi Ezra,”By shortening the length of that handle, the record clamp fits PERFECTLY in the opening of a standard US plastic pint or quart container of take-away Chinese soup with the lip of the container safely resting in the dead-wax. This allows me to rest the lp/clamp on the soup container on my workbench to apply the tergikleen/glycol solution then flip and repeat for side two. The now stubby arm, when the record clamp/lp is placed in my disco-antistat, serves as a reference (like a clock hand) for me to easily count my rotations. (Version 1 disco-antistat clamps won’t have this handy feature but the clamp should fit as neatly inside the Chinese soup container for applying solution.)”

    That sounds good. Can you explain it more maybe with an image?
    Thanks, Henk

  • Reply
    Saverio
    7th March 2021 at 5:04 pm

    After 5 different washing sessions and approximately 50 records cleaned, I thought it could be useful to share my experience so far.

    First of, thank you very much Paul: I am new to “the vinyl side of the moon” in our hobby but I read so many articles about vinyl cleaning and they all seemed weird to me. Everyone claiming “their recipe is the perfect one”, but no hint on…why is that?
    On the contrary, beyond the personal esteem, you convinced me because of the explanation: the background checks, the “journey” you’ve been through…a nice mix of science, theoretical research and practical experience. Not just an opinion, but facts.
    …well, no, you did not convince me to go for the 6 cleaning cycles, that’s way too much for me.

    Second: for anyone with no previous experience like me and wondering if this is worth it… I will not use all the nuances in Paul’s descriptions so I’ll state it as simple and clear as possible: if you ever experienced the sound improvement you get from the newer stylus after removing your worn out one or the improvement after getting the right impedance/capacitance match in your pre-phono when you install a new cartridge…well that’s the level of improvement you‘ll get by properly washing your old records!
    It’s as simple (and immediate) as that.

    Now, my (little) experience so far, for whomever may find it useful.

    1) Don’t throw that ugly mug away!
    I received a porcellane “Christmas milk cup” from someone who ran short of ideas last Christmas and doesn’t know I don’t drink hot milk nor pour biscuits in it…well, that mug is heavy and stable and the size perfectly fits the outside part of the Knosti clamp, so I now use it as a stand for my records, clamps on tight, while going through the surfactant/glicol routine.
    Much better than my early attempts keeping the record in one hand!
    2) Save money from the measuring pipe.
    At the end of the day you will never need the whole set, and here in Italy they are pricey…the measuring cup of any medical syrup for your kids’ cough would do the job just fine, you just need to refill it multiple times depending on the target bottle size for the water/alcohol mix.
    3) Beware the kabuki!
    Although I went for a “professional” brush from a local make-up shop, the first one I used was easily losing its hair, which may eventually damage the record. You may want to try multiple (not cheap) ones.
    4) Experiment with less relevant records in your collection and be gentle with the brush.
    I was mislead by Paul’s words about attrition and his description about keeping the “brush-end stiff” and to “push the mix in the grooves” and I probably pushed too hard. The outcome was I ruined a few records (in old records some tracks would skip where they did not use to, in new records I would hear noise and distortion where the sound was pristine before).
    That was a tough moment and I thought to give up…but I eventually kept on and just realized that given it could have not been due to the knosti itself (they would have not been in business for decades otherwise!) it had to be me.
    I managed to just distribute the surfactant on the record surface and leave the “friction” part of the job to the Knosti: it then worked brilliantly.
    Please note, this is a key aspect, given this part of the process is still needed even with higher tech approaches to cleaning, as Paul just stated in his Degritte video…
    5) How much time do you want to invest?
    I trusted Paul’s words about multiple washing cycles being better than just one, but this whole process is so time consuming (although very rewarding, as I said earlier) that there must be a trade-off.
    I eventually decided to “stop in the middle” after three complete cycles, then a rinse without surfactant/glicol and an additional rinse in a separate bath: at the end of the day the first bath is the one where surfactants and glicol get diluited from previous cycles so better go for a “pure” water/alcohol rinse for the last one.
    This is where I got the level of improvement I described earlier.
    For three full cycles and two rinses I still need 3 hours to complete a Knosti rack of records (7 records).

    Well, these were my two cents.
    I hope they can be useful to someone.
    Regards

    • Reply
      Paul Rigby
      10th March 2021 at 9:24 am

      Thanks for the comments, Saverio.
      For the benefit of anyone else reading this, I strongly doubt that the Kabuki brush is causing skipping. Unless the bristles are tipped with metal or something completely weird. Kabukis are incredibly soft, stiffening the bristles only helps to push the liquid into the grooves. The bristles remain soft as a baby’s what not.
      I’m glad that you’ve adapted the system I presented and found a cleaning regime that fits you and your vinyl. Nice one.

  • Reply
    Phil
    10th March 2021 at 9:44 am

    Paul, two thoughts :
    – Do you let the surfactant sit on the record for any amount of time before going to the knots bath ? I mean for one side beyond the time int takes to prep side 2 ?
    – Have you ever made a null test on before / after cleaning in order to make sure hthe different surfactant / cycles etc do actually make a difference (recording 2 needle drops, one before cleaning, one after, and subtracting the signal of he second from the first. If the result is blank : the cleaning doesn’t make a difference) ? I know for my part that I am as much prone to psychoacoustics as the next guy, and thus try to be as pragmatic as possible in my methods.
    So even though I have no doubt you among other people have a much better ear or equipment as I do, I would love to see actual data regarding the improvement of this process…

    • Reply
      Paul Rigby
      10th March 2021 at 10:14 am

      Hi Phil
      1: No, that’s what the Kabuki brush is for, in effect. To get the surfactant into the groove. Then you’re ready to go.
      2 Yes, I drove myself half crazy with A-B, A-C, B-C, etc, etc, etc! comparisons. The complex variables are sometimes mind numbing 🙂 I spent days doing them. I still have the scars.
      3: This is not the first set up I’ve done (2) with either. I’ve done this grinding test routine with numerous liquids, machines (manual, vacuum-based, ultrasonics), accessories, liquids, surfactants, etc. I tend to over test to make sure because I want to sleep at night feeling confidant in what I’ve published.

      • Reply
        phil
        10th March 2021 at 10:43 am

        Paul, I feel your pain… 🙂
        Maybe it would be a good idea to publish these null tests ? For my part I still have a hard time believing different surfactant will carry different results. I don’t doubt that cleaned / not cleaned will, but beyond that leaves me lost for words…

        • Reply
          Paul Rigby
          10th March 2021 at 11:08 am

          Thanks Phil 🙂 The moment I publish my tests in full is the time I lose half my readership through boredom. I actually do publish the tests, the results form part of the review or feature or Buyer’s Guide.
          As for different sound results? I think some surfactants leave something on the vinyl surface. Triton does, I reckon. A stylus is a dumb tool – it plays what it sees. If you filled vinyl grooves with a fish stew, for example, then the stylus would play that and you would hear what a fish stew sounded like according to a stylus.
          On a more serious note, if there’s residue in the groove from surfactant then it will play that or if the surfactant hasn’t done its job and there’s still grime in the groove then the stylus will play that. The stylus is very sensitive and a great sonic translator. Everything it touches affects the sound.

  • Reply
    Calin Lucaci
    10th March 2021 at 3:53 pm

    Hello Paul.
    I can’t find Propylene Glycol, instead I can buy Glycerol by 100ml bottle from a pharmacy. What you think?
    On this list has superior compatibility than Propylene Glycol for vinyl. I know that vinyl recipes are diverse but I guess it could be good. http://www.gentekwindows.ca/Links/Chemical_Compatibility.htm

  • Reply
    Wayne V
    11th March 2021 at 4:15 pm

    Hi Paul,
    Just wondering why your final rinse for manual cleaning and the Degritter includes alcohol, rather than straight distilled water. Thank you.
    Wayne

    • Reply
      Paul Rigby
      12th March 2021 at 1:23 pm

      Hi Wayne – because you need to remove any final residue of both surfactant and Glycol. Water won’t be enough.

      • Reply
        Wayne V
        12th March 2021 at 4:51 pm

        Hmm. So no need to rinse off the alcohol?

        • Reply
          Paul Rigby
          12th March 2021 at 5:36 pm

          It evaporates during the drying period but if you have access to a vacuum-based RCM, then that will be more efficient because any stray grime will be sucked up. But hey, this is a budget option after all.

  • Reply
    Ant
    25th March 2021 at 11:03 am

    Hi Paul,
    I tried this method, with Triton X-100 as surfacant, completing only two ‘cycles’ due to time constraints and now have static present when removing the vinyl from the platter. Previously the vinyl was free from static due to the cleaning solution previously used?

    • Reply
      Paul Rigby
      26th March 2021 at 11:06 am

      Static can come from a variety of places but cleaning your vinyl will also create it, yes. I would recommend anti-static practices anyway, no matter what system you use and whether you clean your vinyl or not. A Zerostat will reduce static (https://theaudiophileman.com/zerostat/) It won’t remove it entirely, you’ll need a more expensive DeStst II for that but the Zerostat remains invaluable as a basic anti-static tool.
      Also, please see my surfactant feature for a new safety note on Triton: https://theaudiophileman.com/surfactant-clean-vinyl-buyers-guide/
      Scroll down to the Triton section.

  • Reply
    Artie
    3rd April 2021 at 9:50 am

    Hi Paul,
    How did you arrive at 7% alcohol with distilled water? I’ve seen some ‘recipies’ stating 10% and even as high as 20% alcohol.

    • Reply
      Paul Rigby
      5th April 2021 at 9:42 am

      Hi Artie – after my own research and following up on a series of interviews, I found that alcohol can soften vinyl in high concentrations which can result in groove distortion. This is despite the fact that the make-up of a vinyl disc is a lot of more complex than you might think. In purely sonic terms (again after tests) I found that just 1% of alcohol is enough to do the job with higher concentrations offering no sonic benefit. For more, see here: https://theaudiophileman.com/vinyl-vs-alcohol-cleaning-vinyl-new-research/.
      The only reason I use 7% is to melt the Glycol during my vinyl cleaning procedure.

  • Reply
    Wayne
    19th April 2021 at 4:15 pm

    Hello Paul,
    Is there an ETA for Part 2? Eagerly awaiting. Thank you.

    • Reply
      Paul Rigby
      20th April 2021 at 11:44 am

      Hi Wayne – when the greater powers of this universe give me 48 hours in a day instead of the paltry 24 that is currently the agreed standard (I for one urge arbitration with the Time Unions on this matter because its not good enough, it really isn’t).

  • Reply
    Jonas Karlsson
    21st April 2021 at 6:13 pm

    Hi guys – regarding the TERGIKLEEN-product…

    I didn’t order mine from the exact same seller as advertised here, but from here: https://www.ebay.co.uk/itm/TergiKleen-Tergitol-based-Fluid-Concentrate-INVINCIBLE-TERGIKLEEN/265104413485

    Arrived today and the container has only a Xerox-copied sticker on the bottle… doesn’t feel good. Should I be worried? Did they run out of the original Tergikleen-stickers??

    How can I make sure it’s the real deal? Ideas or tips??

    • Reply
      Jonas Karlsson
      22nd April 2021 at 6:26 pm

      OK, now it’s reported FAKE – so DON’T buy from this seller!

      Seems like he’s making his own blend with Tergitol – but has no idea he can’t just call it TERGIKLEEN, which is a registered trademark…

      My bad – but I got my money back (+ 2 nasty messages)…

  • Reply
    Ezra
    25th April 2021 at 6:17 pm

    Hi Paul,

    Been running your system described above (using two Disco-antistat baths) for roughly 100 Lps and have been very happy w the method. I am also using a vacuum based RCM after the baths for quicker drys and further (theoretical) debris removal.

    Can you think of a good reason why I wouldn’t just want to put the 10drops Tergikleen/liter distilled solution directly into my first Disco antistat bath for a number of turns and then drain and move to the distilled/alcohol rinse bath? Obviously I’d burn through more of the surfactant solution this way as it gets muddied up with record gunk in the bath but this seems to me to be a time saver plus the advantage of better surfactant contact during the abrasion spin versus manually applying tergikleen/glycol to both sides. Thoughts about that? Thanks so much!

    • Reply
      Paul Rigby
      27th April 2021 at 9:45 am

      Hi Ezra – because Tergikleen is super concentrated and 10 drops into the relatively small Disco bath would not provide enough dilution. The easiest way is to make a 2 litre bottle of diluted Tergikleen using an old spring water bottle. Then decant part of that bottle into the Disco’s bath. When that becomes clogged, empty the bath, give it a quick clean and decant more from your 2 litre bottle. In that way, you’re maintaining a consistent dilution level and not risking clogging your grooves with gooey, under-dilted Tergikleen.

  • Reply
    Saverio
    27th April 2021 at 9:58 am

    Hi Ezra, I’m interested in better understanding your proposal (and thanks Paul for clarifying).
    – would the first bath only contain tergikleen and distilled water? No alcohol?
    – would you completely omit the use of glycol?
    Thanks, Saverio

  • Reply
    Ezra
    27th April 2021 at 1:13 pm

    Hi Saverio,

    Yes I was thinking of having a bath of the 10 drops of tergikleen in 1 liter of water solution in my first bath for several turns, and then switching the record/clamp to the next bath of distilled and alcohol solution. My thinking is perhaps having the surfactant in constant contact with the record during the spinning through the brushes might a) be easier/more time efficient than the dropper/kabuki brush and b) might provide extra cleaning. This would take the glycol out of the process. I would consider adding a third bath of distilled/alcohol for extra rinse since there will be more tergikleen being transferred into the first rinse wash. There’s obviously many ways to skin this cat and Paul’s process as described already works great so I’m just musing here on ways to make my own process more efficient for me. And of course, I may be overthinking the whole thing, but I have been so pleased about bringing back to life somewhat abused records that I have owned for over 40 years to a whole new level of fidelity and listening enjoyment.

  • Reply
    Chris M
    17th May 2021 at 10:43 am

    Hello Paul
    A very informative and comprehensive article (for free!) which has led to great success in cleaning lp’s for me thank you. For the Kabuki brush it works fine but I found the brush would simply spread as I pushed down on the lp. So I added a small rubber band (from the brocollini no less!) and wrapped it around the middle of the brush to help keep the bristles taut. Keep on keeping on.
    chris

    • Reply
      Paul Rigby
      18th May 2021 at 11:19 am

      Thanks Chris! When I use the brush initially, it’s to spread the liquid over the vinyl surface so the spreading thing isn’t an issue. Later on, when I want to force the surfactant into the grooves, I move my fingers down the bristles to shorten and harden them which prevents that spreading [as I mentioned in the article] but if the rubber band works for you then, of course, all the better.

  • Reply
    Miguel
    21st June 2021 at 1:47 pm

    Hi Paul,
    I have been using your cleaning method and loving the results. After a series of initial tests I determined that your recommended 6 cycles were well worth the time and effort put it. All has gone without a hitch until this past weekend, when I accidentally grabbed the glycol dropper instead of the diluted surfactant (they are labeled…somehow switched them and did not even bother to look…). As soon as I started brushing the glycol in I could tell something was not right, it has a much heavier consistency than the diluted surfactant. Once I realized my mistake, I ran the record through the alcohol/distilled water bath, after which I emptied the bath, cleaned the Antistat, refilled with alcohol/distilled water mix and ran the record through the typical 6 cycles including the surfactant step. Should I be cautious of playing this record so as to not damage the stylus? Not sure if there would be any residue left in the grooves that could be picked up by it. Do you think the glycol I applied will have been diluted/melted away by the regular cleaning process? Will the direct application of glycol damage the record ?
    Best regards,
    Miguel

    • Reply
      Paul Rigby
      22nd June 2021 at 6:35 pm

      Whoops! You should be fine Miguel – the alcohol will melt it all away.

  • Reply
    Miguel Gonzalez
    22nd June 2021 at 6:46 pm

    Thanks Paul! Please ignore my second message today, when I refreshed the page it looked like my inquiry had disappeared.

    • Reply
      Paul Rigby
      23rd June 2021 at 9:19 am

      You just need to wait for me to clear your messages, Miguel – I scan them before they go ‘live’, as it where. Sometimes I’m busy so it might take a little while until I can address your query. Thanks.

      • Reply
        Nigel Gilbey
        15th July 2021 at 1:31 am

        Hi Paul
        I have just bought a degritter and I am going to try your cleaning methods I’ve read through this forum which is very interesting but I have a couple of points to ask you that have been brought up but not answered with the clarity I’m after so here it goes.
        I was considering what surfactant to purchase the Triton x100 is off the list now so was choosing between Ilfotol and Tergikleen I’ve
        Been informed the fake one is called Tergiking now which I saw and is very informative and detailed also cheaper but if it is the fake I don’t want to risk it.
        I’ve been informed this by the Tergikleen seller blues possum very helpful with very quick replies
        I also questioned him about his instructions if used with a Degritter.
        His recommends Tergikleen is mixed in Bath with only Distilled water no isopropyl and applied direct to record is not the way to use it also rinse must be done with pump spray with only Distilled water.
        I Replied to him about rinse in degritter in separate bath with only Distilled water in it basically purchasing a second bath to change over with. He also said no to this because the Tergikleen would still wash into water and then that clean water would have Particles of Tergikleen hence not rinsing properly.
        I read a answer to previous question that you rinse with Alcohol to remove the Glycol I’m assuming that I will not be using it.
        I know your reviews are carried out only on your hard work and time and your very trained ears but this guy says he invented this mix so I was interested in your thoughts its more about the rinsing I maybe tend to agree because if are rinsing records in water you just washed records in can you rinse in same water?
        Also have you ever had conversations with guy you must be drumming up alot of business for him.
        Just got into your videos and site great reviews.
        Thanks

        • Reply
          Paul Rigby
          19th July 2021 at 3:46 pm

          Many thanks. Never met or chatted with the Tergikleen chap, I’m afraid. Neither am I interested in playing a sort of advice tennis with him either 🙂 My own views and reasons for the same can be gleaned in my reports posted on this site.
          All I can do is to offer you my reports. The results based on my own research.
          Going into my research, I was fully aware that everyone has their own ‘system’ and that everyone is right and everyone else is wrong. I just wanted to offer my take on the subject because I thought I had something different to offer vinyl fans.
          All I can do is to report back on – what – three years of tests (still on going, I hasten to add), off and on, over hardware, liquids, techniques and so on. That doesn’t mean, because of all that, you should follow my recommendations, though. You need to weigh up the facts and ask questions (as you’re doing now, of course – a good thing) and come to your own conclusions and then base your cleaning technique on that. You need to be happy and confidant when you clean your vinyl.
          With my reviews, features and advice, I can only take you so far down the path. Ultimately, the choice has to be yours. I’m always here if you need to chat, though.

  • Reply
    Nigel Gilbey
    15th July 2021 at 10:13 am

    Hi
    Left a question yesterday
    Seems to of disappeared before I do it again
    Wanted to confirm you had it.
    Cheers
    Nigel

    • Reply
      Paul Rigby
      17th July 2021 at 11:42 am

      Hi Nigel – away for a few days. I’ll have a closer look when I get back to my desk. Have a nice weekend.

  • Reply
    Patrick a Bower
    19th July 2021 at 9:01 pm

    Paul,
    You are, of course, absolutely right. There is a significant further improvement from using the Kabuki brush to force tergikleen and glycol into the grooves, compared to just using Tergikleen in the Degritter tank. There are no short cuts! I had not noticed that you also recommend alcohol with distilled water for the final rinse. Why the alcohol at this final stage?
    Thanks, Patrick

    • Reply
      Paul Rigby
      20th July 2021 at 1:35 pm

      Hi Patrick – glad to hear it’s working for you and glad to be of help. For that final rinse, I found there were still remnants of glycol on the record surface so the alcohol helped to melt those away.

  • Reply
    Trygve
    7th August 2021 at 5:20 pm

    Hi Paul

    I have been using your recommended process for about 6 months, although using a Degritter ultrasonic cleaner.

    Great results, thank you!

    Today, I tried to clean a (already clean) record five times over as I had the time, not expecting much in terms of sonic improvements…

    Hahahahahahahahah, I’m resigning from my paid job Monday morning to concentrate on cleaning vinyl full time!

    No seriously, this yielded substantial improvements over the once-over cleaning!

    The music is reproduced with a cocky effortlessness that I have not experienced before.

    Keep it up!

    • Reply
      Paul Rigby
      9th August 2021 at 11:29 am

      Glad you’re finding good results, Trygve – thanks for sharing your experiences.

  • Reply
    Ian Barber
    10th August 2021 at 9:44 am

    Hi Paul, I visited a record store in Salisbury yesterday, where I bought a used lp of Weather Report last time I visited. The shopkeeper/owner had a Project VC1 on the counter which he was using to clean all the used records, before sale. I was fascinated to watch the very rapid process, as compared with the manual cleaning method that I use( Disco Antistat MK2 ). He had been using this machine for 5 years and he was happy with the performance, though he was only using the Project cleaning fluid, suitably thinned with distilled water. Now, I had to clean the Weather Report lp as part of my haul of 230 lp’s which I was in the process of cleaning at the time, as it sounded dull and lifeless. However after using my cleaning setup( as recommended by your goodself ) of kabuki brush and Ilfotol worked in to the surfaces, followed by a rinse with isopropyl alcohol( 1% ) and steam distilled water, the sound came alive and all the clicks,pops and bangs had almost completely disappeared. Ok, so it may be that my lp was not cleaned by the record store’s machine( they do get missed occasionally according to the owner of the shop ), or it may be that your solutions are a lot better than the one supplied to the record store, in this case. Or, as a long shot, a second cleaning by me really did the trick. Anyway, happy chappie here, though I may try one of the Project machines in the future( VCE ) as the drying process takes far too long with the manual machine. Unless, of course, you can come up with a reliable,fast drying process for us manual cleaning users, that does not cost the ‘earth’ ? Cheers Ian

    • Reply
      Paul Rigby
      10th August 2021 at 9:57 am

      Hi Ian – thanks for sharing your experiences Ian and I’m glad you’re making progress over there 🙂 I am – despite conspiracy theories, tabloid rumours and reports of alien intervention – ‘getting there’ for Pt.2 of this long mooted series (this is a side line thing, regular work gets in the way) but I am testing the RCM approach for that feature. The most intriguing option thus far is a combo using a Disco Antistatic and RCM as a tag team, as it where. More on that later.

      • Reply
        Paul Findlay
        5th June 2022 at 11:19 pm

        Hi Paul, Is there any update on part 2 yet? There have been a lot of questions and comments on the use of manual/manual and ultrasonic cleaning methods so far (I thought US was part 3?) but vacuum RCM questions seem to have been brushed aside? As you can probably guess… I use a vacuum RCM, a ProJect MKII. I use this with L’Art Du Son diluted in distilled water as per the manufacturers guidelines and a goat hair brush and seem to get good results. But could this be improved using a hybrid of your methods? Could you at least give us a bit of a clue, like a theatrical trailer? We’re all waiting eagerly to find out, it’s like waiting for the next Bond movie 🙂 Thanks Paul

        • Reply
          Paul Rigby
          7th June 2022 at 3:31 pm

          Hi Paul, when I can grab a few moments, I do a bit on Pt.2 but I have been delayed regularly because of deadlines on reviews, I have print magazine work too, YouTube vids, CD and vinyl reviews, books, etc. What I have here is about 75% of the way completed but I need to do more tests. If you can increase the day by an extra 12 hours, it would help. I do provide direct help to RCM users. The only “brushing aside” I recall doing (unless the required explanation needed 2 sides of A4 and hence Part 2 would be the best source) is with a goat hair example from Loricraft 🙂
          Just for the record, manual (completed) is Part 1, RCMs (not yet completed) is Part 2 and Ultrasonics (not yet started) is Part 3.
          A quick update and where I’ve got to so far, is to use the Disco Artistat as an abrasive cleaner and follow Pt.1 then take the disc from the Disco and place it on the RCM for vacuuming which is a much more effective way of drying and preventing recontamination (something the Disco risks – it’s a peril of manual cleaning). I still need to full check that bit and then there’s the issue of the back side of the record being wet while you RCM vacuum.

  • Reply
    Ian Barber
    10th August 2021 at 5:33 pm

    Hi Paul,

    Ok, many thanks for the reply which is much appreciated.
    Looking at the way the RCM was being used yesterday in the shop the weak links , as far as my limited experience allows me to voice an opinion, would appear to be the lack of a surfactant, a mediocre brush for spreading the fluid as it does not get fully into the grooves, and the lack of an alcohol based ‘wash’. So, it would appear that the Disco Antistat is superior as it has a better brush array and is, therefore, more able to get the surfactant into the grooves in it’s wet bath. Use of an RCM would appear to be only of use for using the platter to work-in the surfactant, as it is a level surface, and for sucking all the used fluid off the discs for the drying process. What we really need, in my humble opinion, is a dummy platter so that we can work the surfactant in to the disc, then use of the wet bath( Disco Antistat or suchlike ) with the alcohol mixture and, finally an attachment to be used with ,say, a wet- and-dry vacuum cleaner to suck-up all the fluid. That would keep the costs down to reasonable levels, rather than having to buy an RCM as well. Granted, an RCM and Disco Antistat or suchlike, would be the easiest hybrid solution, but there must be other diy options for we experimenters ? Looking forward, as are many of us on this forum, to your part two etc before too long.Cheers Ian

    • Reply
      Paul Rigby
      11th August 2021 at 10:14 am

      Spot on, Ian. The only issue is the Heath Robinson contraption that you may end up with and the possible lack of consistency in terms of sucking up the surfactant. The latter would be important to not allow residue to remain on the surface. For two reasons: firstly because residue will veil detail; secondly, because long-term exposure to surfactant over weeks/months is not something I recommend for the health of vinyl itself. At this early stage, I’m looking at recommending a cheapo RCM with a Disco as a pairing. Possibly a Pro-Ject. For now, my tests are being done with one of the most expensive RCMs out there, the Loricraft. Reason being, I want to compare and contrast a RCM-only clean with the Disco/RCM duo. I suspect – no proof yet – that the Disco/RCM will be the way forward but I still have some testing to prove that either way. What I have proven (to myself, at any rate) is that surfactant on a RCM alone applied with a Kabuki brush, is better than none at all.

  • Reply
    Ian Barber
    11th August 2021 at 1:53 pm

    Thanks Paul.
    With an RCM, at least the way the chap in the shop was using his, only one side of the disc goes through the process, then the disc is turned-over for the other side. So, only one side of the disc is wet, and the underside is always dry. Might there be a problem having both sides of the disc wet, after the disco antistat bath while using the vac on the top side ? I am thinking of spillage etc from the underside making a mess and possible chemical contamination of metal parts ? Cheers Ian

    • Reply
      Paul Rigby
      11th August 2021 at 2:19 pm

      Absolutely – it did cross my mind too. It’s a bridge I have yet to cross but I agree, its thinking cap time 🙂

  • Reply
    Ian Barber
    11th August 2021 at 3:11 pm

    Maybe, in the spirit of ‘thinking caps’ maybe something like a sombrero hat ( with suitable hole in the top ) placed over the RCM’s disc spindle would do the trick ? It would need to be made waterproof, though. Alternatively, a circular bowl with suitable central hole might do the trick. It would be best to get one that had the sides higher than the level of the disc, and enough room for the hands to remove/replace the discs without coming into contact with the bowl ? The ones used by potters to stop the splashing spring to mind, though somewhat smaller, obviously. Good luck , and we are all looking forward to your conclusions and advice on this topic. Cheers Ian

    • Reply
      Paul Rigby
      11th August 2021 at 4:37 pm

      Yes, I was thinking of something similar: great minds, etc. 🙂 A potter’s-type wheel might be something there. I’ll look around. Thanks for the thoughts Ian.

  • Reply
    Jacob
    10th November 2021 at 5:11 pm

    Hello Paul,

    Since discovering your channel and appreciating your dedication and methods with quality research, I’ve been waiting a year & a half for information on cleaning my records via Vacuum-based RCM, not that you owe that to me or anyone else within a specific timeframe haha. However, I’m becoming very impatient with A LOT of records to clean but only because I don’t want to improperly clean them and have to do it all over again (that would be painful). I trust your knowledge & research so I wanted to ask if you could please provide me with a suggestion. I have tergikleen, distilled water, alcohol, necessary bottles & applicators, a brush, and a vacuum RCM where the record sits flat. I just need to know if the Tergikleen, Alcohol, and Distilled Water is good enough to clean? Or do I need glycol or have to work in a record cleaning solution into the mix? Please advise, privately if needed. Thank you and sorry to be bother

    • Reply
      Paul Rigby
      10th November 2021 at 5:21 pm

      I’ll consider my wrists slapped then 🙂 You’re very patient and I don’t blame you at all for sending this note. Thing is, because I’m busy doing reviews, battling on social media (just kidding), YouTube, news items, print magazine stuff (I still write for mags because, you know, bills) plus a host of other stuff, this long awaited Pt.2 has been slowly progressing whenever I have a spare 5 minutes (ok, 4…well, 3). It is moving forward and ain’t too far from the end in terms of editorial. Then I need to sort the images side which will probably be a afternoon or two’s work. It has been a slog though because of the constant checking, rechecking, re-re-…well, you get the idea.
      So brace yourself because I might put this on Patreon only. As well as Pt.3. That is, I don’t get paid for doing all of this work (I’ve been at this for a little under a year) so any pennies I might get from that might, oh I don’t know, pay for a coffee perhaps?
      Minimum wage? Me? I wish 🙂
      I need to go into a bit of detail so I’ll wait until I publish this thing. I hope to sort it before Xmas.

  • Reply
    Artie
    22nd November 2021 at 11:39 pm

    Would you recommend this process, up to step 14, as a preparation for cleaning records in an ultrasonic bath, as per your Record Cleaner Pro review?

    • Reply
      Paul Rigby
      23rd November 2021 at 11:11 am

      Hi Artie and absolutely, yes.

    • Reply
      Nigel
      19th January 2022 at 3:38 pm

      Hi Paul
      I have 3 questions
      1.Seen on ebay selling tergitol quite cheap
      In two bottles 15 S-9 15 S-3.
      Do you think using these in equal measure would be same as tergikleen much cheaper.?
      2. Would goats hair brush work as well as makeup brush when applying directly to record?
      3. Can you apply mix to record with spray bottles instead on droplet method?
      Thanks again for all you imput and help with great reviews.
      Cheers
      Nigel

      • Reply
        Paul Rigby
        19th January 2022 at 4:18 pm

        Ni Nigel:

        1: I’m not sure about this 2-bottle seller. I have no direct evidence but I have heard that this particular source might not be totally on the money. Happy to be corrected by anyone else out there who has more direct evidence. I went for the US source.
        2: The Kabuki is preferred because its soft (you don’t need rough and ready at this stage) but also dense so the ‘forcing’ action of the surfactant into the grooves is better maintained.
        3: Sure, spray is ok but, during tests, I noted a lot of spray is wasted because it bounces off the vinyl surface and into the air (and often into your lungs which isn’t healthy). There’s also a greater risk of hitting the record label.

  • Reply
    Alan
    30th January 2022 at 5:33 pm

    Hi Paul,

    Great directions and really looking forwards to doing my first batch.

    Is De-Ionised water the same as Distilled?

    Thanks,
    Alan

    • Reply
      Paul Rigby
      31st January 2022 at 9:57 am

      Hi Alan – distilled is preferred. De-ionised still retains bacteria.

  • Reply
    Pascal
    26th February 2022 at 4:20 pm

    Hello Paul ,

    Help !
    I am very frustrated with the result obtained with my Degritter, which is much worse than listening to the disc (new)! So yes, the disc is visually clean but it is at the expense of noise! How to get a deep clean disc with very little noise when playing a disc, new or old? What did I not do, what should I add… please? I used distilled water that I bought from a local pharmacy and added Tergikleen in the Degritter on heavy mode!
    The language barrier does not help me, I speak French and therefore I use Google translation to read you!
    Can you help me please ?

    Best Regards

    • Reply
      Paul Rigby
      27th February 2022 at 5:35 pm

      Have you read my vinyl cleaning guide? The manual guide? Most of that can be utilised for the Degritter. It’s the system I use.

      • Reply
        Pascal
        28th February 2022 at 6:28 pm

        Yes I have read both but as I told you, I speak French and Google translation is not necessarily faithful to a good understanding! I recapitulate ! Before passing the disc to the Degritter, I must apply on the surface of the disc a mixture of distilled water with Tergikleen, applied with the Kasubi brush. Then in the Degritter tray, and that’s where I don’t understand! what mixture should I put in the Degritter bath? On the other hand, Propylene glycol cannot be found! I only have distilled water, Isopropyl alcohol but no Glycol! What should I do please? Thanks very much !

        • Reply
          Paul Rigby
          1st March 2022 at 2:27 pm

          IN the bath you need distilled water and alcohol. The amount of alcohol depends if you are using Glycol (as stated in the Guide I mentioned). No Glycol means just 1% of alcohol in the bath. With Glycol you need 7%. Glycol can be bought in several places on the Internet including amazon, eBay and my favourite suppler, APC Pure: https://apcpure.com/product/mono-propylene-glycol-99-80-acs-uspep/

          • Pascal
            1st March 2022 at 4:40 pm

            Hello Paul,
            I remind you in case, that I use the Degritter washing machine!

            So in this case, on the disc itself, I have to apply a Kasubi brush with a mixture of Tergikleen and distilled water!

            For the cleaning phase with the Degritter, in heavy mode, in several cycles, In the Degritter bath, a mixture of distilled water, isopropyl alcohol, and glycol!

            And for rinsing, a mixture of distilled water and alcohol in equal quantities!

            I understood everything correctly Paul ?

            I really want to understand your procedure and get the same results as you, have the same “Wow” effect!

            Thank you for helping me and thank you very much in advance for your indulgence and patience with me with the English language that I master very poorly ! But I take care ! Lol !

          • Paul Rigby
            2nd March 2022 at 11:53 am

            Hi Pascal – the first part of the Guide is applicable to the Degritter too – not just the Disco Antistat.
            I use diluted Tergikleen which I store in a glass bottle with a pipette. I add Glycol to that liquid. The mix is added direct to the vinyl surface as a surfactant. My Guide explains more on that. In the Degritter’s bath is the alcohol and distilled water only. For rinsing, I do not add any surfactant to the vinyl surface. Instead, I do a basic clean with the bath’s alcohol/distilled water on a heavy clean. A one-cycle clean with no surfactant in other words.

  • Reply
    Jack Pot
    1st March 2022 at 5:52 pm

    I apply the tergikleen solution directly on the disc (with kabushi brush) and use a 1% alcohol bath (no glycol). Excellent results (Audio Desk ultrasonic RCM). The improvement over other methods, incl using Audio Desk’s own surfactant, is VERY audible.

  • Reply
    Wayne Verdon
    2nd March 2022 at 3:39 pm

    Hi Paul,
    Time Lords notwithstanding, I wanted to remind you that your eager audience awaits Part 2 of your Vinyl Cleaning Guide (RCM). I believe you have until Oct 2022 to deliver in order to undercut the gestational period of the African Bush Elephant, the longest known gestational period on the planet. We have not forgotten! Thank you,
    Wayne

    • Reply
      Paul Rigby
      2nd March 2022 at 4:27 pm

      Hehe. You’re quite right, Wayne. I was wondering – and this is possibly a muse too far – about turning the whole trilogy into a book (i.e. manual, RCM and ultrasonic guides, the three parts). One you can use on a practical level. Ring bound and all that. But maybe I should stop all that nonsense and just get on with it eh? 🙂

  • Reply
    Ian Barber
    3rd March 2022 at 9:28 am

    Sounds like a great idea. However, a book will need up-dating from time-to-time, whereas on-line would be much quicker and,maybe, easier. But an on-line manual may be the answer, as updates to specific pages could be done on-line and then anyone wishing to do so, could print -off the relevant sections which apply to them, and keep them up-to-date and act as a reference while they are actually carrying -out each part of the process. Myself, I have a Disco Antistat MK2 and would like to get a more reliable/quicker way of drying the records, either with an RCM, or perhaps using an affordable ultrasonic machine as well, or instead of. The Ilfotol is still in date for this this year, so looking forward to parts 2 and 3 before I have to get another supply of same. I was in a record store yesterday, and the lady shopkeeper was busy cleaning her new stock of used/pre-loved records, using a very old Project RCM which had seen better days. She was still using the Project supplied fluid, which does leave a reside of dirt and fluff on the stylus, as we know. I pointed her in the direction of your website and explained a bit about the manual/RCM fluids that you recommend and that I use. However, she said that she did not have the time to go through all that , so will carry -on using what she has. I did try, as I told her that my method using the Disco Antistat etc made a big difference to the sound quality of the records that I have bought from her shop in the past,even though they have all been ‘cleaned’ by her on the RCM ! Cheers Ian

  • Reply
    Pascal
    3rd March 2022 at 12:33 pm

    Hello Paul,
    Thank you very much for your help! concerning the rinsing, I must logically empty and replace the Degritter washing bath with distilled water and alcohol and equal quantity, is that right Paul ? Do you think that the Degritter performs a good drain so that there is no washing liquid left during rinsing ?
    As I told you previously, I speak French and therefore I use Google Translate to read and write to you and the “Google” translation is not always accurate and can mislead and complicate my understanding ! Thank you Very much again !

    • Reply
      Paul Rigby
      4th March 2022 at 10:46 am

      Hi Pascal – You don’t need to empty the bath when rinsing. I only change the water in the bath after 30 cleans or so. It depends on the condition of the records and how dirty they are.

  • Reply
    Pascal
    5th March 2022 at 3:08 pm

    Hello Paul ,

    I don’t know if the subject or the question has been addressed or asked, but during the manual pre-cleaning of a vinyl record with the kazubi makeup brush… (before its cleaning in the Degritter), can we imagine the use of Spin clean ? Are the Spin Clean brushes as effective as manual use of the Kazubi brush ?

    • Reply
      Paul Rigby
      7th March 2022 at 9:50 am

      Hi Pascal – the Spin Clean wouldn’t really help or, more accurately, it would be redundant. A manual cleaner can provide good attrition (the Disco Antistat is preferred to the Spin Clean in that department) but ultrasonic technology offers improved, more efficient attrition. Hence, the addition of a Spin Clean stage wouldn’t add any extra cleaning benefits.

      • Reply
        Pascal
        11th March 2022 at 10:58 am

        Hello Paul ,
        Indeed, the Disco Antistat seems more suitable and in addition it is half the price of the Spincleaner! The only problem is that its two brushes don’t seem to be as soft as the Kasubi makeup brush! If so, the Disco Antistat would be the perfect complement to the Degritter for pre-washing both sides at the same time! In my case, in the meantime, I use an old Rega turntable (without motor or ToneArm) and its glass platter and its felt, as a support to pick up my records with a Kasubi-type brush! My only problem now is that my geographical location makes it difficult for me to order Glycol! Grrrr! Anyway, thank you very much for your help and advice!

        • Reply
          Paul Rigby
          11th March 2022 at 11:34 am

          I don’t think the Disco or any other cleaner in this genre, would be at all suited to cleaning vinyl if you already have an ultrasonic. A Disco will just get in the way of the process. There are better suited tools out there and I listed many of them in my Degritter review.
          For your Glycol needs, have you seen this company? : https://apcpure.com

  • Reply
    Mr Ashley Carr
    4th April 2022 at 4:35 pm

    When you get to 11, 12, 13, 14 of the process, what surface are you placing the records on? Apologies if this has been answered in the 144 comments above. I haven’t had time to read them all.

    • Reply
      Paul Rigby
      4th April 2022 at 5:48 pm

      Can’t see the feature right now because I’m out and about but – from memory – I use my hand to support underneath and catch the very edge of the record in my stomach for support (finger and thumb at 11 and 1 o’clock, little finger around the centre of the record to stop it bowing and the 6 o’clock position of the run in groove wedged in my stomach). Helps to have larger hands, I suppose. Others have found this an issue. I did put out a call for those who prefer to use a support of some sort and there may be suggestions in he comments to that effect. I ain’t sure right now.

  • Reply
    Saverio
    5th April 2022 at 10:23 pm

    Mr. Carr, personally I put a mug on the work table, whose diameter is slightly larger that the Antistat’s clamp, so I can make the record+clamp lay horizontally, almost stuck in the mug, without anything touching the record grooves (other than my kabuki brush). Turning the record upside down is easy, the new side can then be put upside while the wet one faces downwards without touching anything.

    • Reply
      Mr Ashley Carr
      6th April 2022 at 1:22 pm

      Aha. Brilliant Saverio. Many thanks. I’m just acquiring the ingredients listed by Paul and was wondering how to get round this. A no cost solution is very welcome. Prices have inevitably risen since the article.

  • Reply
    Kurt Walling
    24th April 2022 at 3:11 pm

    Hi Paul. What brought me here was a link that was posted over at Discogs.

    Re: Abrasion. Yes, I agree completely with this premise. With my VPI Cyclone, during the initial cleaning cycle, I spray on a Tergikleen mix first, brush it in in both directions, then a spray of 99% iso alcohol mixed with distilled water 1 to 5, or about 20% iso, brush in both directions again and let soak for about 5 minutes. Then I run it forward rubbing my finger from the label outward to the edge, change direction, and do the same. I can feel all kinds of debris get loosened as I run my finger over the surface. Then I use a plush wetted microfiber cloth and in reverse run it over the surface from the label to the edge. Follow that with a distilled water / Ilfotol rinse and vacuum. For a brand new or first time cleaned album, I do this step twice. Then follow up with a soaking cycle that uses a mold release agent (MOFI Super Deep Clean) mixed with an alcohol free eyeglass cleaning solution (50/ 50 mix) which serves as both a surfactant for the MOFI solution as well as its cleaning properties that deal with grease and fingerprints that affect the anti reflective coatings on spectacle lenses (I am an optician by trade) followed by another rinse. Similar to the L’Art Du Son solution which had its beginnings as an optical lens cleaning solution, IIRC. The solution is sprayed on and brushed again in both directions and is left standing for about 5 minutes before vacuuming. Followed by a distilled water / Ilfotol mix rinse. This is standard practice every time I break out an album, even if it has been done before. Up until the third time, I can still feel little particles that come loose.

    I got the idea of rubbing my finger across the surface from observing the Keith Monk machine’s use of the thread for the pickup arm. I figured that the thread served the purpose of loosening debris that resisted brushing. Brushes are nice, but they cannot hit the entire surface, just most of it and likely do not even get to the bottom of the groove in reality anyway. I think it also deals with very stubborn particles that an Ultrasonic may not be able to dislodge.

    Curious as to your thoughts on the finger rubbing process.
    I have used this method now going on 5 years and it does no harm to the vinyl surface, provided you keep the surface very wet while during the rubbing and wiping processes.

    • Reply
      Paul Rigby
      25th April 2022 at 3:41 pm

      Hi Kurt – thanks for sharing your technique. I do see some issues here, though. I don’t recommend adding alcohol to the surface of vinyl, you risk groove distortion. I also don’t recommend using your finger (complete with body oils which reinfects the groove and may harden over time) onto the vinyl surface. I also don’t recommend using a cloth which will push as much dirt back in the grooves as it removes. The Keith Monks thread isn’t part of the cleaning process, it’s there as a spacer, nothing more. The spacer provides the right gap between the groove surface and the vacuuming action to provide efficient and consistent suction. I’ve used MoFi’s liquids. They’re…ok. I much prefer the liquid variants/combos as listed in my Guide. Glad to see that you’re experimenting though.

  • Reply
    Ashley Carr
    10th May 2022 at 1:49 pm

    Hi Paul, and all you cleaners out there. I have assembled all the recommended products and have very successfully been cleaning my records but to my slight disappointment I have discovered Paul is right. Like him I have “heard the difference” that cleaning a record 5 or 6 times can deliver and like him “I can’t go back”! However, I have discovered something that has horrified me as I have trodden this pedantic path and that is how carbon fibre brushes undo all your cleaning endeavours, well not all but bear with me whilst I provide a little more context.

    I was intrigued by finding a way to actually see the results of cleaning, and the results of years not cleaning, and purchased the digital equivalent of a jewellers loupe. Attaching one to the camera of your mobile phone can reveal, in startling and disturbing detail, the dirt your record surface and grooves is able to harbour. It was using this, as well as my ears, that convinced me of the need for multiple cleans.

    It’s now the plot thickens. Previously I have regularly used a carbon fibre brush to clean surface dust but was continually perplexed as to why, regardless of how many sweeps I made, dust just kept on being revealed. My jewellers loupe provided me with the visual evidence as to why this is. Having cleaned a record I used the loupe to see what affect it had had and noticed there was still some loose dust and used the brush to remove it. I looked again and couldn’t believe my eyes. The brush had promptly dumped an avalanche of dust back on to my near pristine surface. Because it uses my mobile phones camera I was able to take pictures of the results. I would be happy to supply these to you Paul if you wish to see them. Suffice to say, I will not be using these brushes again. Instead I use a short blast from a can of compressed air to blow any dust away. I believe the digital loupe cost me less than £5, so it is very inexpensive to bring an objective value to your efforts. Unfortunately it will probably mean that you too are cursed to clean more. 🙂

    • Reply
      Paul Rigby
      10th May 2022 at 5:26 pm

      How intriguing, Ashley! Thanks for going to the trouble of taking the images. Be happy to see them but I think might be an issue to post them in the Comments, I don’t think it can handle images. How about my Facebook Group? Are you in there? Are you on Facebook?
      And sorry to hear that you’re doomed 🙂 Welcome to cleaning purgatory. Pull up a chair.

  • Reply
    Ashley Carr
    10th May 2022 at 9:28 pm

    Hi Paul,

    You’ll be astonished at the pictures. I don’t have anything to do with Facebook, I’ve seen THAT documentary. If I can email them to you I will do that or share a Dropbox link if you prefer to not use email.

    • Reply
      Paul Rigby
      11th May 2022 at 11:22 am

      A Dropbox link might be better in terms of sharing with myself and others reading your post, if you’re happy to do that here?

  • Reply
    Ashley Carr
    11th May 2022 at 11:53 am

    Here is the link https://www.dropbox.com/scl/fo/k97qri52fkfmcolagpgis/h?dl=0&rlkey=9uinto0albq0yey7newo9ashm

    I don’t have a paid for account so I can’t restrict who can edit. Please respect that folks.

    • Reply
      Paul Rigby
      11th May 2022 at 5:15 pm

      Interesting stuff, Ashley. This offers fascinating evidence for myself (as it should to others, I reckon). Thanks for presenting your images to us here – I’ll be doing feature articles on How To Clean Your Carbon Fibre Brush next 🙂
      If I offer attribution, may I present these images to my Facebook Group and Patreon?

    • Reply
      Ian Barber
      12th May 2022 at 9:08 am

      Hi Ashley,

      Interesting pics, and I do use a velvet cleaning pad with carbon brushes attached before playing all my lp’s, together with use of a Zerostat gun immediately before I lower the needle on to the suface. I will just use the velvet part of the pad from now-on and see if there is any improvement. Thanks for posting, much appreciated. Cheers Ian

      • Reply
        Ashley Carr
        12th May 2022 at 3:57 pm

        Hi Ian,

        Get a digital Loupe from eBay just to make sure the pads doing what you want. I have serious doubts it will. The Knosti machine does an excellent job, albeit it requires a few goes, but to see it all undone is heartbreaking. The combination of the Knosti, Paul’s “recipe”, a Zerostat and a can of compressed air should keep all the work good for many plays before dust once again requires you to drag out the Knosti. The digital Loupe enables you to decide when.

        • Reply
          Ian Barber
          13th May 2022 at 8:04 am

          Hi Ashley,
          Sounds like a good idea to get a Loupe. I also use the Knosti, MK2, but only in the Summer as the drying time takes hours and hours in the Winter in my conservatory, but only a couple of hours in the Summer( for 8-15 discs at a time ). Cheers Ian

  • Reply
    Ashley Carr
    11th May 2022 at 5:54 pm

    Hi Paul,

    By all means use as you wish. I would love to see you do an article on this. It astonishes me that it isn’t better known. Well it isn’t from what I’ve read. I’ve noticed that the after CFB image is at a slightly lower resolution than the first one but it conveys the message at least. Get yourself a Loupe. I got mine on eBay but I daresay there are much better versions for a more thorough analysis. I look forward to reading more from you on the subject.

  • Reply
    Ashley Carr
    13th May 2022 at 12:25 pm

    I thought I would give a couple more examples for you to look at. The first link is to a record that has been cleaned twice (Fleetwood Mac’s Rumours). I picked this out on the record as it shows a good example of a click that is due to dirt, not static or a scratch. The stylus hasn’t a hope of not “playing” this dirt rather than the music underneath.
    https://www.dropbox.com/s/gg8myswkv599dek/Cleaned%20twice..jpg?dl=0

    The second link is for a record that I have now cleaned 7 times, I know, but this shows how good this record now is (Tracey Chapman’s debut album fantastic for showing off the hi-fi). There is still 1 or 2 isolated spots with tiny clicks but most of what I see is surface dust that the stylus can handle without it being heard.
    https://www.dropbox.com/s/7ntj31pyqe6idj2/Cleaned%207%20times.jpg?dl=0

    • Reply
      Paul Rigby
      13th May 2022 at 1:34 pm

      Very nice, Ashley – interesting stuff. Thanks for posting.

    • Reply
      Saverio
      13th May 2022 at 4:06 pm

      Very interesting Mr. Carr, and the same tool could be used to inspect cartridge’s stylus better than some cheap USB microscopes out there. Could you link the loupe you’re using (or at least its specs: Nx magnifier, fixed/variable focus, …). Thanks!

  • Reply
    Ashley Carr
    13th May 2022 at 9:36 pm

    I don’t think it would be suitable for that Saverio. Possible, but rather awkward as it requires being very close to the object. A little too unwieldy and capable of causing some damage in the attempt. I haven’t tried it so I can’t say for sure but I would suggest caution. Search on portable mobile phone microscope on eBay, there are many examples to choose from.

  • Reply
    Mark Andersen
    5th June 2022 at 10:41 pm

    Hi Paul, I’m doing the basic clean routine as discussed in one of your videos (using the “machine” with 1% alcohol and distilled water and then letting it dry). After lifting up the record and letting it drip for a few seconds, I remove the clamps and place the record on the included drying rack. I’m seeing some liquid dripping down onto the label during the drying process. I was careful not to fill the bath up over the top of the brushes. Should I be leaving the clamps on until the record is completely dry? This would seem a rather undesirable approach, as I wouldn’t get many records cleaned in a day. Thanks, Mark.

    • Reply
      Paul Rigby
      7th June 2022 at 3:36 pm

      Hi Mark – have you investigated the Glycol application and the Kibuki brush application? It makes a difference. I could hear it when I A-B tested it. Re. the clamps, I would life the record from the bath, give it a firm shake, 2-3 times, to remove large drops and prevent label intrusion, then place the vinyl in the rack. But yes, remove the clamp first.

      • Reply
        Mark Andersen
        7th June 2022 at 3:47 pm

        Thanks for the reply Paul. I was considering the Glycol, etc. route, but just recently purchased a single Disco Antistat (at some expense, as it shipped from Germany to here in Canada). Not sure at the moment about purchasing another, which, as per your instructions, is recommended for use as a final rinse. Not sure how else I could properly remove the surfactant. I suppose I could spray the vinyl with distilled water and wipe with a microfibre cloth, but that might just reintroduce dust, and I imagine wouldn’t properly get down into the grooves.

        • Reply
          Paul Rigby
          7th June 2022 at 3:59 pm

          Hi Mark – you’re ok with one machine for now. Just use the surfactant/glycol method then do a final rinse by *not* applying surfactant/glycol and clean as usual. Yes you might say that the bath has some contamination and sure, two machines/baths are better in this case but it’s not a major issue because you’re not pushing the surfactant/glycol into the grooves with a brush (and that makes a difference) so any recontamination is minor. That is, the benefits of a rinse were certainly obvious to my ears. Even with one machine and a contaminated bath in use. So I would personally use the surfactant/glycol/kabuki approach with one machine for now. Monitor the sound results, sure, listen for any sound degradation but change the bath every 30 cleans anyway. Then, when you get the cash later, grab a second machine.

  • Reply
    Mark Andersen
    7th June 2022 at 4:28 pm

    Sounds good. I’ll give it a try. Thanks again!

  • Reply
    Mark Andersen
    13th July 2022 at 11:07 pm

    Hi again Paul. I performed all the steps in the guide and can attest to the remarkable change in sound quality. Just one question regarding step #10. When you draw the four lines, do you do that using one vial of the glycol/surfactant mix, or do you use one vial for every one of the four lines? I went with the latter, but it seems that it could lead to the bath water becoming contaminated faster. Thanks.

    • Reply
      Paul Rigby
      14th July 2022 at 4:01 pm

      Good to hear, Mark 🙂 And yes, one vial for one side of vinyl. Another vial for the flip side of the vinyl disc. So one vial will give you the four stripes.

      • Reply
        Mark Andersen
        14th July 2022 at 4:06 pm

        Thanks Paul. Happy listening!

  • Reply
    Bucky Dann
    26th July 2022 at 1:55 pm

    Your articles on cleaning have been very helpful. I am confused about how much glycol to use. When I mix Tergikleen into a gallon of distilled water, what would be an appropriate amount of glycol to add?

    • Reply
      Paul Rigby
      27th July 2022 at 4:53 pm

      I mix the Glycol in that pipette bottle I mentioned, Bucky. So I fill a glass pipette bottle with diluted Tergikleen, then add two pipette vials of Glycol to the Tergikleen bottle and give the whole thing a shake for a while to mix.
      To store the Glycol, I take the large Glycol bottle you would have bought and I fill a second glass pipette bottle with Glycol only because it’s easier to dispense from there.
      In terms of Glycol amounts? I fill two pipette vials with Glycol to mix with Tergikleen. I slowly fill the Glycol into each pipette. So when filling I squeeze the vial’s rubber bulb and slowly release to maximise the ‘fill’. I find that rushing this ‘fill’ sometimes results in less Glycol in the vial. Each vial tends to be about half full when you do this and that’s enough. You don’t have to be super exact.

  • Reply
    Bucky Dann
    27th July 2022 at 6:14 pm

    Thanks. After reading your extensive Kirmuss review, I purchased one and use this as a less expensive surfactant mix.
    I also took your advice, and finish the cleaning with a vacuum on a used Nitti Gritti. The results have been excellent.

  • Reply
    John Parks
    8th August 2022 at 1:43 am

    Paul- Excellent record cleaning guide! Detailed, indispensably informative with advice based on years of research, and experience. All of this without the dogma. The archeology analogy is brilliant.

    I doubt it makes much difference but I use the Vinyl Styl Deep Grove Record Washer System. This unit is similar to the Disco-antisat. It could be thought of as a younger sibling. It functions in the same way as the Disco-antisat down to the goat hair brushes, but has a few cosmetic variations. This is the link to the Vinyl Styl:
    https://www.vinylstyl.com

    I also use the Record Doctor V RCM, initially as a safe platform to apply cleaning solution on both sides of the record before transferring the record to the Vinyl Styl. This is done without turning the Record Doctor on and keeping the record stationary. (I appealed a non-distructive tweak to the Record Doctor. Because the turning puck rocks a little from side to side I cut two sides of a paper file folder to size and placed it under the puck that rests on the bearings as a shim. This solves that annoying rocking when you turn the record) Once the record has been sufficiently wetted with solution, in my case Audio Intelligent #6 (https://shop.audiointelligent.com), I put my record into the Vinyl Styl for 6 to 10 turns one way, then the same number of turns in the opposite direction. I am not filling the Vinyl Styl with cleaning solution (this is a variable that I will add during later tests). Then I transfer the record back to the Record Doctor, applying additional cleaning solution then turn the vacuum on and rotate the record 4 to 6 turns in one direction then 4 to 6 in the opposite direction. This cuts down on drying time from the Vinyl Styl, while sucking away remaining fluid and, hopefully, any remaining dirt along with it.

    No doubt you know the Record Doctor has two soft, fibrous pads on either side of the vacuum slit. With the idea in mind to ensure they are clear of any debris, I brush them out (using the same little red handle brush supplied with the Discwasher Vinyl Care System). When brushing I’ve noticed these little pads have very fine, loose fibers. My response is to use a handheld vacuum to suck them away before and after each use. I wonder whether these little fibers are somehow finding their way into the groves.

    Nonetheless, the record is clean and I hope, as the manufacturer of Audio Intelligent #6 (AI-6) claims, free of the chemicals left behind from release agents, etc. Upon examination of my phono needle there is evidence of leftover “stuff” from the cleaning process. It is audible, albeit intermittent mostly on passages with low musical content and on quite passages. But this is intermittent. What this stuff is I can’t say. It is either fibers from the Record Doctor pads or dirt remaining in the groves that the cleaning fluid “released” that didn’t get sucked away or both. Whatever the case it seems that this stuff has been embedded in the groves during the life of the record, which was one that I purchased from a used record shop years ago. This is not a record that had, from the naked eye, dirt issues and no stuff ever found its way to the needle before. I should think additional washes and a rinse bath may help.

    A second reading of the Audio Intelligent instructions reveals that in addition to the chemicals present in vinyl during the manufacturing process, there are various contaminants that get embedded in the groves. This is why a pre-soak is recommended especially for used records. Audio Intelligent recommends 1 to 3 minutes, 5 minutes maximum for a pre-soak. This roughly the amount of time it takes me to wet both sides of the record on the Record Doctor and the spins in the Vinyl Styl.

    I have repeated my process 4 times with audible improvements each time.

    The takeaway from my cleaning method, at least for now, illustrates the need for an A/B comparison test between what I am currently doing and a “solution bath” then maybe a secondary Vinyl Styl or Disc-antistat as dedicated for rinsing.

    The AI-6 is sold as a one step cleaning solution requiring no rinse. This is economical and the reason why I chose it. With a few more expirements I should find the most efficient way to use the AI-6.

    Vinyl cleaning. A fun, but time consuming challenge in deed. Vinyl cleanliness is next to audio nirvananess.🙂

  • Reply
    Paul (not Rigby!)
    31st October 2022 at 11:24 am

    Firstly, thanks to Paul Rigby for his comprehensive guide to record cleaning which, on the evidence of the 150+ records I have cleaned to date, is extremely effective.

    Although my record cleaning methodology closely follows the method suggested by Paul I have tweaked the process as set out below. As I posted in Paul’s surfactant guide, the difficulty (and expense) in sourcing distilled water without resorting to online retailers and the very “ungreen” implications of delivering several litres of water over possibly hundreds of miles means that I have minimised my use of distilled water when cleaning records.

    My method requires the use of three Knosti cleaning tanks, four sets of Knosti record clamps, one set of Knosti cleaning brushes (although I would suggest ordering at least one spare set) and two dish drying racks.
    Instead of purchasing the complete Knosti record cleaning kit I recommend acquiring the tanks, clamps and brushes directly from Knosti:

    https://www.knosti.de/shop/en/vinyl/?p=1

    I use distilled water to prepare the surfactant solution and for the final record rinse but use dehumidifier water for the main cleaning bath and the first rinse – for those who do not own a dehumidifier it is possible that deionized water will work just as well. Before using dehumidifier water I did carry out some analyses of distilled water, tap water, dehumidifier water and deionized water using a water quality test meter (£7 from a well-known online retailer) which measures dissolved solids as “parts per million” to carry out some preliminary tests with the results as follows:

    Distilled water (0 ppm);
    Tap water (240 ppm);
    Dehumidifier water (8 ppm);
    Deionized water (12ppm).

    I was satisfied that the dehumidifier water (which I first boil to sterilise) is pure enough to be substituted for distilled water for two stages of my record cleaning procedure which is as follows:

    Step 1 – I follow Paul’s instructions for the initial application of surfactant although I find that once the application brush has been used on several records it becomes so saturated with surfactant that after applying the surfactant solution to the first side of the record using a dropper as instructed by Paul the brush has enough retained solution for this to be applied to the second side without applying more solution to the second side by dropper.

    Step 2 – The record is cleaned in the Knosti bath as instructed but using dehumidifier water instead of distilled water to make up the alcohol cleaning solution. The record is then balanced on top of the cleaning brush and against the side of the bath to drain the cleaning fluid.

    Step 3 – Whilst waiting for the wash fluid to drain I attach clamps to a second record and apply the surfactant; The time taken to do this will have allowed most if not all of the wash fluid to drain back into the cleaner bath from the first record.

    Step 4 – I place the first record in the second Knosti bath which again contains a 7% alcohol solution using dehumidifier water and give the record a few spins to rinse. I then leave to drain.
    Step 5 – I clean the second record as per step 2 and leave to drain.

    Step 6 – I prepare a third record for cleaning by which time the first record can be removed from the first rinse bath and placed in a second rinse bath which contains a 7% alcohol solution using distilled water which is then rinsed.

    I continue record by record which, since the lengthiest part of the process is waiting for the records to drain, allows for much quicker cleaning.

    Step 7 – After the final rinse I place the record in a dish drying rack – these are cheaper than the Knosti racks and generally contain 12 records although I was lucky enough to find one with a 18 dish/record capacity.
    A few further tips I have learned:

    I clean 25 records in one cleaning session after which I discard the first cleaning solution then filter and save the first and second rinse solutions. The first rinse solution is used next time as the main wash solution and the second (distilled water) rinse solution I use a couple more times before then using for the first rinse.

    Emptying the wash/rinse solutions straight from the Knosti bath into a funnel is next to impossible with most of the solution ending up on the floor. I therefore empty the solution into a large plastic photographic print tray; I’m sure it is possible to find other suitable draining trays. The solution can then be easily poured into a used solution container via a funnel and filter – I use absorbent kitchen towel but coffee filters may work just as well.

    I recommend removing the two brushes from the main wash bath after each use and thoroughly rinsing and drying. If left in the bath the metal securing strips will rust and the brushes will become impossible to remove.

    In conclusion by principally using dehumidifier water and cleaning several records in sequence I minimise the use of and expense of distilled water and can greatly reduce the cleaning time – I reckon it takes me about 2½ hours to clean 25 records. The use of dehumidifier water for all but the final rinse appears, as far as I can tell, to be as effective as using distilled water.

  • Reply
    Bucky
    31st October 2022 at 1:01 pm

    Since distilled water is used in CPAP machines, I don’t find it difficult or expensive to purchase. My cleaning process involves all three methods I have used over the years. I begin with my Kirmuss ultrasonic, followed by a rinse in distilled water in a Spin Clean, and then finish with vacuum drying in a used Nitti Gritti. It takes me about 1 1/2 hrs to clean six records, with excellent results.

  • Reply
    Renzo
    5th December 2022 at 1:33 pm

    Hi Paul,
    Amazing work!
    Got a question about the pipette you are using here. The Amazon link is no longer valid: https://www.amazon.co.uk/gp/product/B00IZOCRB8/ref=ppx_yo_dt_b_search_asin_title?ie=UTF8&psc=1

    How big in ml are the two pipette you were recommending on that Amazon link? 50ml? Or is 50ml what you are using from a bigger bottle? I’m trying to look for an Amazon US equivalent to purchase.

    Thank you!

    • Reply
      Paul Rigby
      6th December 2022 at 4:53 pm

      Hi Renzo – I use a 50ml bottle. A couple of pipettes amounts to around 1.5ml in total I think.

      • Reply
        Renzo Novara
        6th December 2022 at 7:55 pm

        Thanks Paul! I’ll sign up to your Patreon to support all the great work you’ve been doing! Thanks for doing all this!!

        • Reply
          Paul Rigby
          7th December 2022 at 11:41 am

          Well that’s very kind of you, Renzo. Thank you.

  • Reply
    Paul
    6th December 2022 at 12:24 pm

    Hi Paul,

    Are you drying your Lp in some way after each of the 6 cleaning cycles?
    I just wondered if the water left on the record between cycles would somehow dilute the glycol/surfactant/distilled water, especially with the chance of some alcohol/water solution left on the vinyl before cycle 2,3,4,5,6?
    Many thanks!

    • Reply
      Paul Rigby
      6th December 2022 at 4:55 pm

      For the manual method either dry in a rack or – if you have the budget – use a RCM to dry faster, Paul. I wouldn’t use cloths, etc, in case of recontamination. Once dry, you can start another cycle. Air drying is slow which is why investing in a cheapo RCM is a good idea.

  • Reply
    Randall Stinson
    10th January 2023 at 10:59 pm

    Evening Paul,

    Do you have an exact ratio of Glycol to surfactant? I’m estimating around 1 to 30. I wanted to make enough to fill an 8 ounce generic squeeze condiment bottle and decant that way.

    Great tutorial and looking forward to hearing the difference.

    Many Thanks!!

    • Reply
      Paul Rigby
      11th January 2023 at 2:55 pm

      Hi Randall, I use 50ml glass bottles with pipettes filled with diluted surfactant and about 1.5ml of glycol per bottle full so that’s what, 1:33. So you’re about right, yes. And thank you.

  • Reply
    Micheal Kiefer
    23rd January 2023 at 5:05 am

    Hello Paul,
    I have only recently discovered your website and YouTube channel, and what a great time I’m having reading your work.
    Regarding the vinyl cleaning protocol you have developed, I have but one question. Between step 13 and 14 you must turn the record over to repeat the application of the surfactant/glycol solution on side two. On what kind of surface are you placing the record? If you put it on a towel or fabric of any kind, then most of the solution will be absorbed away from side one of the LP. I’m reluctant to place it on a hard surface or countertop because any dirt or hard granular presence will scratch the vinyl. I have invested in a Degritter and all the products you specify in your vinyl cleaning guide and I’m ready to go!
    Keep up the good work!
    Kindest regards,

    • Reply
      Paul Rigby
      23rd January 2023 at 10:37 am

      Thank for joining us Michael. Glad you have your company! And yes, that particular step offers issues doesn’t it? The imperfect system I use is to hold the vinyl disc in one hand. Using my fingers to simultaneously support the centre record label and also the rim of the record (I have big hands – it’s a sort on Ninja death grip, I suppose). I also support the very edge of the record on my ever-expanding tummy. Then I flip the record over and do the same. That way, I avoid scratchy hard surfaces and the possibility of recontamination on a piece of fabric.
      Of course, everyone has their favourites or have adapted their own systems but just be careful about dust recontamination if you decide to lay the record on a surface.
      I’m not a fan of fabric absorbing anything either because when liquid is absorbed into the fabric, dust may also retreat back into the groove. Which is not what you’re going for here.

  • Reply
    Mr. Ashley Carr
    23rd January 2023 at 11:27 am

    I have a very cheap and simple solution to your question Michael. I use a plastic container that came from my local Chinese Take Away. It came with sweet & sour sauce in it and is just the right size to rest the record on, with the Knosti clamp already in place. The rim of the circular container rests on the label/run off groove border. Doesn’t touch the grooves but keeps them completely clear of any surface that might contaminate them.

    • Reply
      Micheal Kiefer
      24th January 2023 at 12:57 am

      Ah yes, the ever expanding tummy! I’m very familiar with that condition, myself! But it does sound like a workable technique. I’ll give it a try. Thank you, Sir.

  • Reply
    Micheal Kiefer
    24th January 2023 at 1:02 am

    Mr. Carr, what a good idea. I’m sure I can find an appropriate container in the pantry that will fit. Thank you for the tip. Perhaps Paul will be able to pass this on to others, as well.

  • Reply
    Mario Lopo
    19th February 2023 at 6:20 pm

    Hi Paul, thanks for the great step-by-step guide!
    I’m fairly new to this, I used once the Disco AntiStat mixture but I was disappointed by the amount of white powder collected by my needle.

    I substituted the Terglitol with Triton x-100 (5 drops in 1 later) as surfactant and tried the first wash cycle.
    7% IPA in distilled water for the bath.
    I noticed a great improvement in the playback, but the drying process was kinda annoying, as the record surface instead of completely dry out in the rack (with a turn of 2) had some drops of solution in some spots and very hard to remove without using a towel.

    Would you recommend any change in the solution to avoid this? more or less alcohol?
    Thanks!

    • Reply
      Paul Rigby
      20th February 2023 at 9:01 am

      Hi Mario – first up? I would recommend Tergitol over Triton nowadays because Triton is now proven to be a harm to wildlife and that stuff will eventually find its way into the system, presenting health issues for wildlife.
      Second, the natural drying process is a problem unless you leave the discs to dry in a warm room/area for natural drying. You might want to consider purchasing a low-cost/second-hand RCM to vacuum the liquid away but that will cost you. I wouldn’t recommend any more alcohol, no. I wouldn’t recumbent using a towel either because that will only reintroduce dust, etc back into the grooves from the towel.

  • Reply
    Jerry Thomas
    7th March 2023 at 8:04 pm

    Hi Paul, I’m using an ultrasonic machine so should my bath solution consist of distilled water and surfactant, or water and alcohol, or both? Also when applying surfactant glycol mixture to vinyl what surface are you using to put the vinyl on? Microfiber cloth…? Thanks

    • Reply
      Paul Rigby
      8th March 2023 at 11:10 am

      Hi Jerry – your bath should contain distilled water and alcohol (in the proportions noted in the feature). The surfactant should only be applied to the vinyl surface (as noted in the step-by-step instructions).
      What surface? That’s the only bugbear in this entire enterprise. This one has been discussed in the comments already here(or was it in the Degritter review comments?) I don’t place the record anywhere because I’m scared stiff of recontamination.
      I hold the record. I have large-ish hands so a couple of fingers support the centre label (at the back) and a few support the outer rim and the very edge sits on my rapidly expanding tummy (it’s age, you know – and the food and the beer and…). If you have a better idea though, I’d be very happy to hear of it.
      I was considering some sort of plastic surface but I’ve never found one that I like. A cloth/towel surface only invites recontamination. Let me know your thoughts.

  • Reply
    Ashley
    8th March 2023 at 11:37 am

    See my comment 23rf January.

    • Reply
      Paul Rigby
      8th March 2023 at 1:50 pm

      Thanks for the reminder, Ashley.

  • Reply
    Jerry Thomas
    10th March 2023 at 8:58 pm

    How much glycol should I use for a 4 oz bottle. I’m guessing 7.5 milliliters?

    • Reply
      Paul Rigby
      12th March 2023 at 3:34 pm

      Hi Jerry – I use 50ml glass bottles with pipettes filled with diluted surfactant and about 1.5ml of glycol per bottle full.

  • Reply
    Jerry Thomas
    15th March 2023 at 7:33 pm

    Thanks Paul. Another question, what do you use when rinsing the album? I’ve seen videos using a 2 gallon pump sprayer. That has a lot of pressure but not convenient for me, messy! Does it need a lot of pressure? How about a spray bottle like you would use to clean your mirrors? Spray them off in the sink. Thanks

    • Reply
      Paul Rigby
      16th March 2023 at 11:33 am

      Hi Jerry – to rinse you also need gentle abrasion. As stated in this guide, I pop the record back into the Disco Antistat (remind me, what do you use please?) but this time do not add surfactant to the vinyl surface. I just clean the record in the bath with the brushes. Yes, you might flag that the bath has contamination but I’ve never had issues with this. As long as the bath is changed after (depending on how dirty your records are) 30 cleans or so then I’ve never had issues. I’ve always heard a ‘freshness’ after a rinse. I would not recommend sprayers.

  • Reply
    Jerry Thomas
    16th March 2023 at 4:24 pm

    I use an ultrasonic machine and I clean 3-4 at a time and about 30-40 before I change the solution.I could rinse in the machine but don’t know that would work if I clean 30 and then switch out the machine and rinse. The records would be dry before I could rinse. Thoughts on this? Thanks

    • Reply
      Paul Rigby
      17th March 2023 at 10:33 am

      Hi Jerry, I would rinse as part of the cleaning cycle. So: Record 1 – clean – rinse. Record 2 – clean – rinse. Etc.
      The possible issue of bath contamination should be fine up to around 30 records (that’s what I do and I notice a ‘clean’ sound after I rinse).
      Rinsing is important because there may be bits and bobs of surfactant, alcohol or whatever else you use, hanging about the vinyl surface.

      • Reply
        Jerry Thomas
        23rd March 2023 at 12:42 am

        Paul, when rinsing how many revolutions does it take to get a good rinse? Also, rinse in both directions?

        • Reply
          Paul Rigby
          23rd March 2023 at 1:44 pm

          Are we talking about an ultrasonic here? Your typical cleaning cycle period of time. Use that for the rinse.

          • Jerry Thomas
            23rd March 2023 at 5:30 pm

            No, I’m cleaning in an ultrasonic machine, I want to rinse in a disco Antistat! Way too much work to clean one or two records, drain cleaning solution, refill with rinse water to rinse then repeat! Also, How much water does the Antistat need to rinse?

          • Paul Rigby
            24th March 2023 at 10:03 am

            I wouldn’t recommend rinsing in a Disco, Jerry – the ultrasonic will do a better job and it will be a faster and less ‘hands on’ process.

  • Reply
    Romain
    21st March 2023 at 11:50 am

    Dear Paul, I find your guide and our videos always enlightening and informative. Thanks.

I listen almost exclusevily to Classical music and jazz on vinyl, so I buy a lot of used records (always NM or M). Most of them are really mint but usually need a clean because there’s dust deep into the grooves.

    I just got a Knosti but I haven’t used it yet. I won’t use the fluid they sell because I’ve read everything about what it leaves on the stylus. I’m using my own solution which is distilled water, Isopropanol 99% and a little bit of wetting agent. No dishwasher soap or whatever.

    I have two questions please :
    
I was wondering if after every cleaning it would be a good idea to spray some distilled water on them as the final step before letting them dry. I’m worried that air drying the records leaves some kind of spots on them or whatever. But I’m also worried about using a microfiber cloth to dry them before putting them on the rack, since I don’t want to push some dust into the grooves.

    One last question, do you have any idea of how much solution is needed on the knosti in terms of millilitres ? Would you say is closer to 500ml or maybe 750ml ?

    Thank you!

    • Reply
      Paul Rigby
      22nd March 2023 at 10:18 am

      Hi Romain – agreed, please don’t use a cloth on the records for the reason you state. Your last point – are you asking how much liquid to put in the Knosti bath? Your earlier question – I would do a final rinse, without any surfactant added to the vinyl surface. The brush action/abrasion is important in this rinse because it physically removes any surfactant spots, trapped loose grime, etc. I don’t think a final water spray would achieve a great deal, to be honest.

      • Reply
        Romain
        22nd March 2023 at 11:38 am

        Thank you for your answer Paul.
        Yes, I was asking for that but nevermind because I’ll prepare 1L of the solution and then follow your instructions about filling the Knosti bath. I’ll keep preparing batches of 1L every time.

        About the rinse, do you think it is possible to clean all records, let’s say 15, with the solution and then empty the Knosti bath and fill it only with distilled water or distilled water/IPA and do the rinse there? The records would be already dry I guess, from the 1st bath, so I don’t know if this would work. I’m trying to avoid buying another Knosti bath just for the rinse, so wondering if using the same bath but without sufractant would work.

        Thanks again.

        • Reply
          Paul Rigby
          22nd March 2023 at 12:32 pm

          Hi Romain – I wouldn’t worry about the used bath causing recontamination, as it where. It should be fine for 30 cleans (it depends how mucky your vinyl is, though). For the rinse? I had no issues rinsing in a ‘used’ bath. I always heard a difference after a rinse. I personally think that surface tension over the grooves helps here for once and stops recontamination by creating a barrier to the bath water (just my own pet theory, no proof) but that abrasive nature of the brushes does the bulk of the rinse work.

    Leave a Reply

    By using this website you agree to accept our Privacy Policy and Terms & Conditions

    Pin It on Pinterest

    Share This
    %d bloggers like this: